


There are times when you’ll need to do a manual update on your hosts. Depending on how your environment is setup, you may need to plan out the best steps to do a ESXi version upgrade on your hosts.
For me, atm since I don’t have vCenter stood up, I’m not currently running VUM just yet so I’ll have to manually update these 3 hosts that I have with an Offline Bundle.
Lolz...VUM. What a funny name.

Cool info I guess, but I didn't ask. So, why even bother upgrading anyway?

Download the Offline Bundle
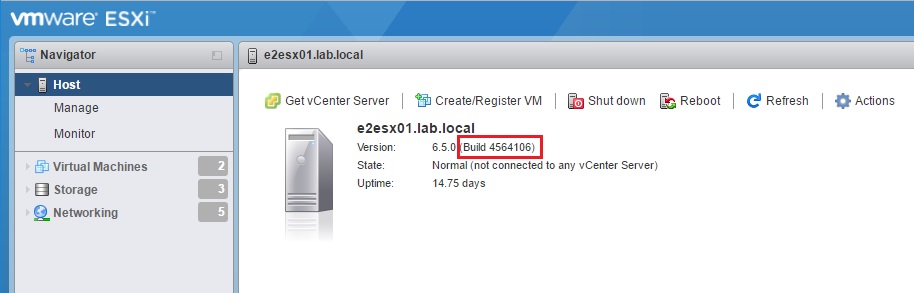
So right now I’m rocking ESXi 6.5 version/build 4564106 which was when 6.5 was first released on November 2016. Yikes!
Currently the latest ESXi version is 6.5.0d that came out in April 2017 which we’ll need to download from HERE. Remember, you’ll need a valid myvmware account to be able to download.
Once you are logged in and on the download page. Click on the Download Now button under the VMware vSphere Hypervisor (ESXi) Offline Bundle section, accept the EULA and wait for the download to complete.

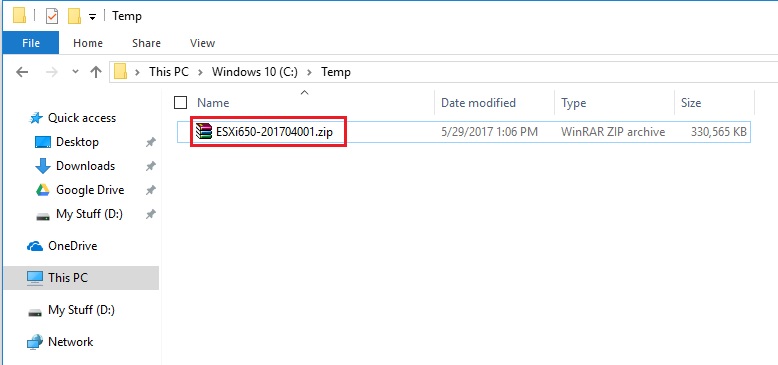
When done you’ll have a .zip file called ESXi650-201704001.zip which contains all the updated VIBs packaged together in an Offline Bundle.

")
Upload the Offline Bundle to a Datastore
Remember that Shared Storage datastore we created a little while back? Well we’ll need to upload this Offline Bundle somewhere on there so that all the ESXi hosts can see it.
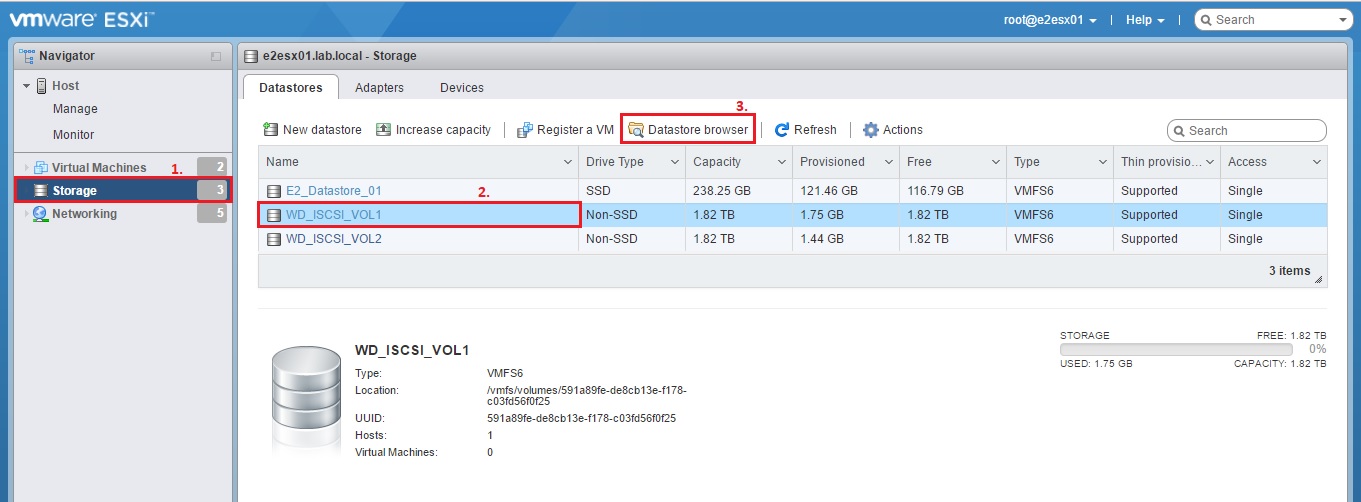
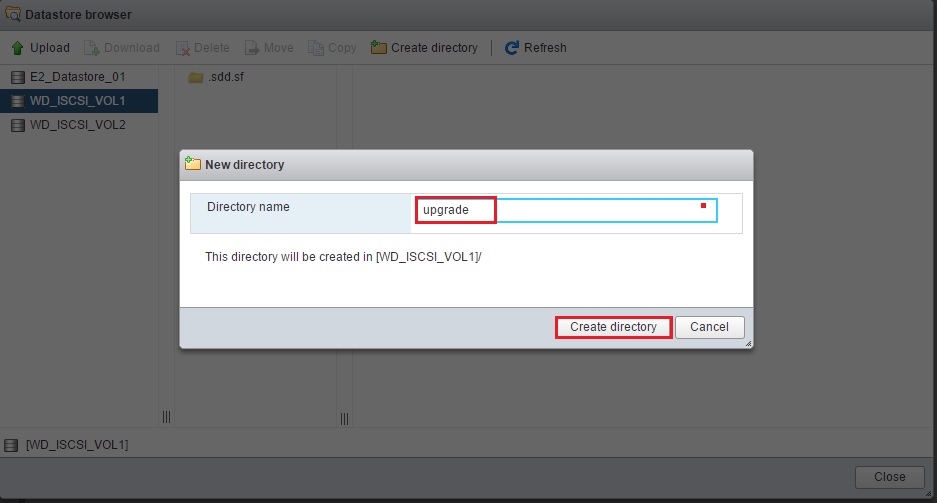
Login to your ESXi host and navigate to Storage > Datastore. Select the datastore you want to upload the Offline Bundle to, then click on Datastore Browser.
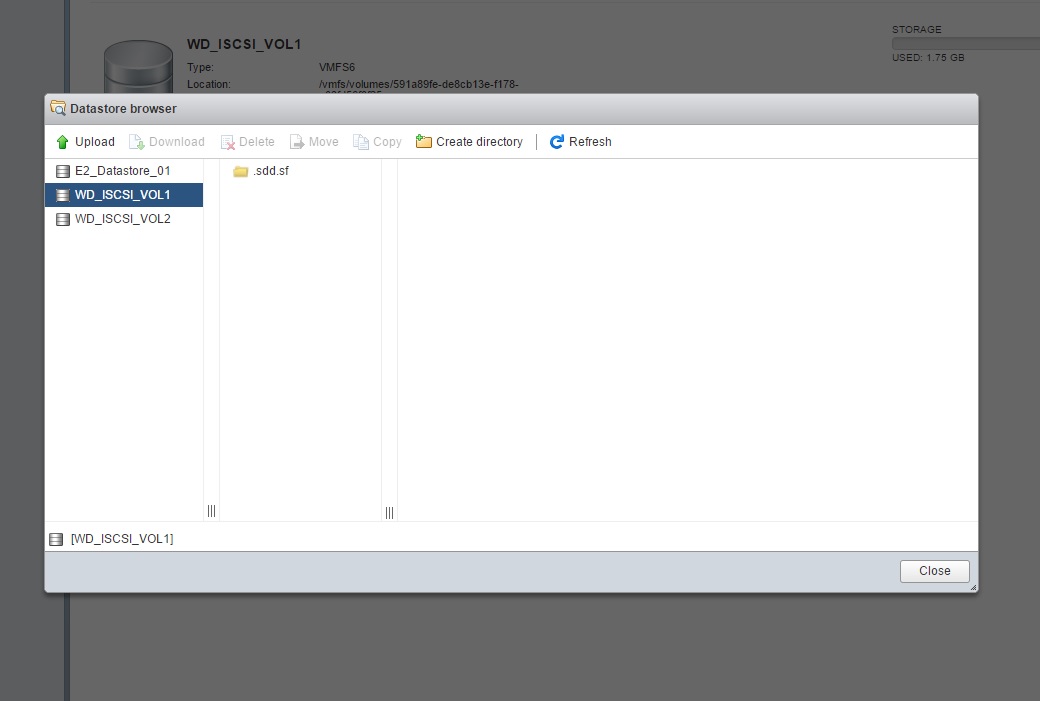
Once that opens up, click on Create directory and call it whatever you’d like. I’ll call mine “upgrade“. When done, finalize by clicking on Create directory once again.
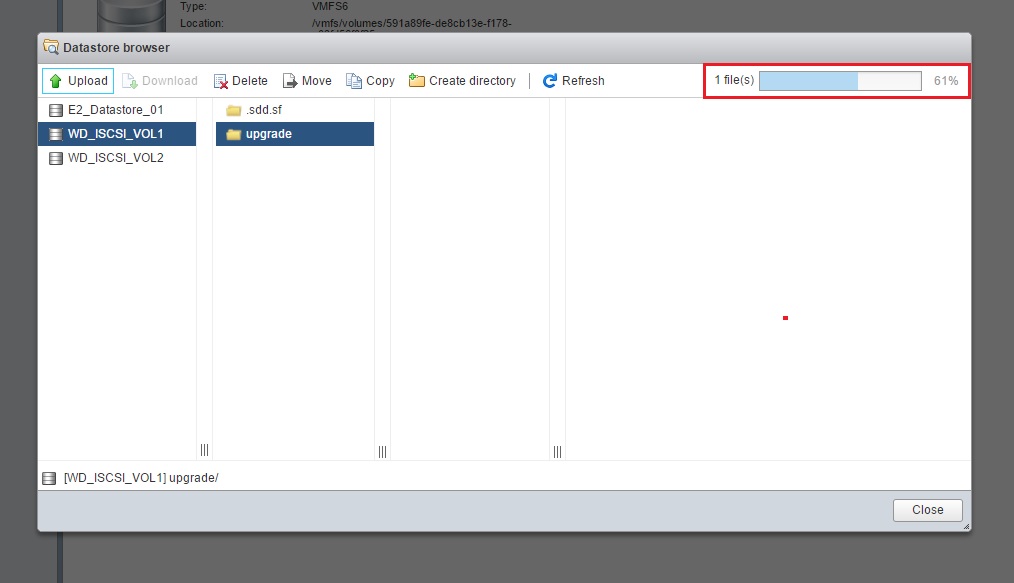
After the folder is created, highlight it by clicking on it, then click on the Upload button in the top left.

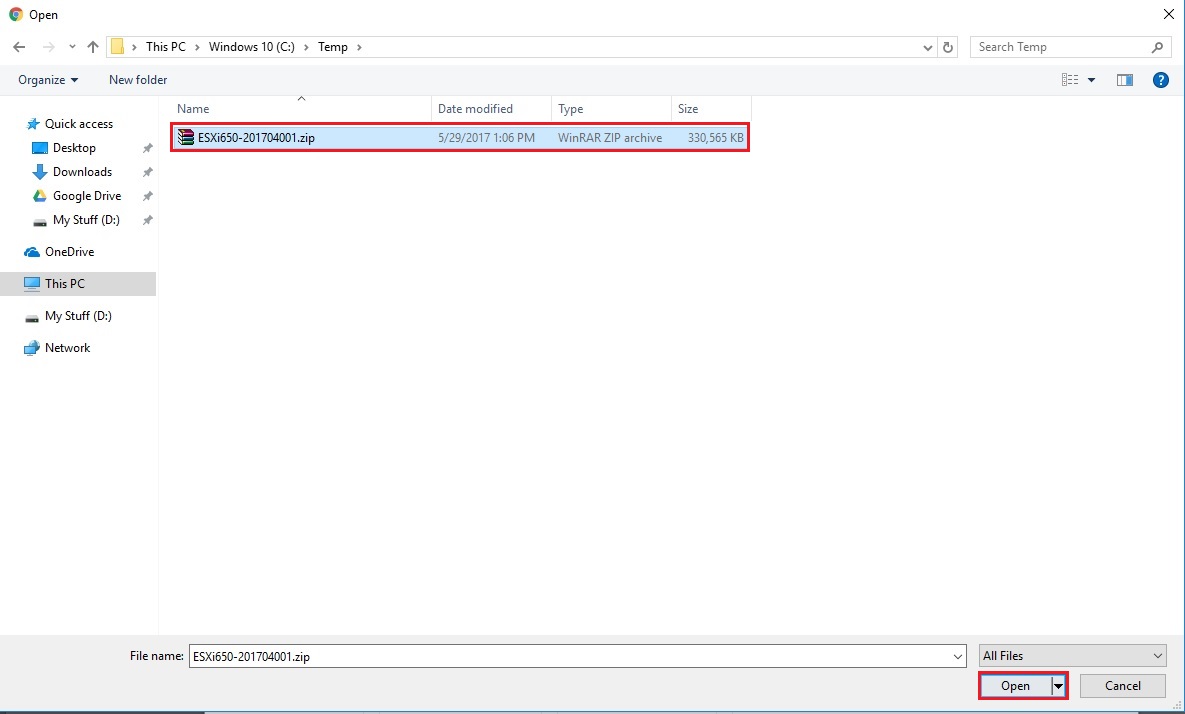
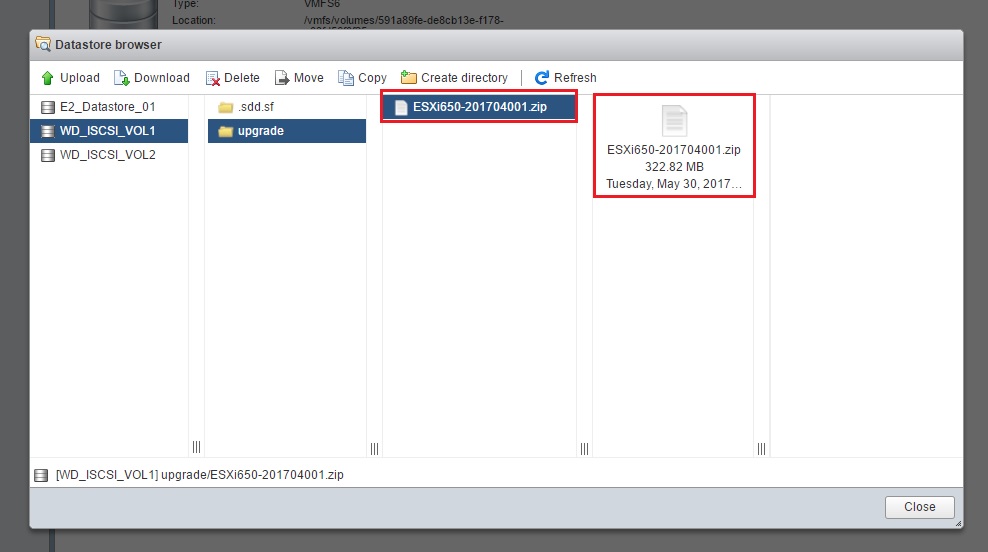
Browse to the location where your downloaded Offline Bundle resides, select it then click on Open. The upload process should now start and you’ll see a little progress bar at the top right of the window. When done, the file upload to the datastore should now be complete.
Upgrade ESXi via CLI using the Offline Bundle
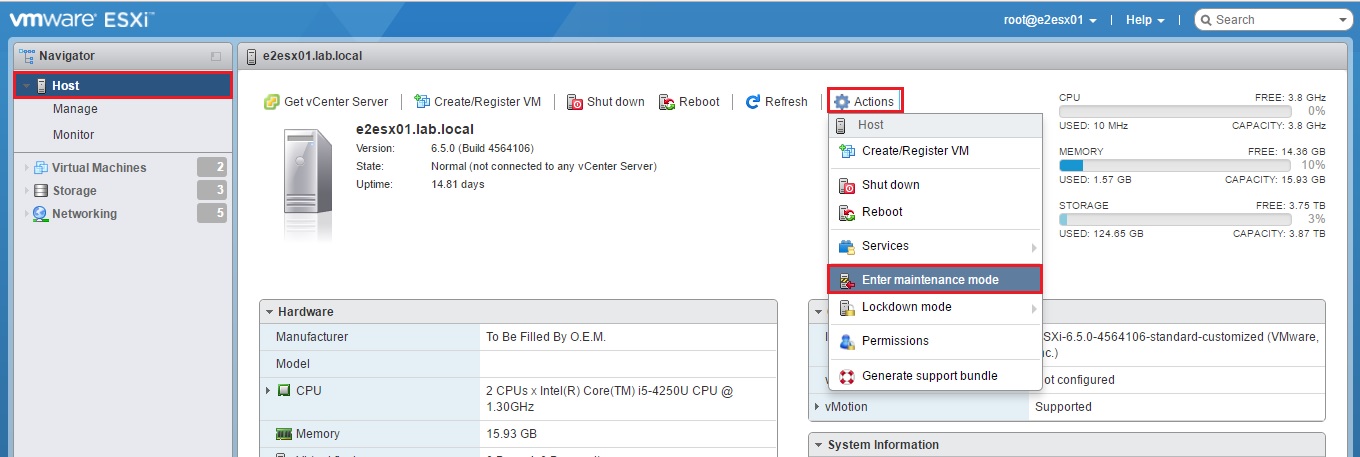
Now that we have our bundle uploaded we can begin to upgrade ESXi. I like putting my hosts in maintenance mode before performing any changes on them. Try to get into the habit of doing so, it’s just good practice.
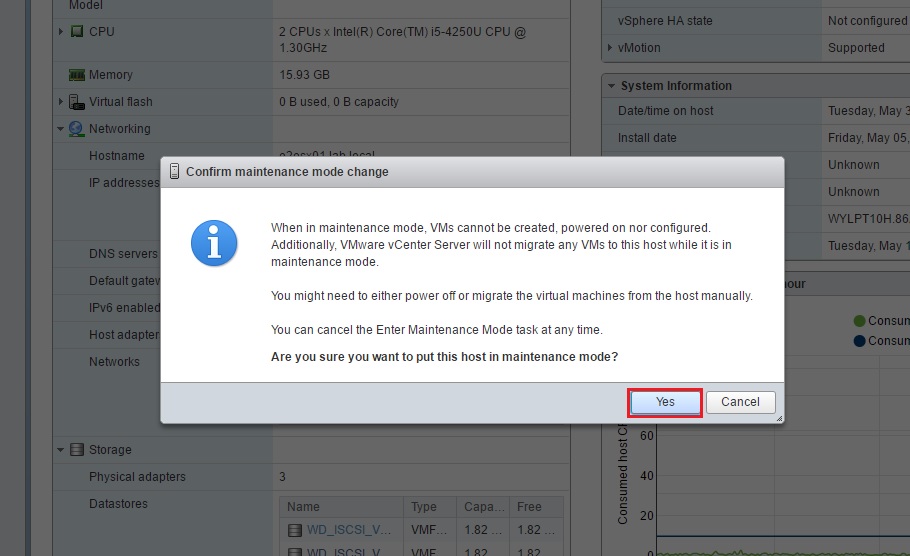
Click on the Host option under the left hand Navigator section. You can either right click on the host or click on the Actions menu to Enter Maintenance mode. Both work to get the job done. It’ll give you an informative prompt that you need to migrate or power off the VMs manually. Since I don’t have any VMs running I’ll just click on Yes here.
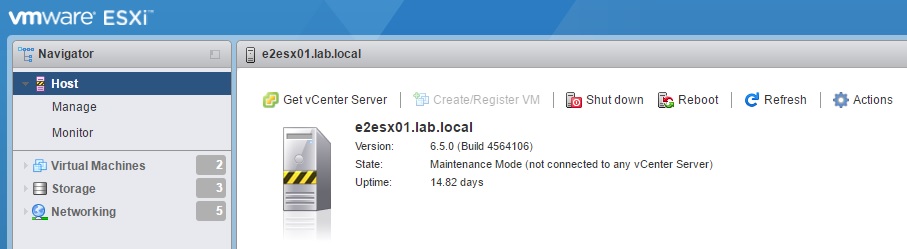
Once its finished, you’ll notice that the host icon has changed to one with maintenance tape around it. Pretty cute.
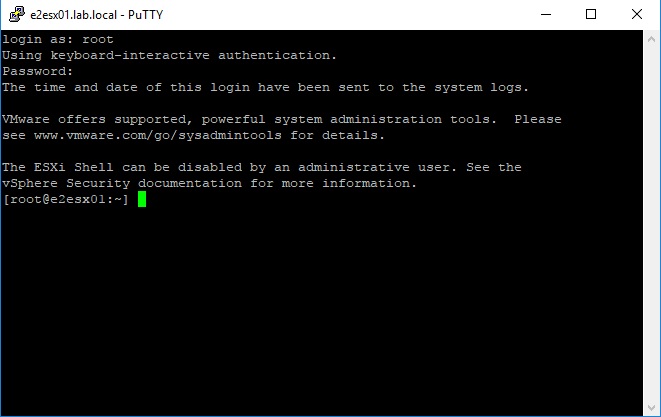
Anyway, use whatever SSH client you’d like to get into the host we just put in maintenance mode. I’ll use Putty. Login with whatever credentials you set on your host.

Once logged in, we know that the Offline Bundle is located where we uploaded it here:
/vmfs/volumes/WD_ISCSI_VOL1/upgrade/ESXi650-201704001.zip
*Remember your Datastore and folder path will likely be named differently from mine.
So we’ll have to run the following:
esxcli software sources profile list -d /vmfs/volumes/WD_ISCSI_VOL1/upgrade/ESXi650-201704001.zip
- esxcli
- sources
- profile
- List
- -d
The software namespace outputs the following. Since we want to update the image profile, sources would be our next command.
[root@e2esx01:~] esxcli software
Usage: esxcli software {cmd} [cmd options]

Available Namespaces:
   sources               Query depot contents for VIBs and image profiles
   vib                   Install, update, remove, or display individual VIB packages
   acceptance            Retrieve and set the host acceptance level setting
   profile               Display, install, update or validates image profiles
After running the command, you should see the results below:
[root@e2esx01:~] esxcli software sources profile list -d /vmfs/volumes/WD_ISCSI_VOL1/upgrade/ESXi650-2017
04001.zip
Name                             Vendor        Acceptance Level
-------------------------------  ------------  ----------------
ESXi-6.5.0-20170404001-standard  VMware, Inc.  PartnerSupported
ESXi-6.5.0-20170404001-no-tools  VMware, Inc.  PartnerSupported

Copy the ESXi-6.5.0-20170404001-standard to a notepad since we’ll use it with our next command.
Now that we have the profile list, we need to update the software profile using the name we just copied to a notepad.
The command below is what we’ll use to start the update.
esxcli software profile update -p ESXi-6.5.0-20170404001-standard -d /vmfs/volumes/WD_ISCSI_VOL1/upgrade/ESXi650-201704001.zip
The update command is what we’ll use to update the host with VIBs from the Offline Bundle. The -p option will let us specify the profile name of the image since there is typically more than one profile contained in the image.
[root@e2esx01:~] esxcli software profile update
Error: Missing required parameter -p|--profile
        Missing required parameter -d|--depot

Usage: esxcli software profile update [cmd options]

Description:
   update                Updates the host with VIBs from an image profile in a depot. Installed VIBs may
                         be upgraded (or downgraded if --allow-downgrades is specified), but they will
                         not be removed. Any VIBs in the image profile which are not related to any
                         installed VIBs will be added to the host. WARNING: If your installation
                         requires a reboot, you need to disable HA first.

Cmd options:
   --allow-downgrades    If this option is specified, then the VIBs from the image profile which update,
                         downgrade, or are new to the host will be installed. If the option is not
                         specified, then the VIBs which update or are new to the host will be installed.
   -d|--depot=[ <str> ... ]
                         Specifies full remote URLs of the depot index.xml or server file path pointing
                         to an offline bundle .zip file. (required)
   --dry-run             Performs a dry-run only. Report the VIB-level operations that would be
                         performed, but do not change anything in the system.
   -f|--force            Bypasses checks for package dependencies, conflicts, obsolescence, and
                         acceptance levels. Really not recommended unless you know what you are doing.
                         Use of this option will result in a warning being displayed in the vSphere
                         Client.  Use this option only when instructed to do so by VMware Technical
                         Support.
   --maintenance-mode    Pretends that maintenance mode is in effect. Otherwise, installation will stop
                         for live installs that require maintenance mode. This flag has no effect for
                         reboot required remediations.
   --no-live-install     Forces an install to /altbootbank even if the VIBs are eligible for live
                         installation or removal. Will cause installation to be skipped on PXE-booted
                         hosts.
   --no-sig-check        Bypasses acceptance level verification, including signing. Use of this option
                         poses a large security risk and will result in a SECURITY ALERT warning being
                         displayed in the vSphere Client.
   -p|--profile=<str>    Specifies the name of the image profile to update the host with. (required)
   --proxy=<str>         Specifies a proxy server to use for HTTP, FTP, and HTTPS connections. The
                         format is proxy-url:port.
Once you are ready, kick off the command and start the update.

Once you do, nothing will happen for about a minute or so. Everything will be updating behind the scenes. When it’s done you’ll receive a TLDR wall of text displaying the update result.

Although, it’s nice to see what drivers were updated, we were basically just looking for something along these lines:
[root@e2esx01:~] esxcli software profile update -p ESXi-6.5.0-20170404001-standard -d /vmfs/volumes/W
CSI_VOL1/upgrade/ESXi650-201704001.zip
Update Result
    Message: The update completed successfully, but the system needs to be rebooted for the changes to be effective.
    Reboot Required: true
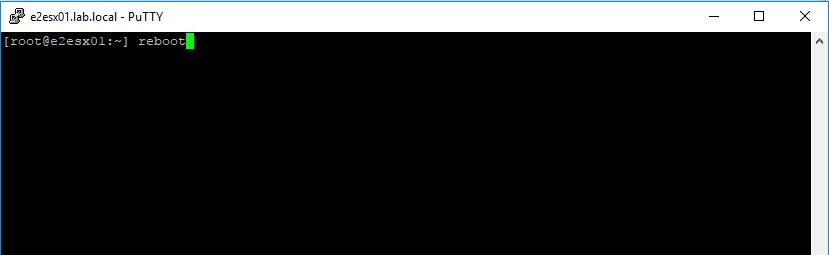
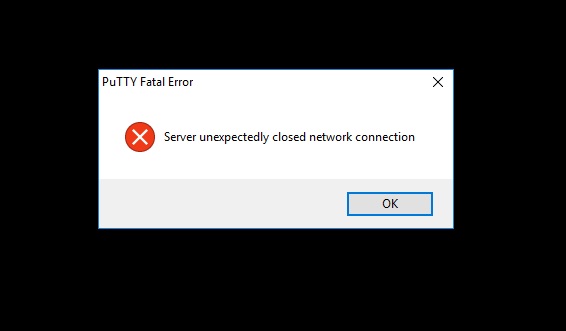
So since the update completed successfully, simply type reboot in the next line to reboot the host that we’ve already placed in maintenance mode. If you kept the Putty session opened, you’ll receive a prompt telling you that you’ve lost connection since the host is now rebooting.
Once the host is rebooted, log back in and validate the upgrade now reflects the new version/build.

Yey! Now take your host out of maintenance mode and dance!


[…] Below is a quick vid on how to upgrade your ESXi host by installing directly over an existing ESXi installation. I've created a previous post on how to upgrade your ESXi host using an Offline Bundle here. […]