


Ah good ol’ storage. There never seems to be enough of it especially for data hoarders like myself. For my home lab I’m going to need some shared storage amongst all my ESXi hosts.
Since I don’t have a dedicated fibre channel SAN, I can re-purpose my Western Digital NAS which supports iSCSI as my SAN for shared storage throughout my hosts.
What in the hell is iSCSI?
So I’ve gotten my 8TB Western Digital configured in a RAID 1 setup. Which gives me half of that with 4TB usable. I’ve again split that in half and carved up 2 separate volumes giving me 2TB each volume. Now to configure iSCSI targets.
Configure iSCSI Targets
First login into the Western Digital admin page. Navigate to Storage > iSCSI then click on Create iSCSI Target.
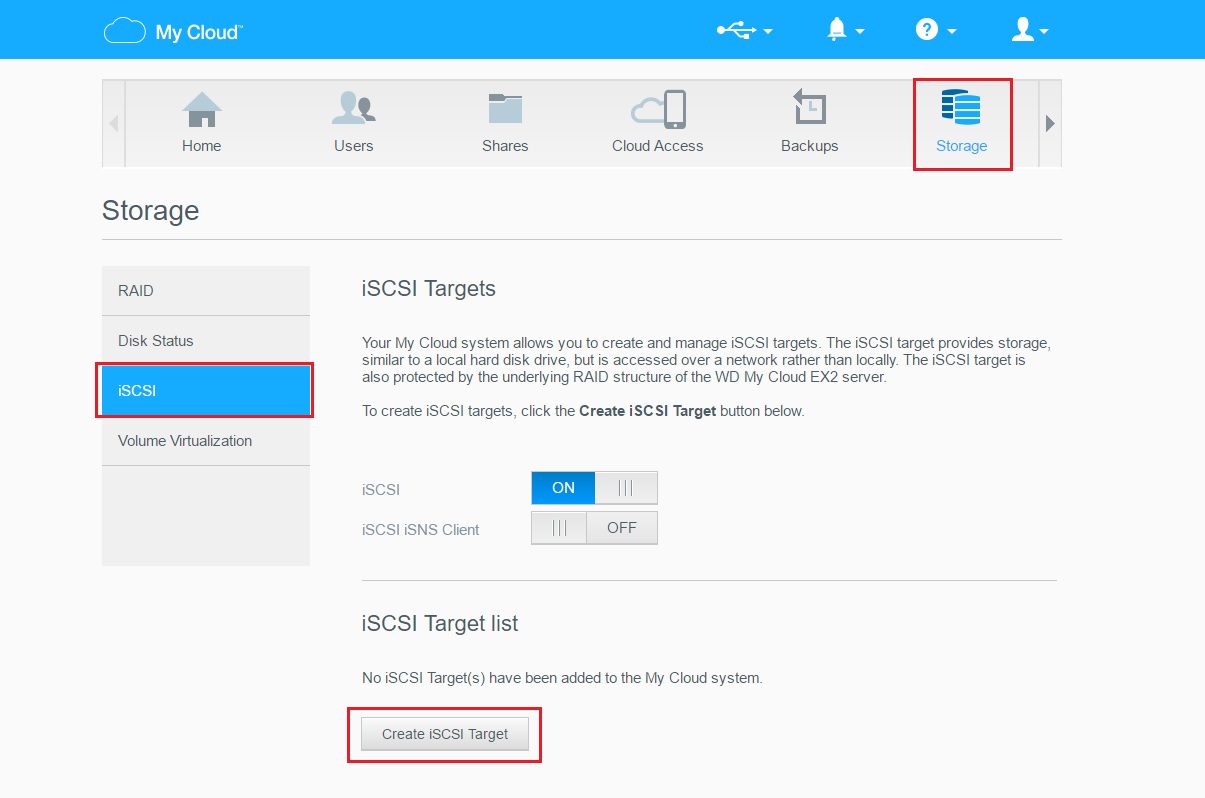
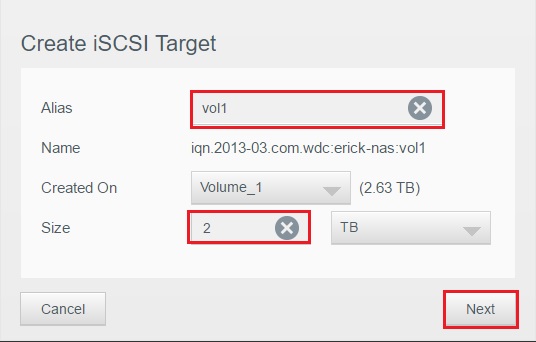
We’ll label this first one vol1 for the alias and provision 2TB from this volume. For extra security you’ll typically want to enable CHAP. However, since I destroy and rebuild my home lab constantly, I’ll choose None for this setting. Then click on Apply when done.
Repeat the steps above again a second time for the secondary volume vol2.


Once complete, you’ll now have two volumes with No initiators connected. Let’s go to our initiators and configure them to see this storage target.

Configure Initiators
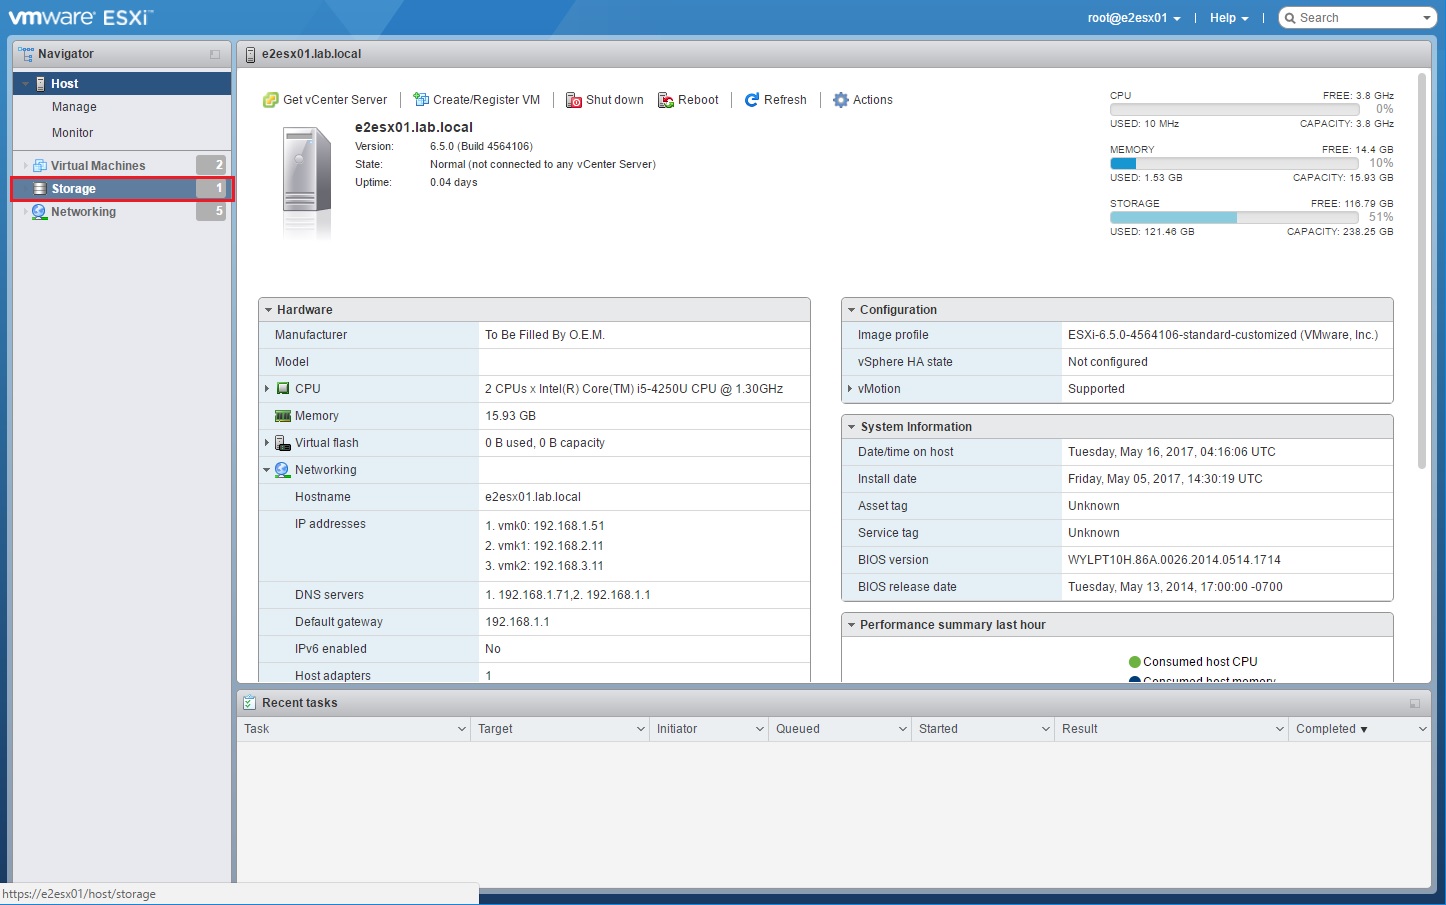
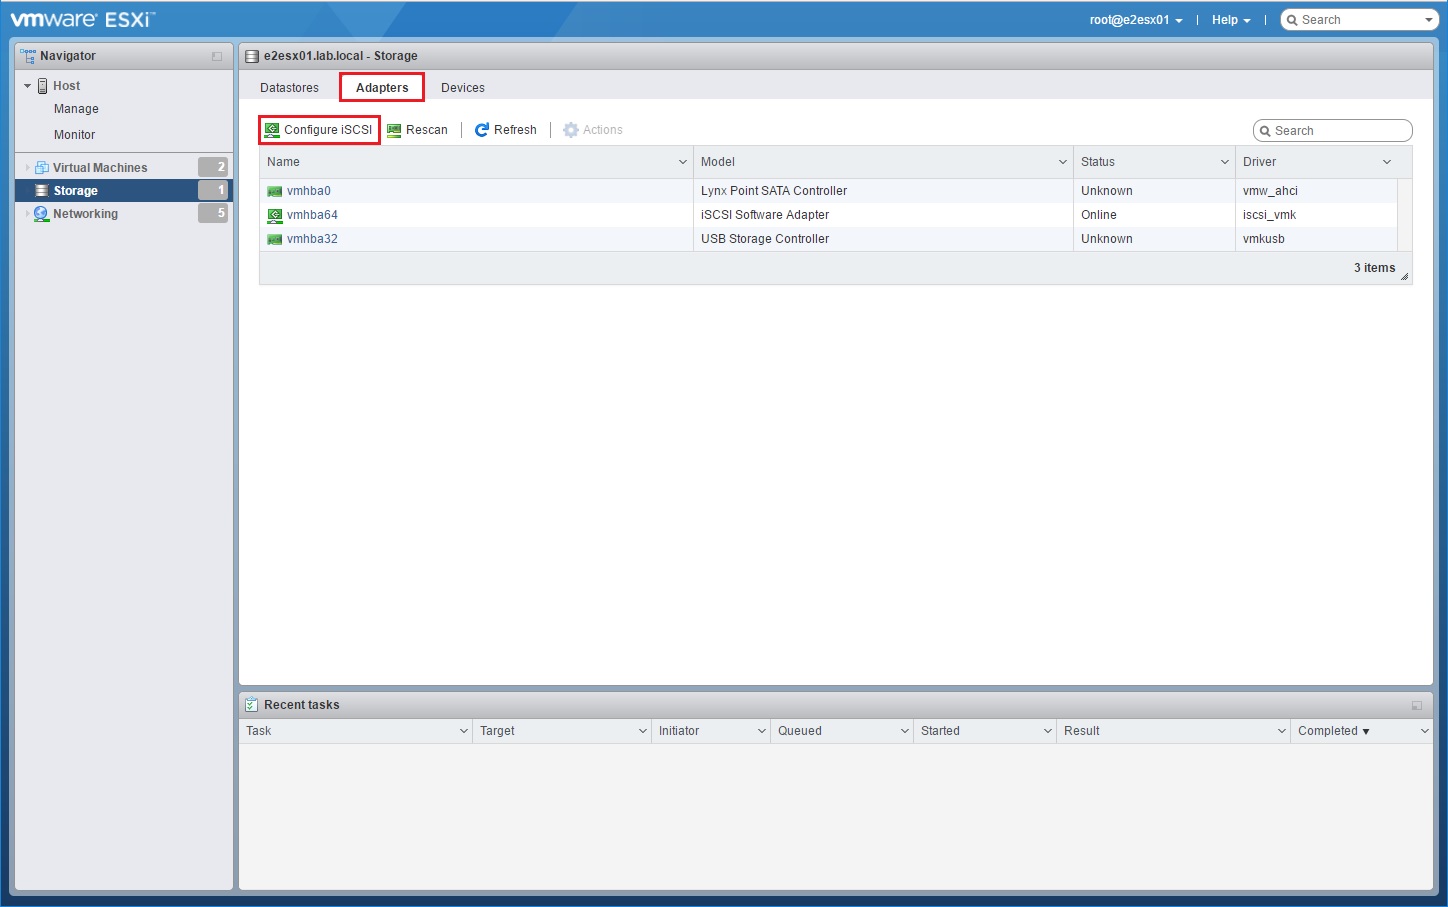
First things first. Let’s login into one of the hosts we setup the other day. Once you’ve logged in, navigate to Storage on the left hand menu. Once there click on the Adapters tab then click on Configure iSCSI.

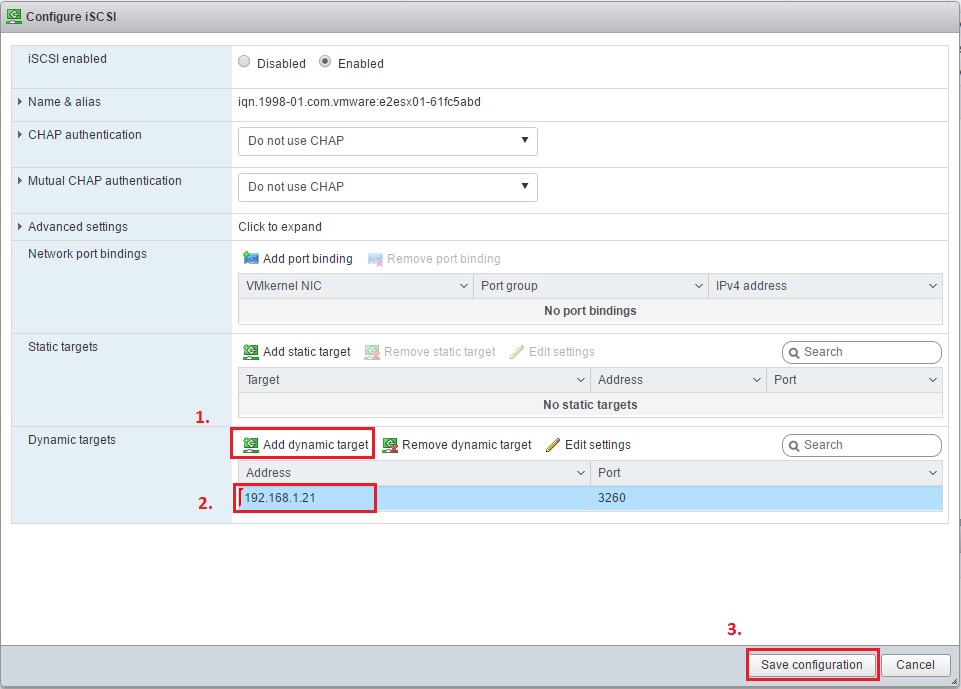
Once the menu pops up, change the radio button from Disabled to Enabled. Then we are going to want to add a Dynamic Target. Click on Add dynamic target. In the field below enter the IP address of your target. This will be the IP of your Western Digital EX2. Save configuration when done.
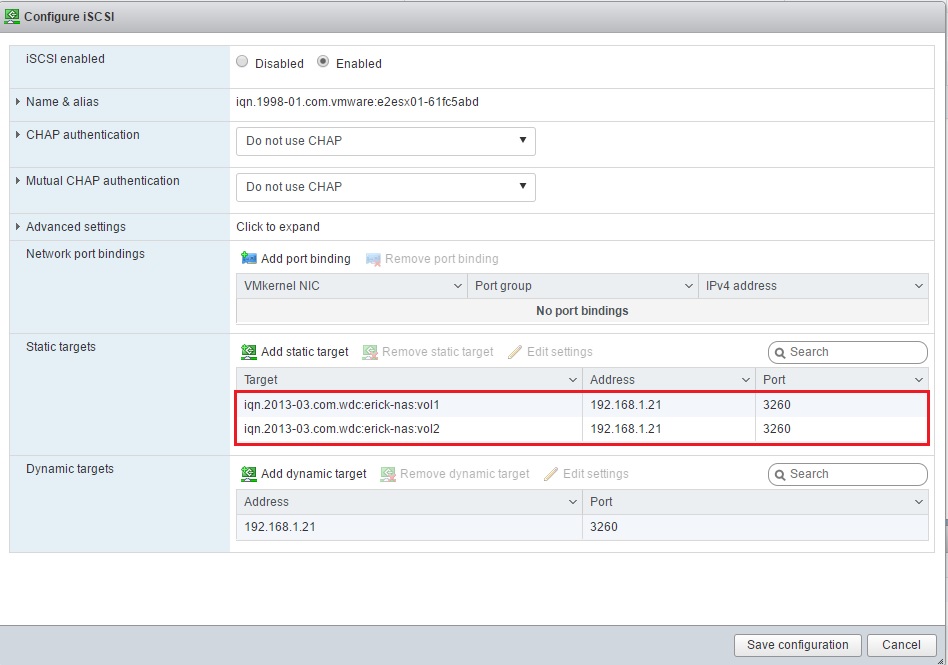
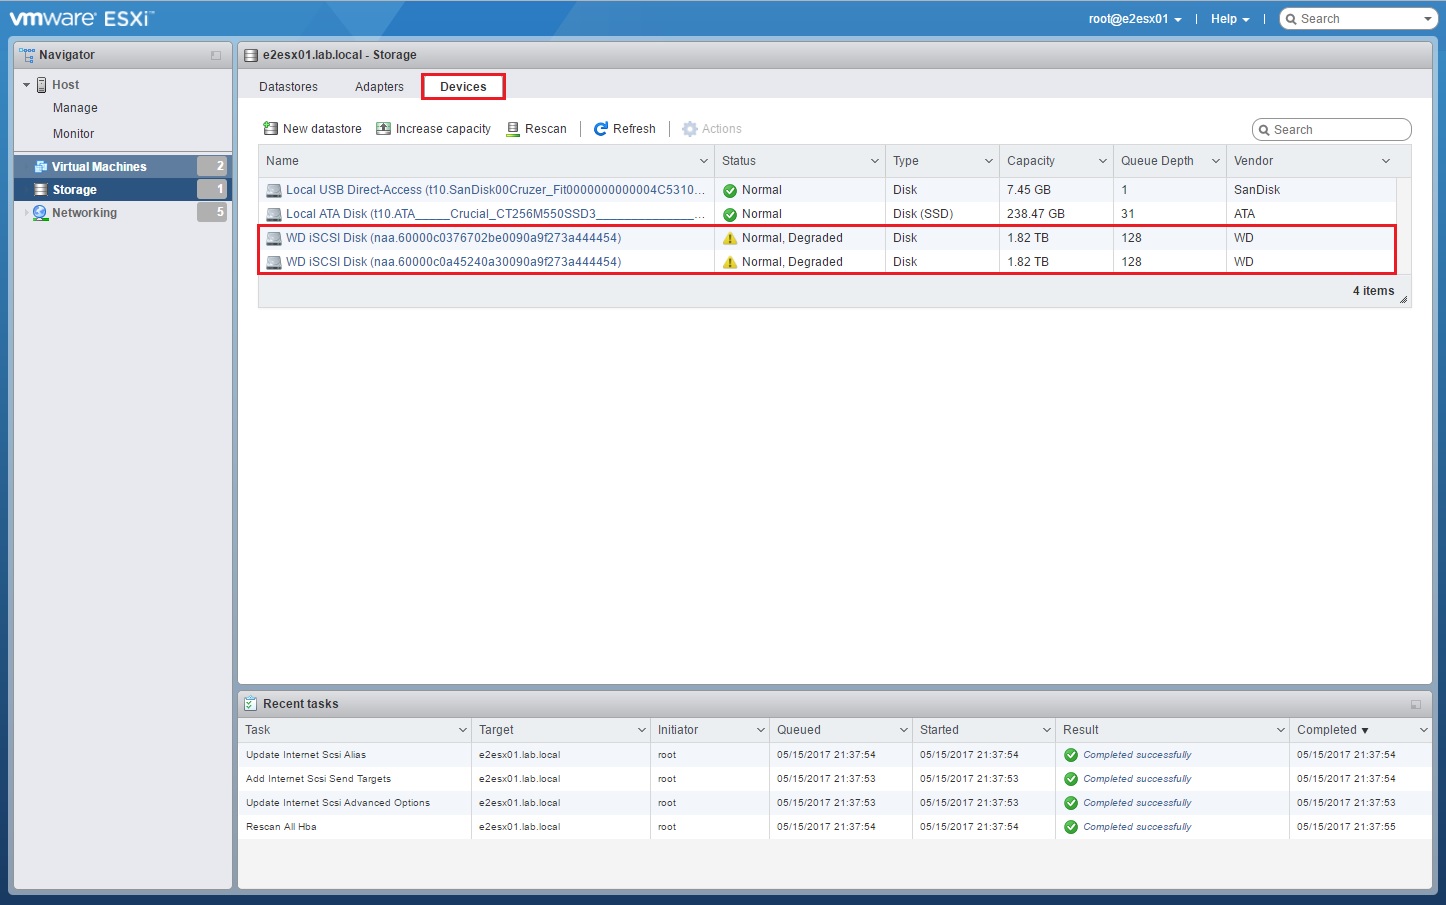
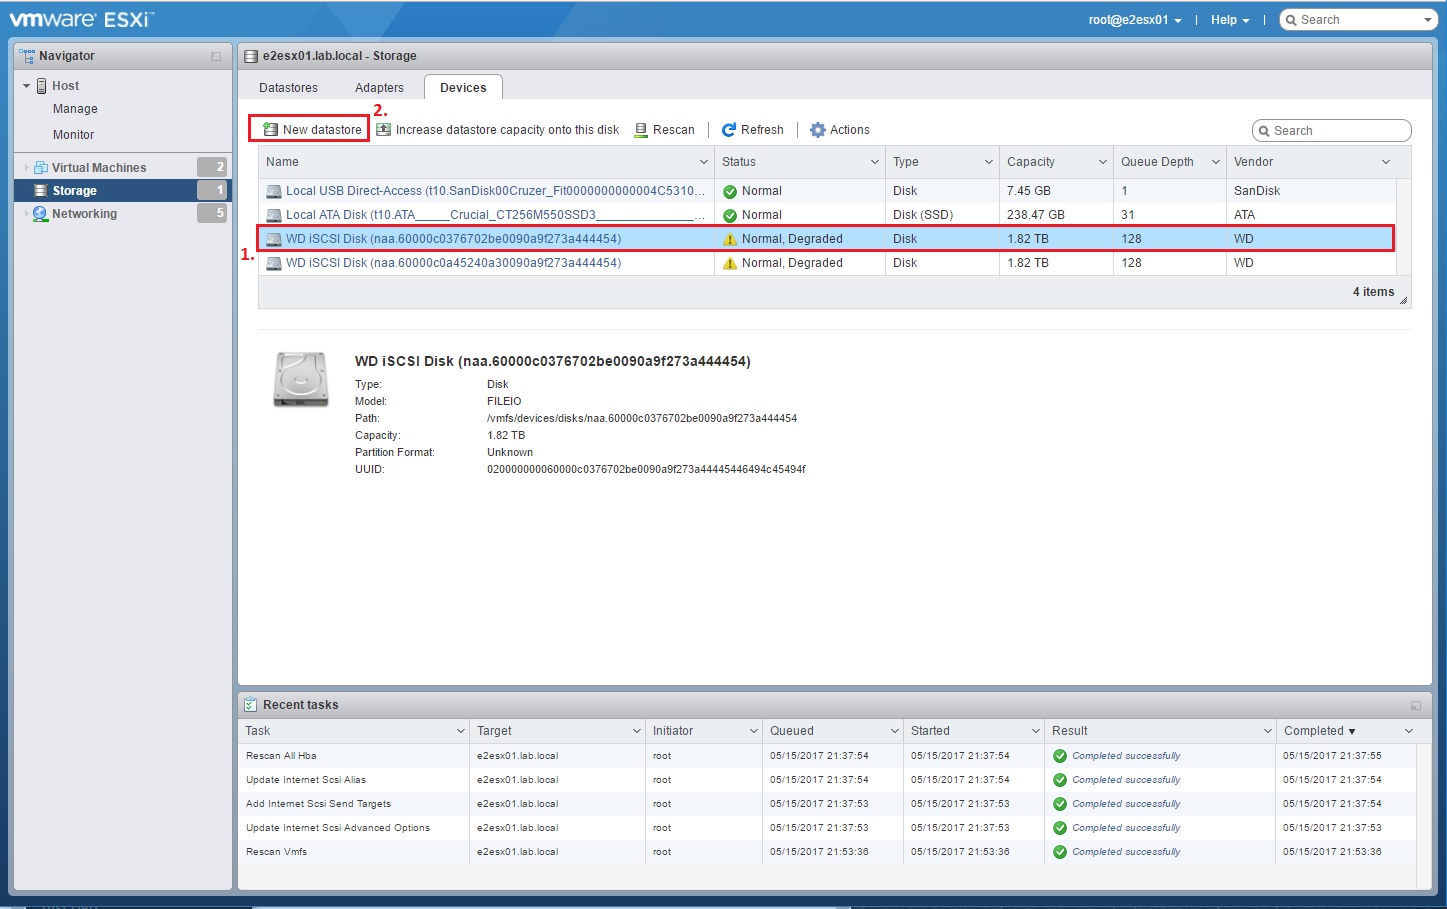
Once you save, open Configure iSCSI again and you should now see both volumes under the Static targets section. Once you validate that click Cancel. Now head over to the Devices tab. You should see both 2TB volumes with a usable capacity of 1.82TB each showing Degraded like little pansies.

Creating VMFS Shared Storage Datastore
Now that our host can see both drives available, let’s create a VMFS (Virtual Machine File System) datastore which will be used as storage by our VMs.
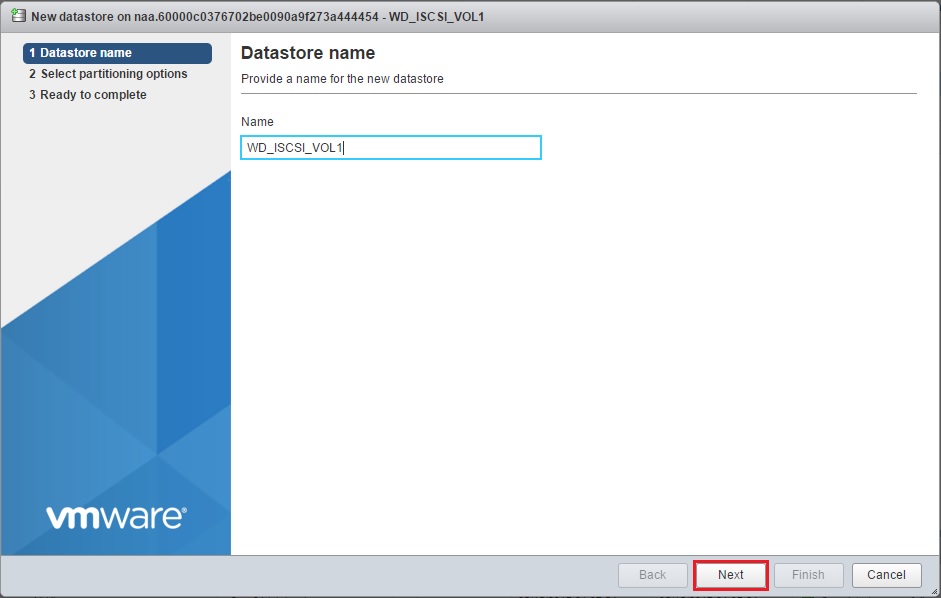
Highlight one of the disks and click on New Datastore. Call it whatever you’d like then click on Next.
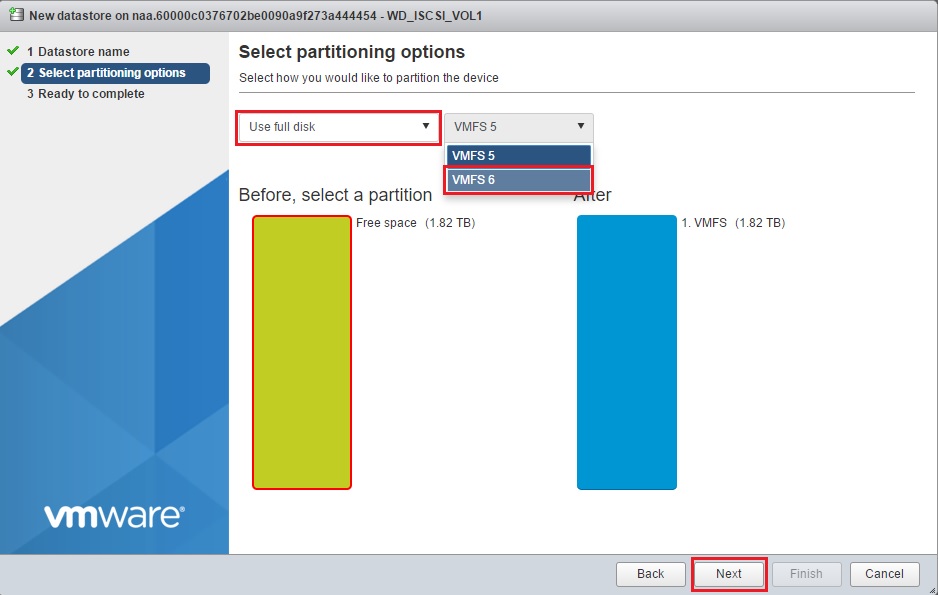
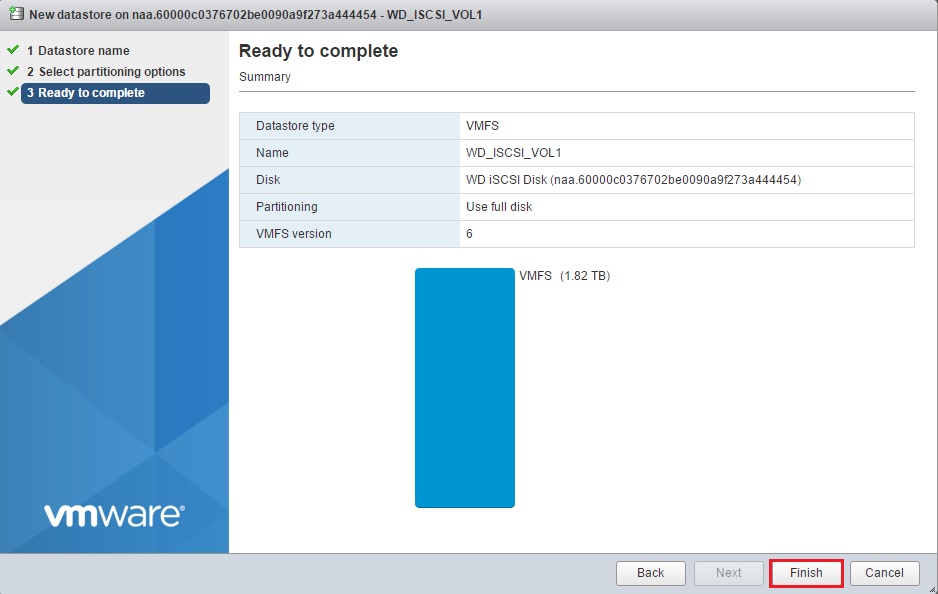
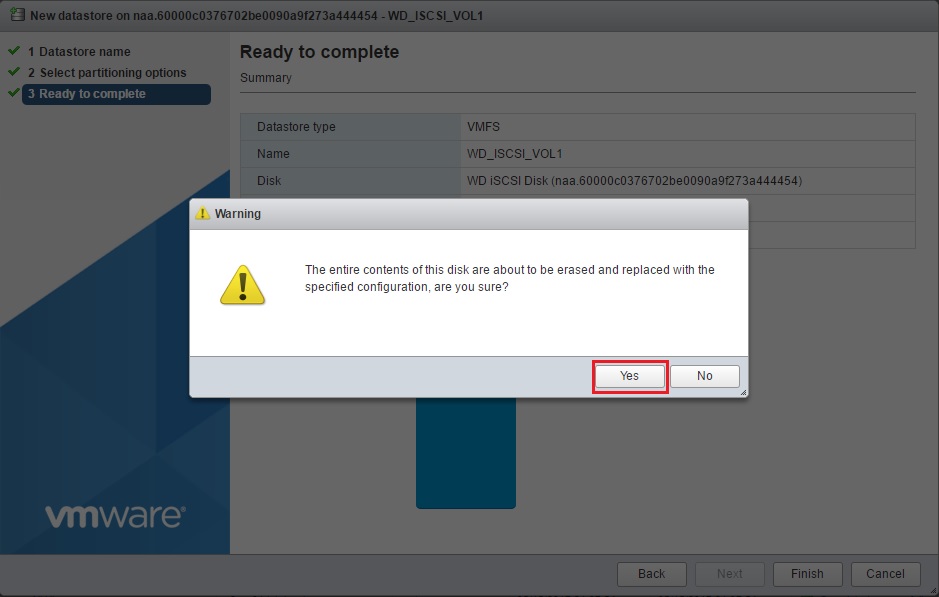
I’ll be using the full disk for both of these volumes. You can carve up different sizes for different purposes but in the end it’ll still use the same Volume. Also, change the file system to use VMFS6 from VMFS5. VMFS6 is newer and comes with the Automatic Space Reclamation (UNMAP)built in. When ready, click on Next. If everything looks all good on the last page. Click Finish. A prompt will pop-up crying about all the disk contents will be erased. Just click on Yes.
It shouldn’t take very long to format. Once it’s done, head over to the Datastores tab and you’ll see your new Datastore. Repeat those steps for the second volume vol2.
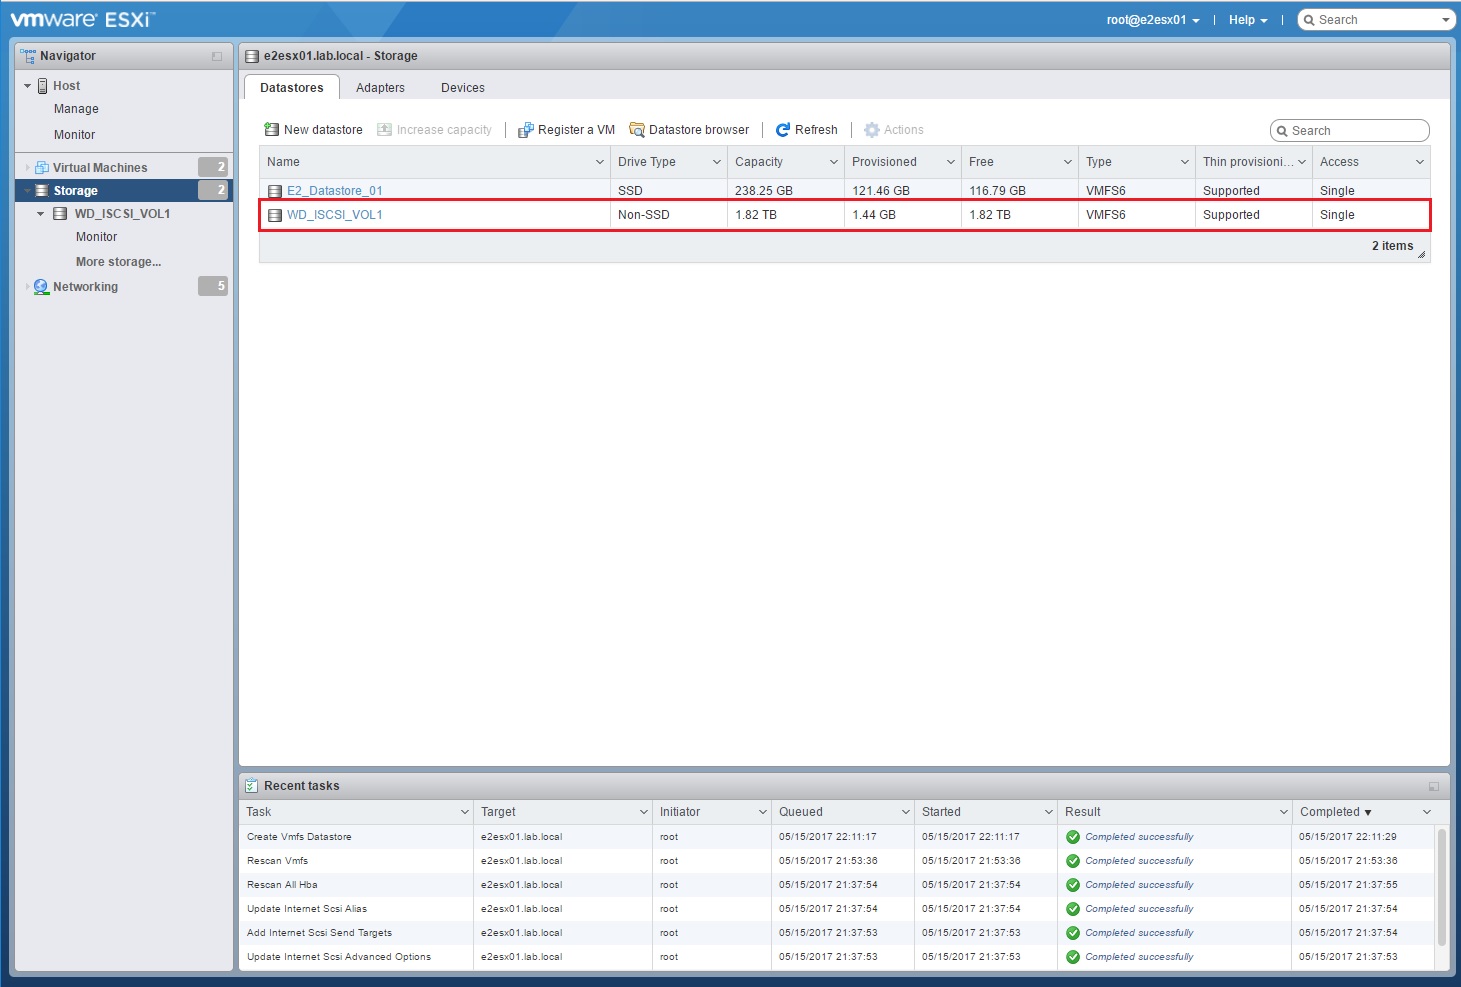


Yey. Now we have two volumes which we can add to a Datastore Cluster once we get vCenter stood up.
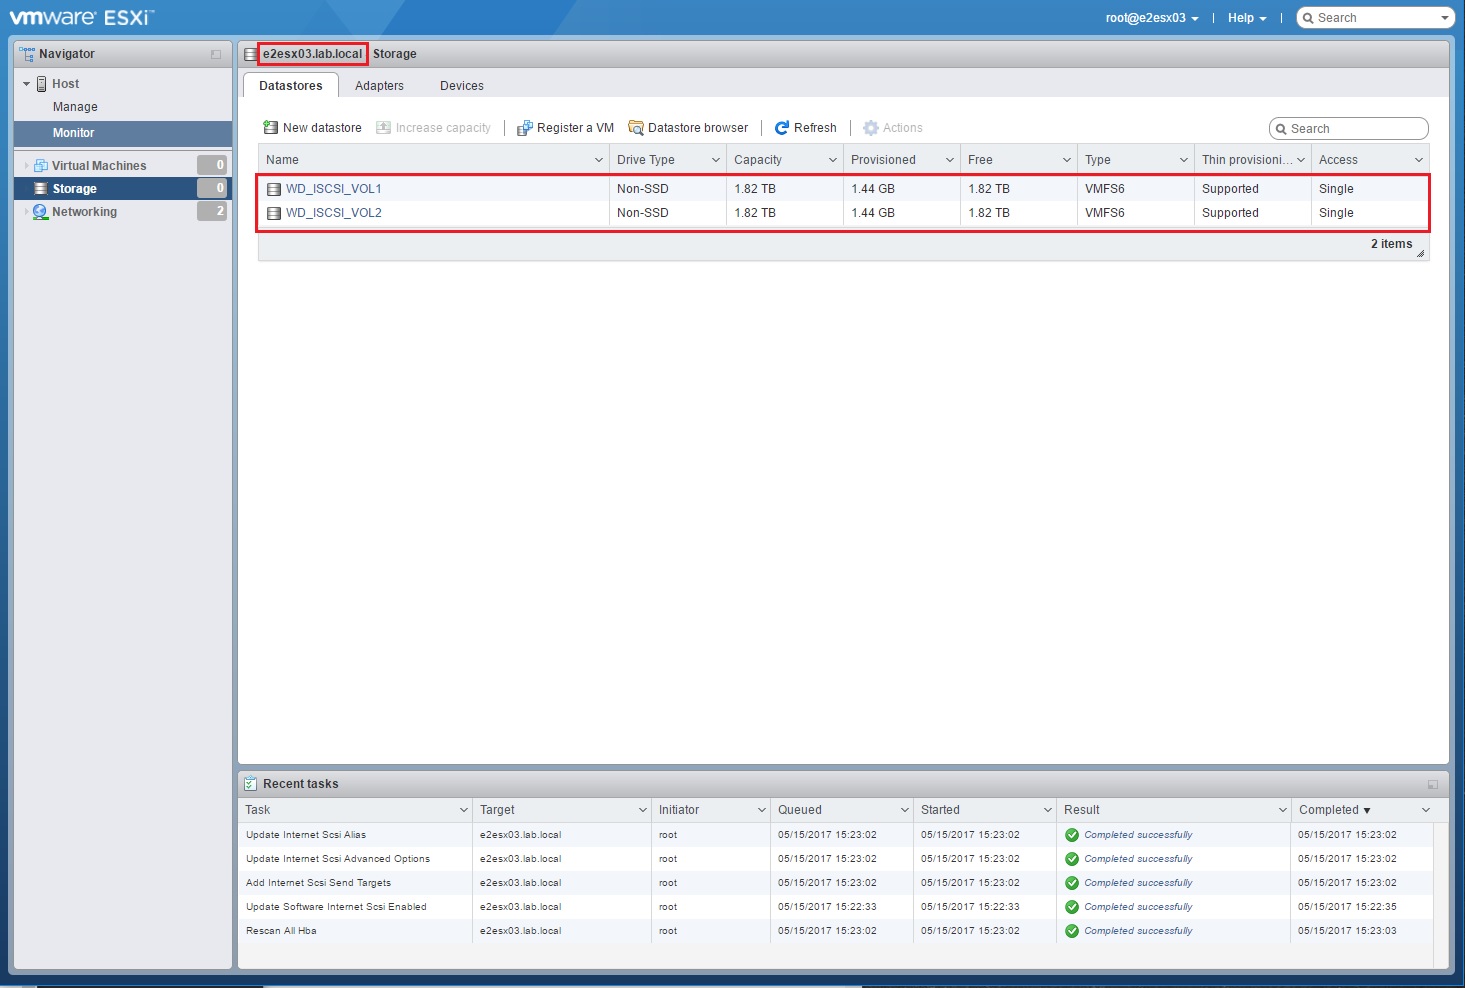
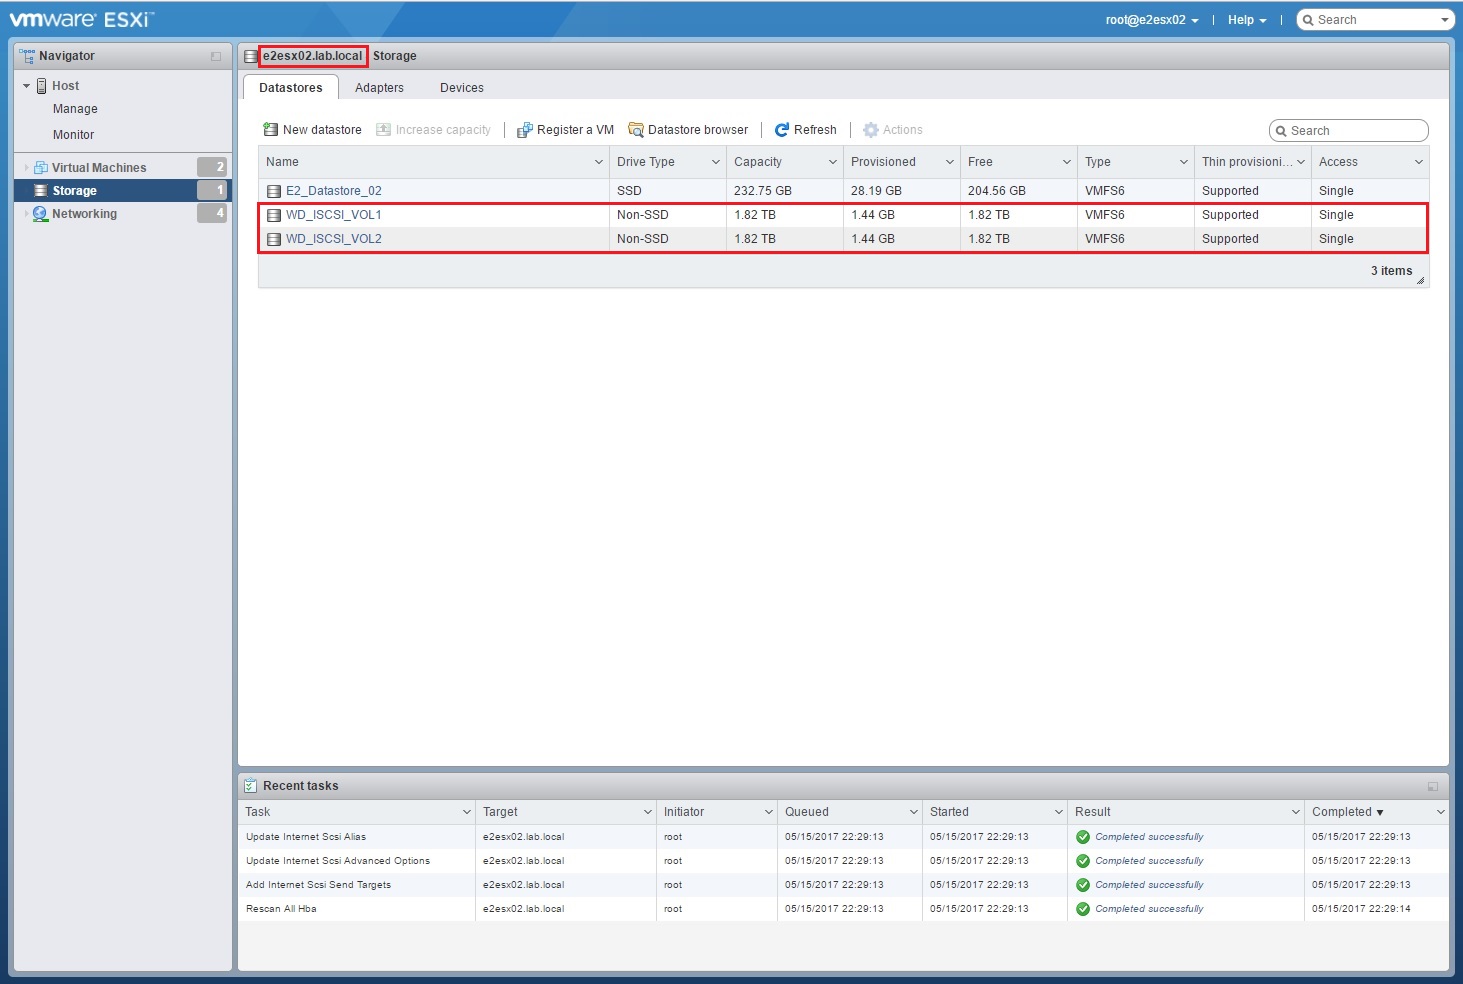
In the meantime, since you’ve already formatted these two volumes and created two VMFS6 datastores, you’re going to want to login to your remaining hosts Configure iSCSI and add that Dynamic target IP when we were Configuring Initiators above. Once you do that, simply refresh and the drives will be present and ready under the Datastores tab to be used as shared storage with those hosts as well.

[…] the storage where you’d like to store the VM. We’ll use the shared storage we created a while back. Once done click on Next where you’ll customize the hardware. Give whatever […]
[…] Remember that Shared Storage datastore we created a little while back? Well we’ll need to upload this Offline Bundle somewhere on there so that all the ESXi hosts can see it. […]