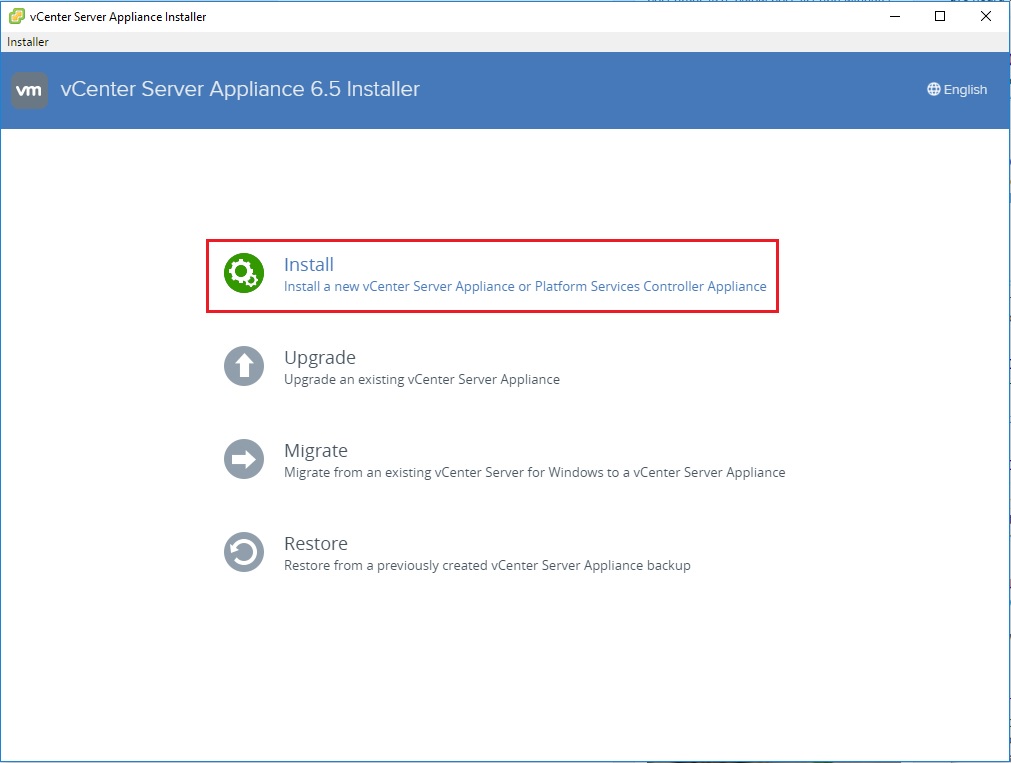
So after all this prep work, we can now install vCenter to do all the cool things. Also, since we are installing vCenter 6.5, we may as well utilize the new VCSA Installer and create a vSAN 6.6 cluster all in the same process.
More...
Dude! Wut the heck is Bootstrapping?
Bootstrapping is a term I’ve first heard of when learning to build websites. There was a method called Twitter Bootstrap which is a toolkit to develop webapps to work out of the box and be compatible with all browsers. Its also is a popular business term and an actual physical strap on boots. 🙂
Here is a more definitive example taken from techterms.com
The most fundamental form of bootstrapping is the startup process that takes place when you start up a computer. In fact, the term "boot," as in booting up a computer, comes from the word bootstrap. When you turn on or restart a computer, it automatically loads a sequence of commands that initializes the system, checks for hardware, and loads the operating system. This process does not require any user input and is therefore considered a bootstrap process.
Prerequisites
There are a few things we need to make sure we have in order for the new installer to work properly.
- 1. ESXi 6.5 Host
- 2. VCSA 6.5 ISO
- 3. Hardware
- 4. Domain Controller
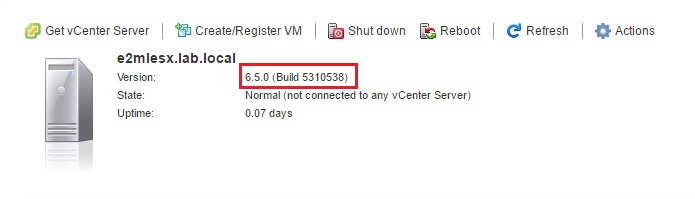
The host needs to be on build 5310538 or later.
You’ll need the VCSA 6.5 ISO on version 5318154 in order for the vSAN cluster creation option to show up.
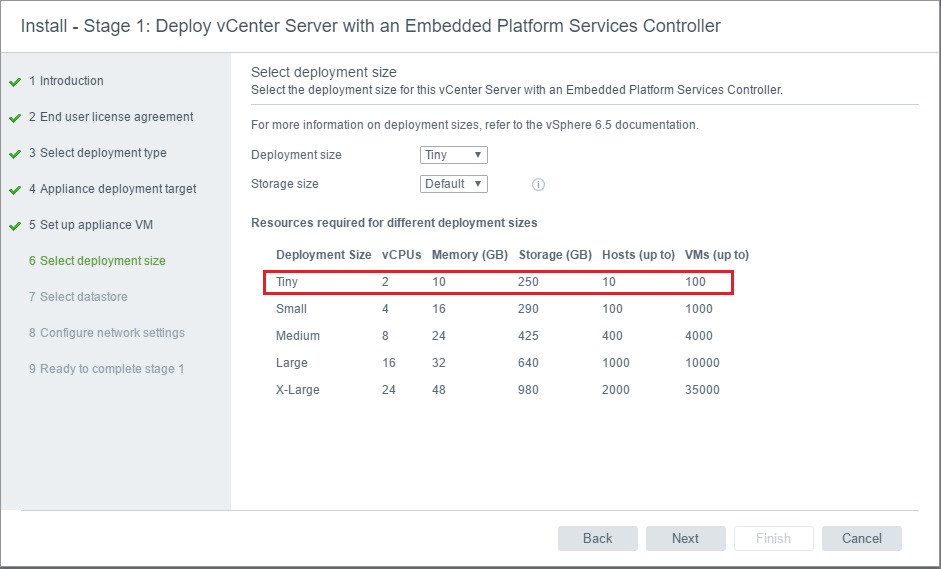
Your host needs to have the minimum hardware requirements in order to create a vSAN cluster and also to deploy vCenter with an Embedded PSC. It all depends on how much VMs you are planning on running. I don’t plan on having anywhere close to 100 VMs in my home lab so I’ll be choosing the Tiny deployment size which requires:
*vSAN requires mixed speed disks for caching (SSD) and data storage (HDD) that aren’t already formatted. The disks need to be presented to the host ready to format by vSAN.
You’ll need a domain controller with the DNS role installed. Of course you don’t have to go this route and you are welcome to use any other solution for DNS.
Create Domain Controller VM & Configure DC w/DNS Role
First thing I like to do is spin up a DC to serve up DNS. DNS is recommended when installing vCenter as opposed to using just the static IP. vCenter relies hugely on DNS since the SSO (Single Sign-On) service is part of the PSC (Platform Services Controller) and stuff and things.
*You don’t necessarily need to do this step first in order to install vCenter, but I like to have a working DNS server before deploying.
So first thing we’ll do is create a new VM and install a DC. I’ll use Windows Server 2016 as my DNS server. Before you get started, go ahead and upload the installation ISO to a datastore.
Create A Virtual Machine
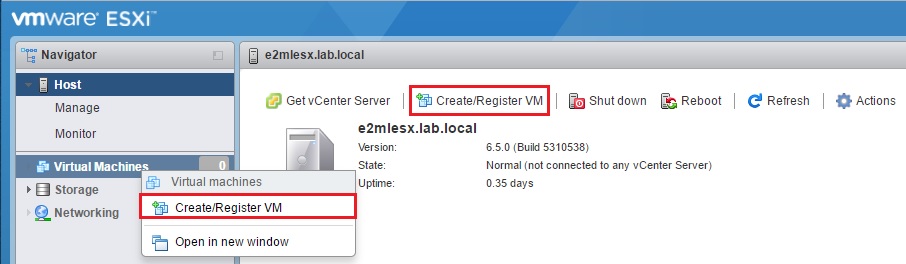
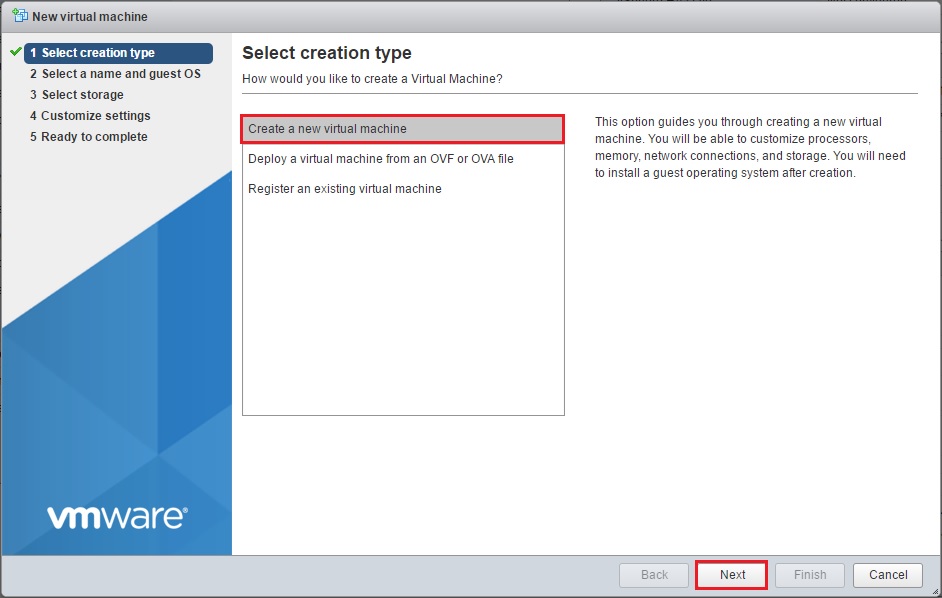
Login to your ESXi host. You can either right click on Virtual Machines on the left column or simply click on the Create/Register VM button.
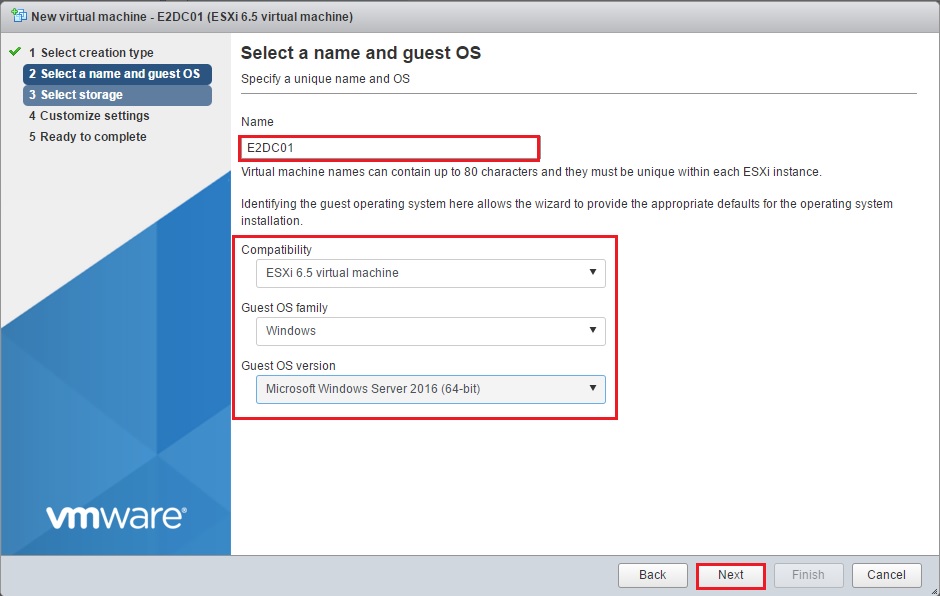
The VM creation window will pop up. Click Next on this first screen. Then enter a name for your VM and choose the OS family and version. Once complete click on Next.
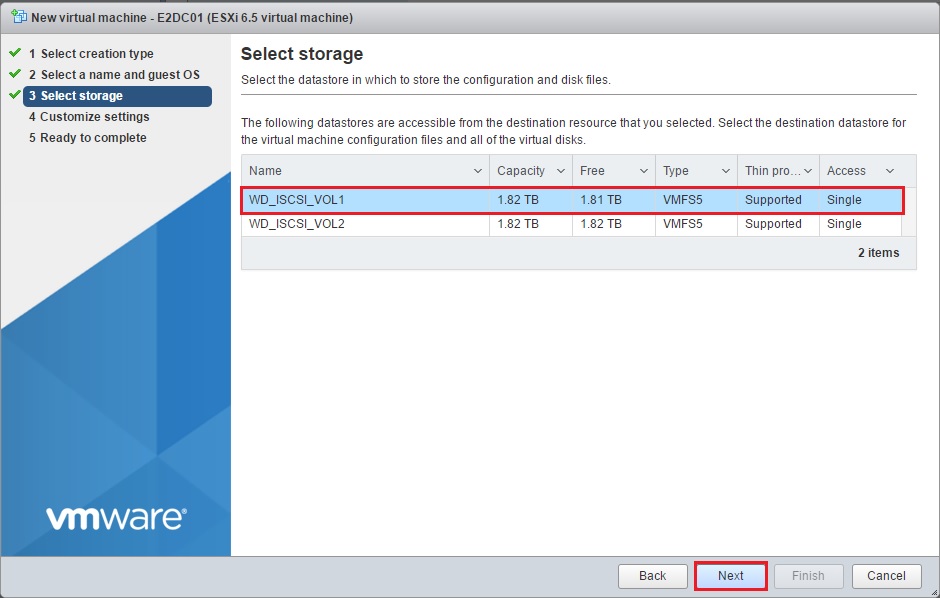
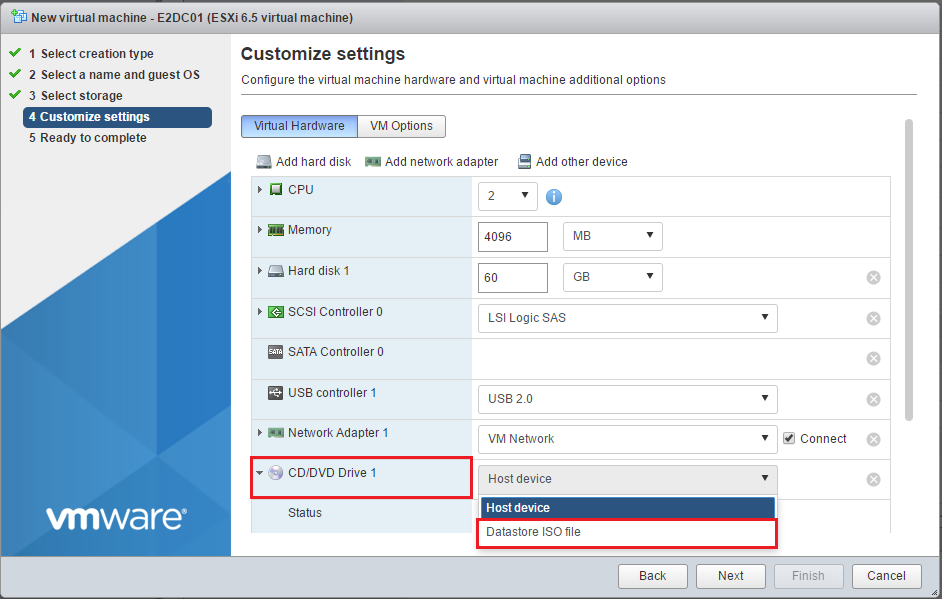
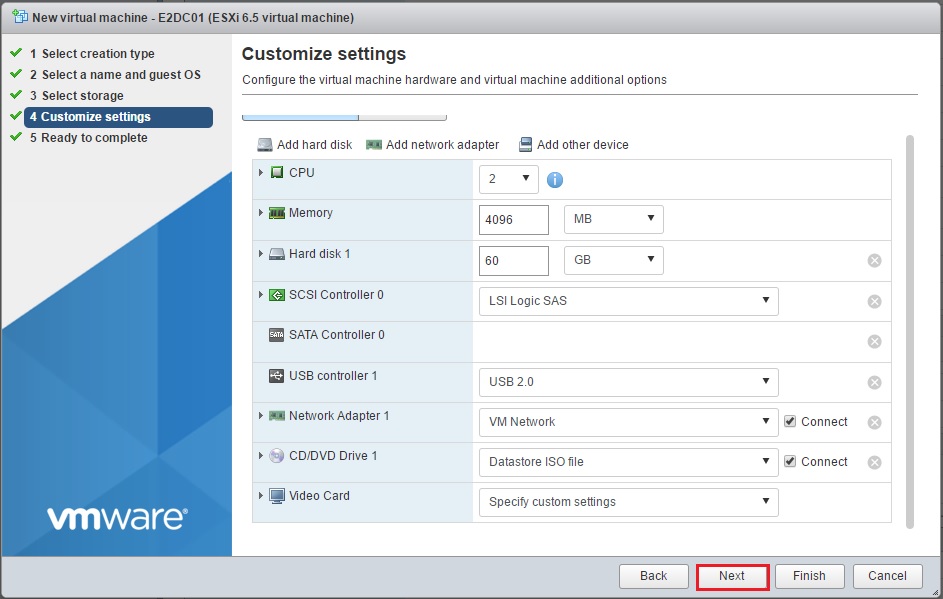
Select the storage where you’d like to store the VM. We’ll use the shared storage we created a while back. Once done click on Next where you’ll customize the hardware. Give whatever resources you feel are necessary to run the DC depending on how much resources you have to spare. When done, navigate down to the CD/DVD Drive 1 section. Click on the drop down and choose Datastore ISO file.
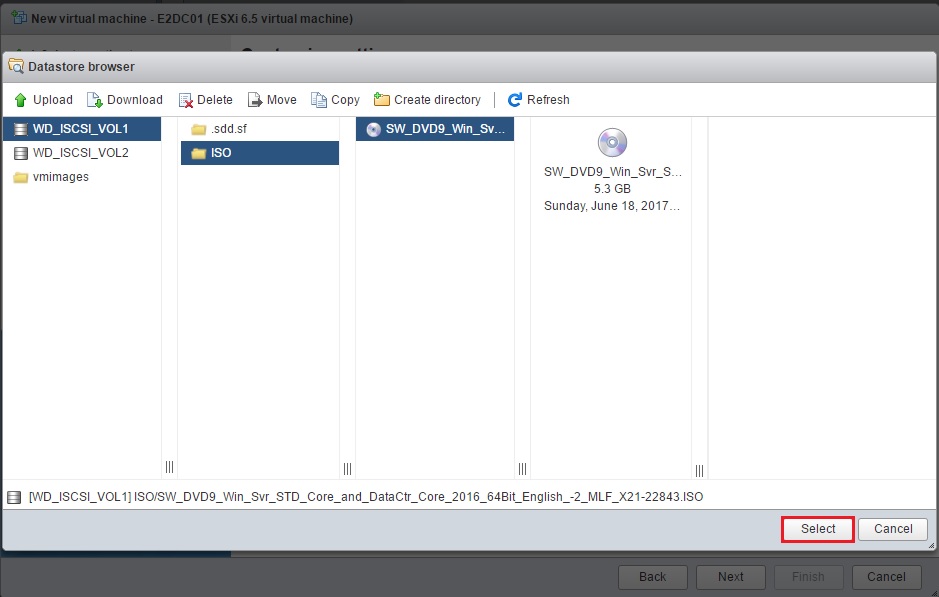
Another window will pop up to select the ISO from a datastore you should have uploaded beforehand. Find the ISO and click on Select the Next and finally Finish.
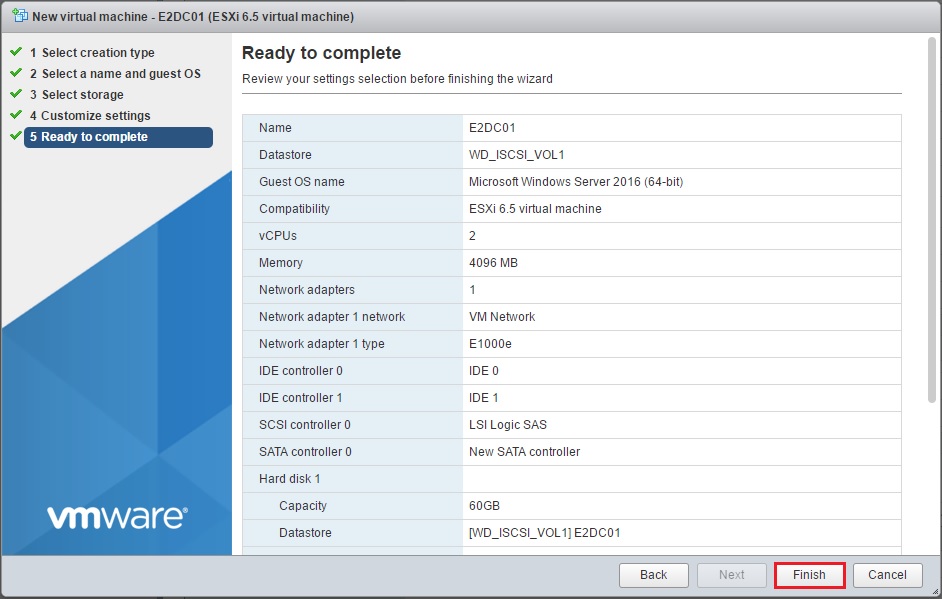
The VM creation should happen almost instantly. Next we’ll install and configure the Domain Controller.
Create Domain Controller & Install DNS Role
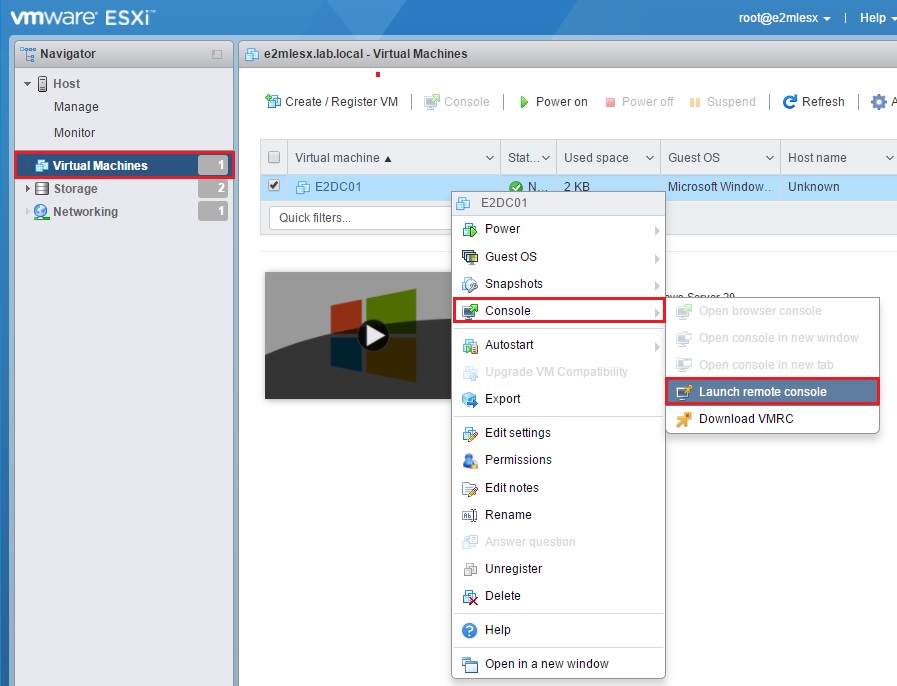
Now that we have our VM ready, on your ESXi host, click on the Virtual Machines section on the left column. Right click on the newly created VM. Navigate to Console > Launch Remote Console.
*Install the Remote Console if you haven’t done so already.
Click on the Play/Power On button and the machine should boot to the ISO we mounted from the datastore by default.
Once loaded simply continue through with the Windows install process. I like to use the Windows GUI as opposed to the core installation. So for those installing Windows Server 2016 Standard. Make sure you choose the Desktop Experience option when selecting the operating system.
When the install is complete, let’s make sure we…
- Set a static IP
- Turn Off Power Management on the NIC
- Activate windows
- Install the latest VMware tools
- Un-mount the ISO from the machine
…before promoting this machine to a Domain Controller and installing the DNS role.
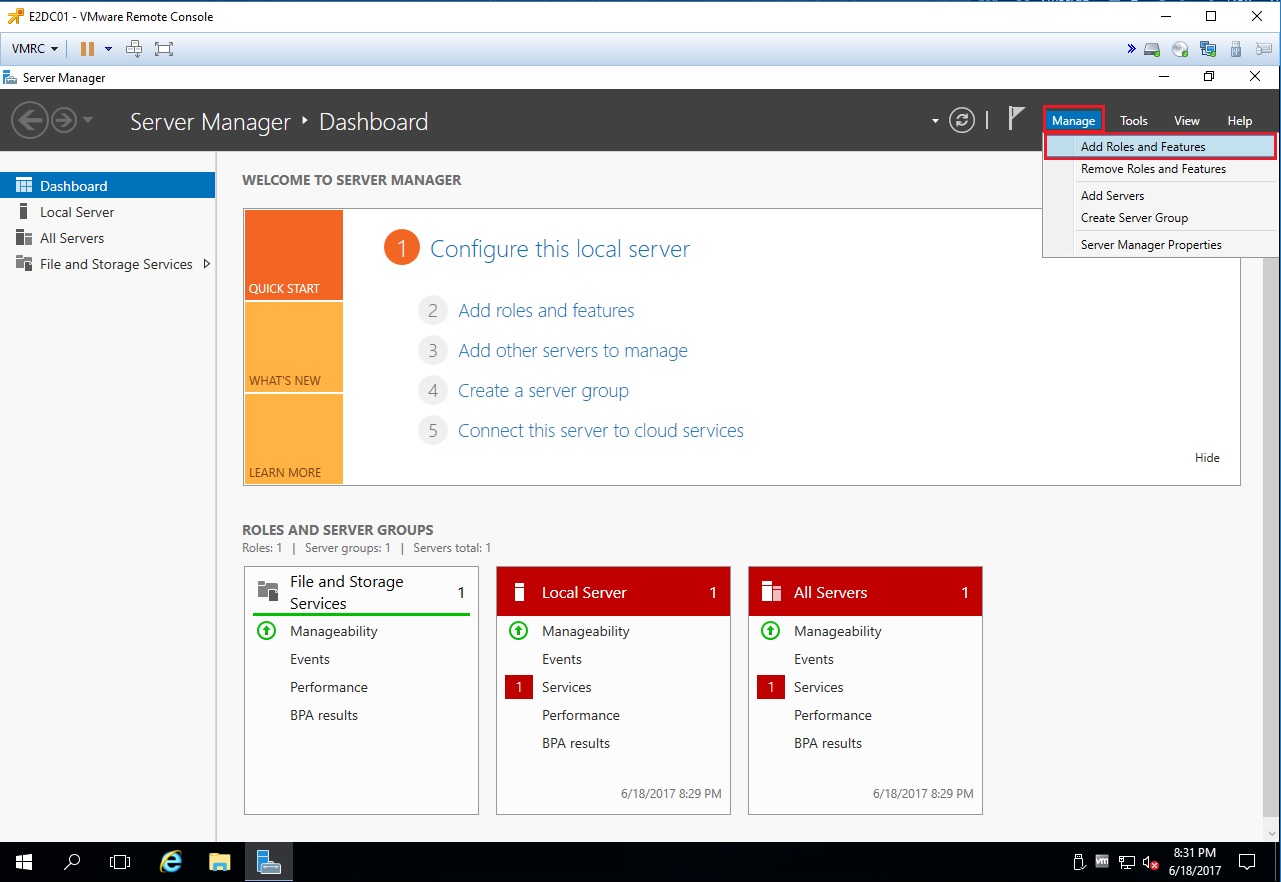
K done? Cool! So now let’s add a few roles.
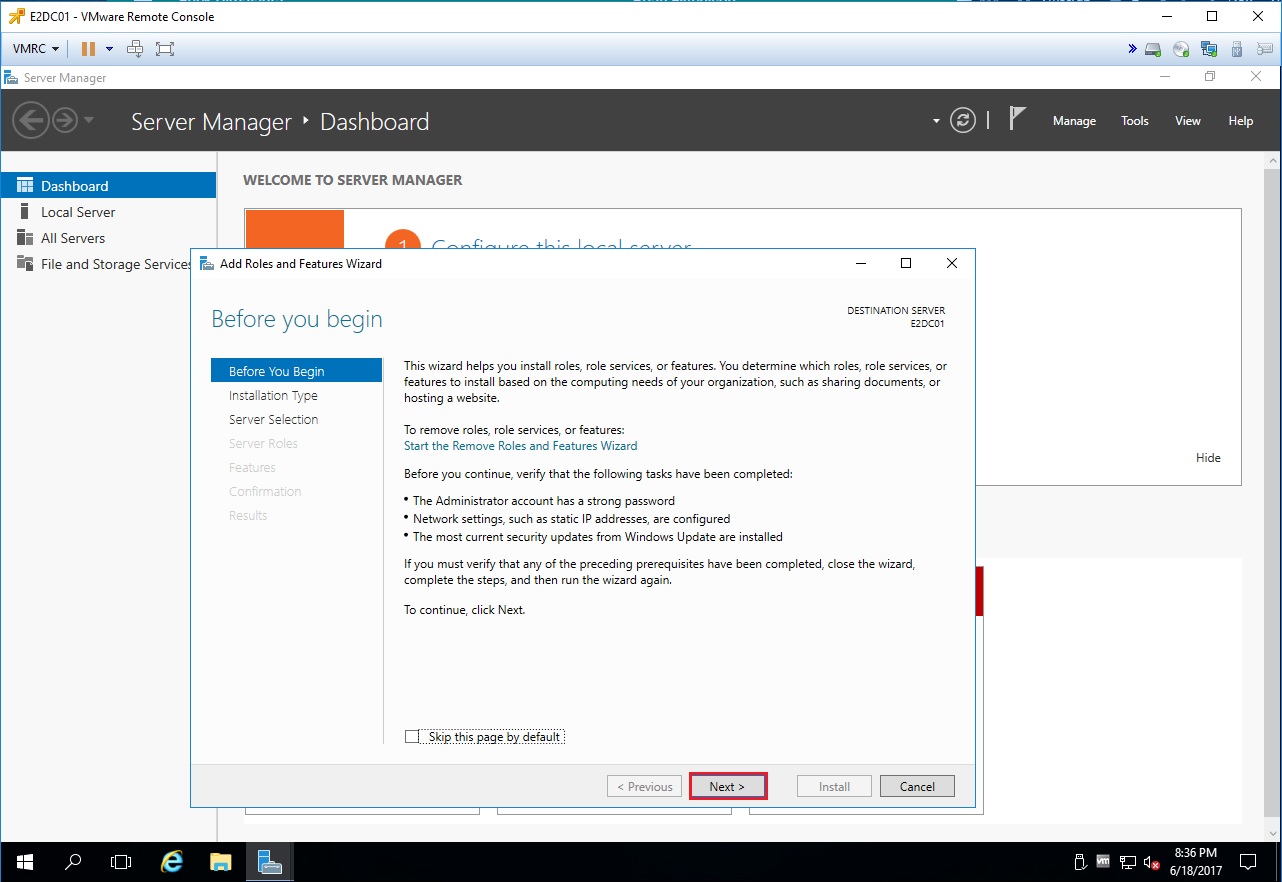
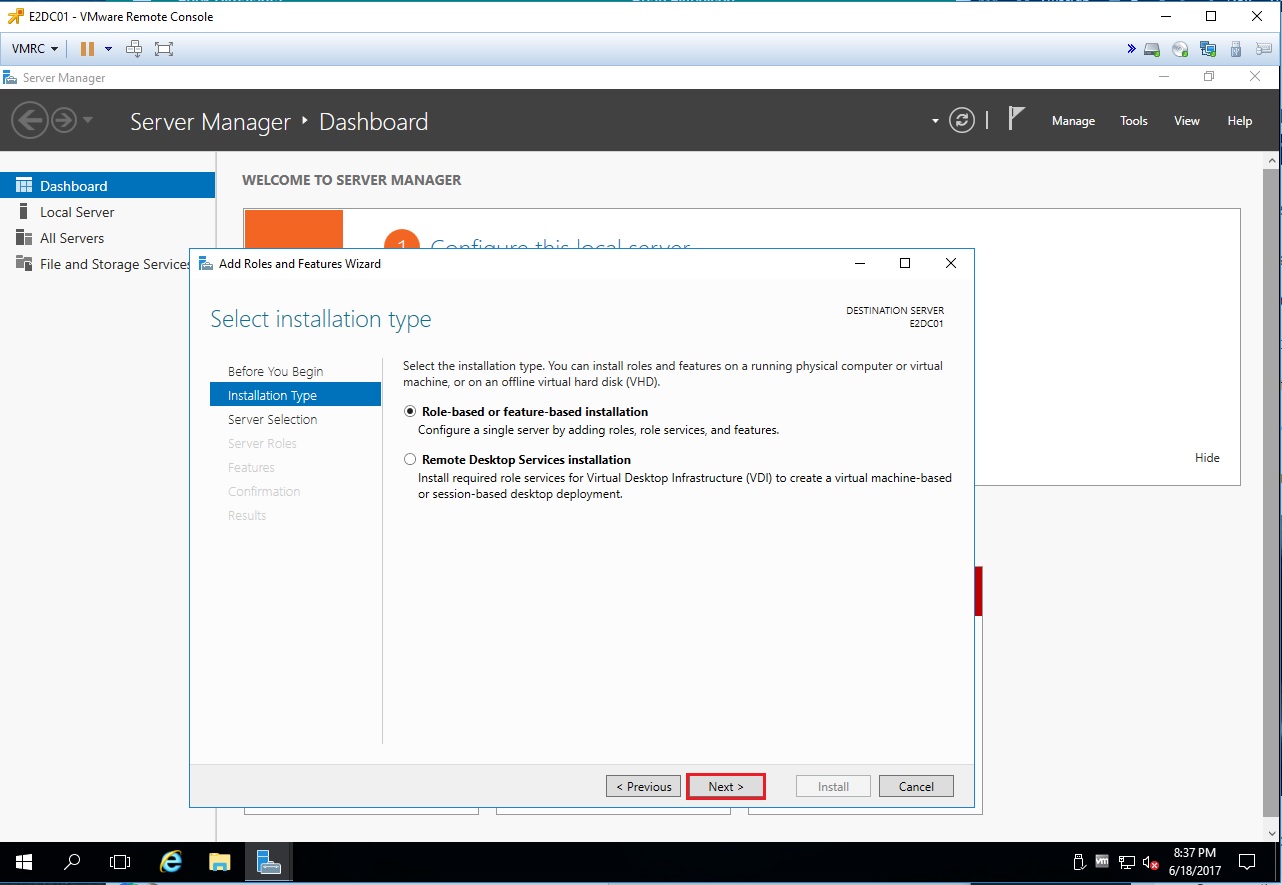
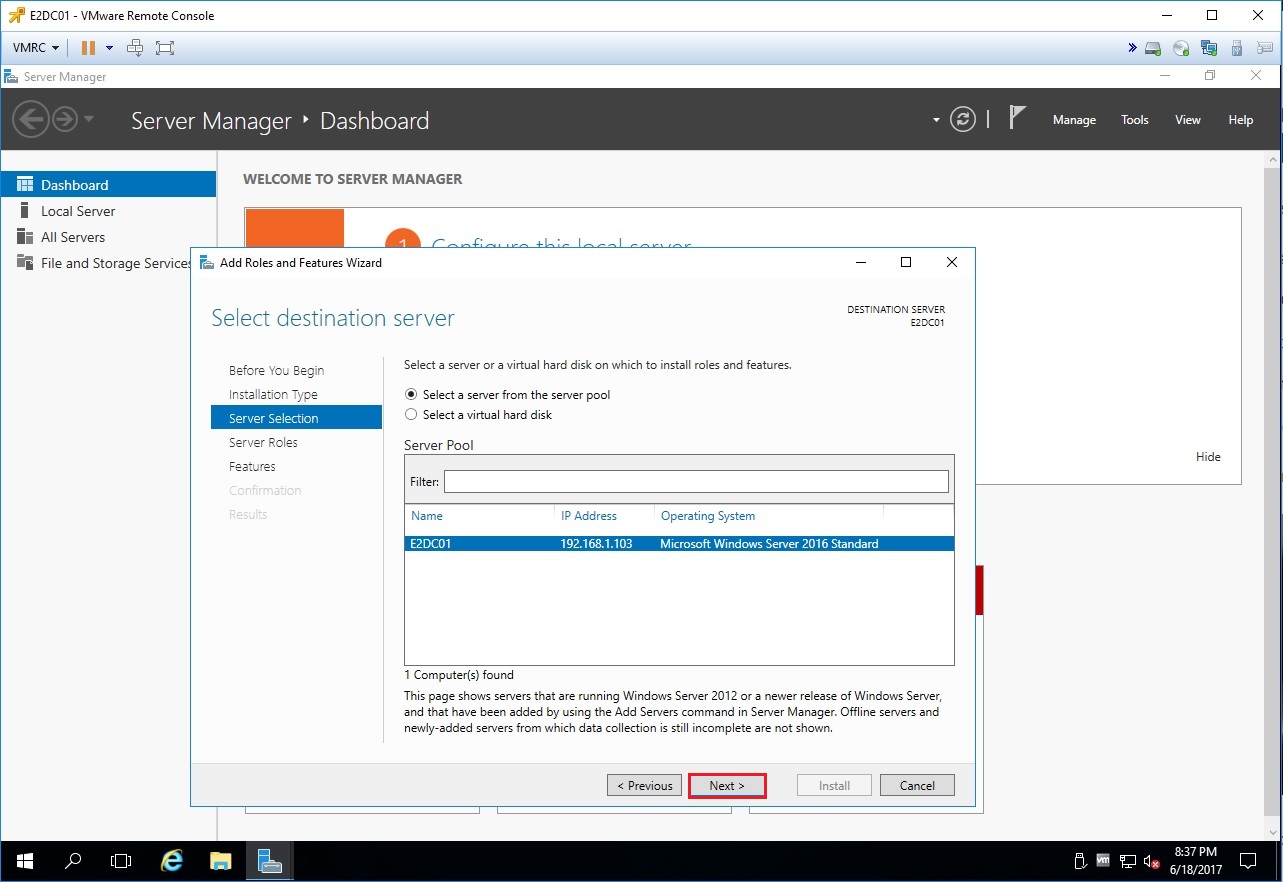
Open up the Server Manager if it isn’t already. Navigate to Manage Add Roles and Features. Click Next a few times till you get to the Select server roles page.
Then select the following roles:
- Active Directory Domain Services
- DNS Server
Installing them with the default settings is fine for now.
When done, click on close. You’ll notice a little bang in the Notification flag at the top. Once you click on that you’ll have the option to Promote this server to a domain controller. Do that!
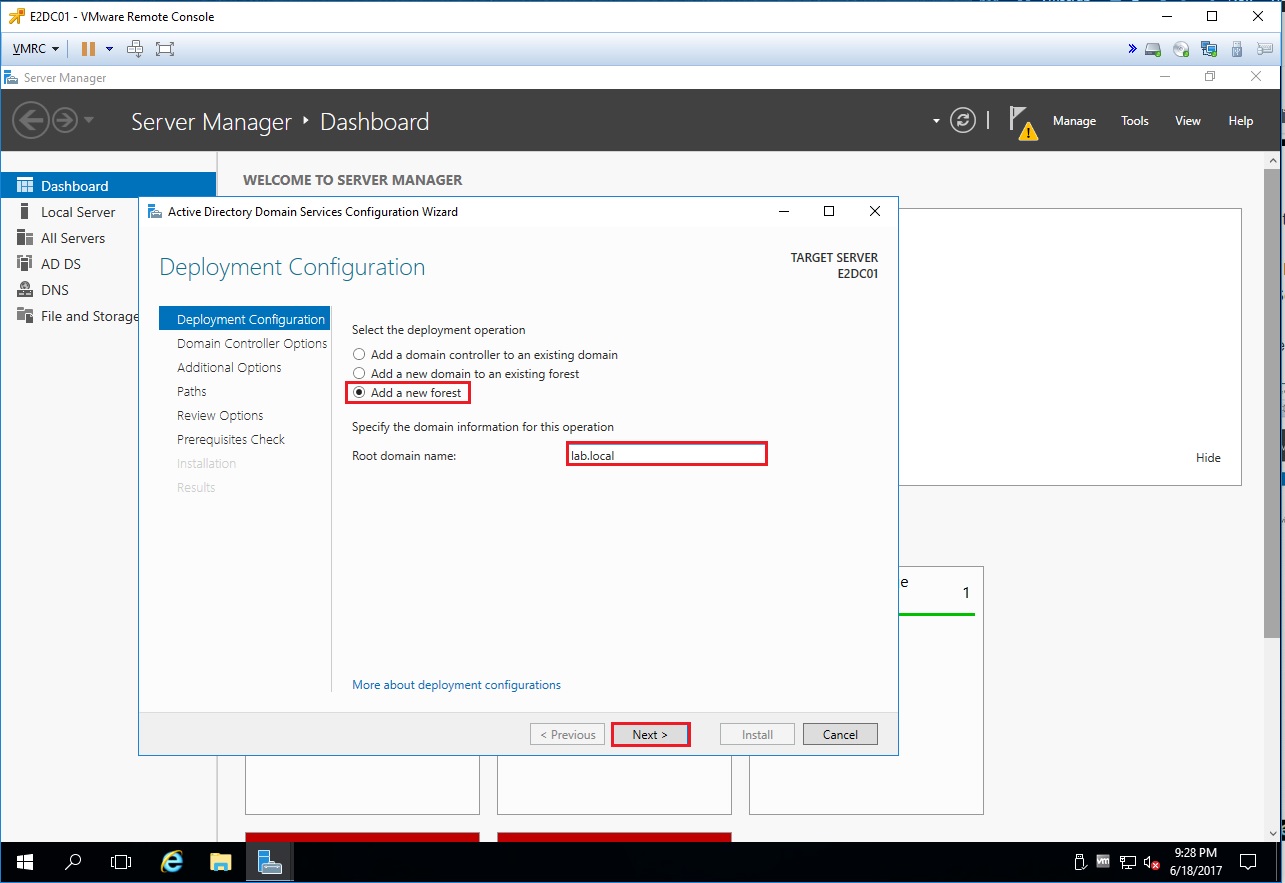
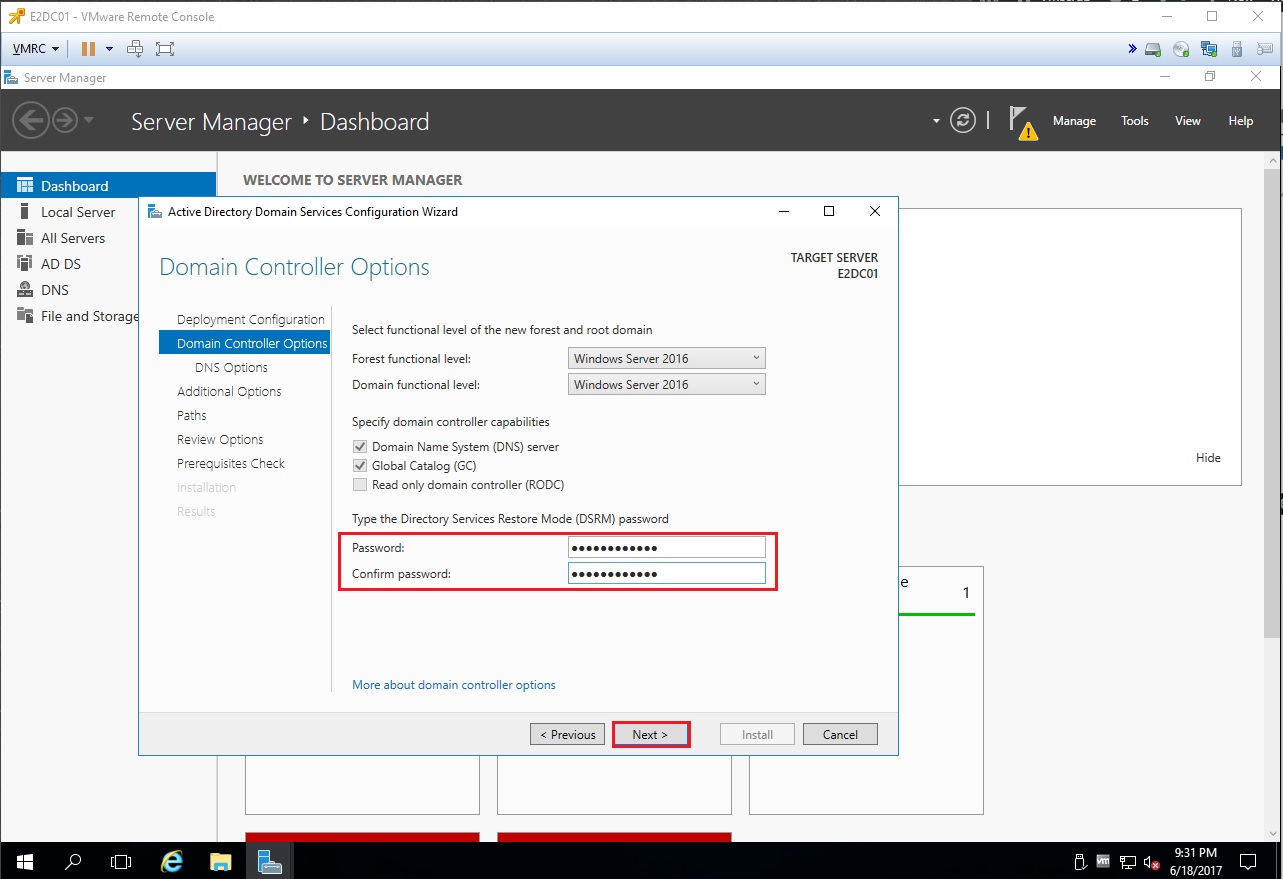
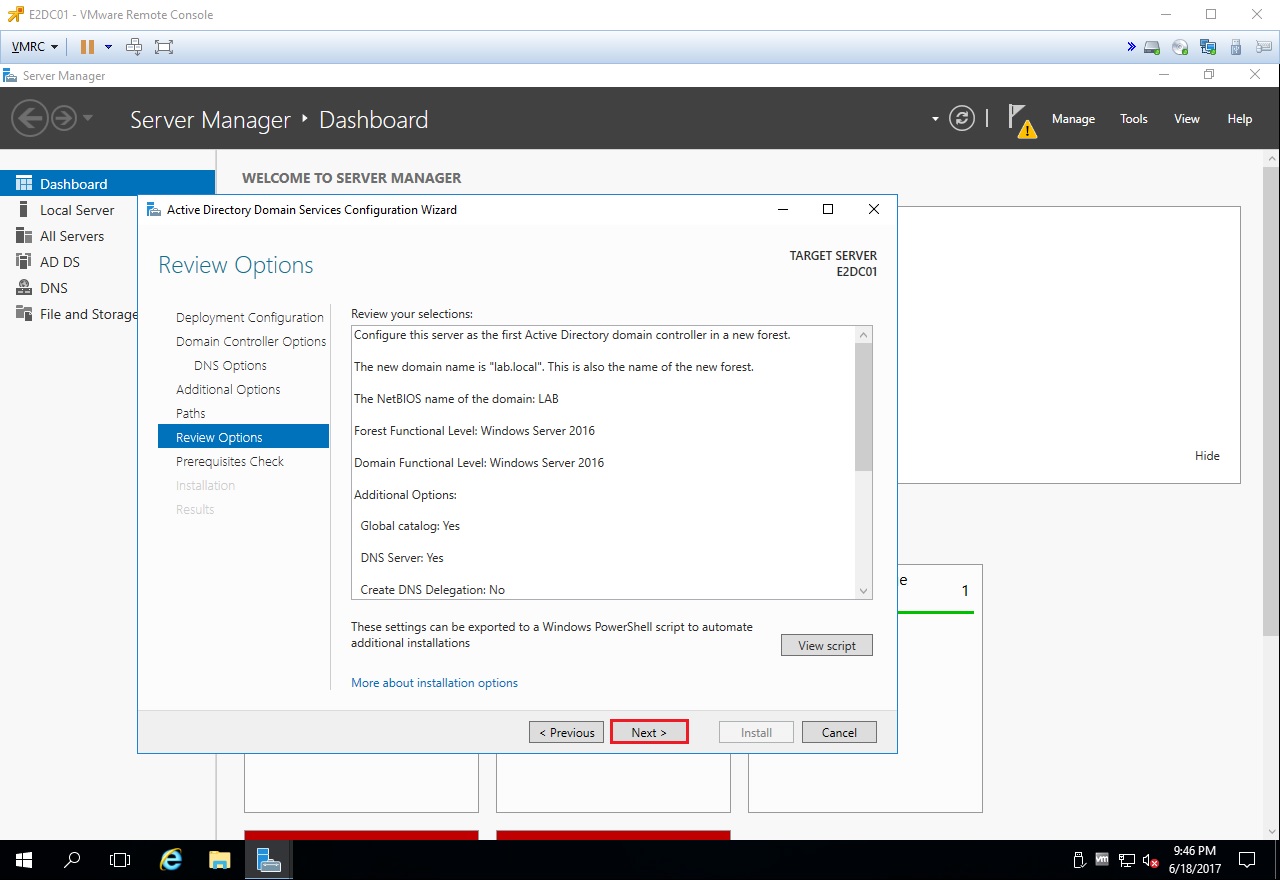
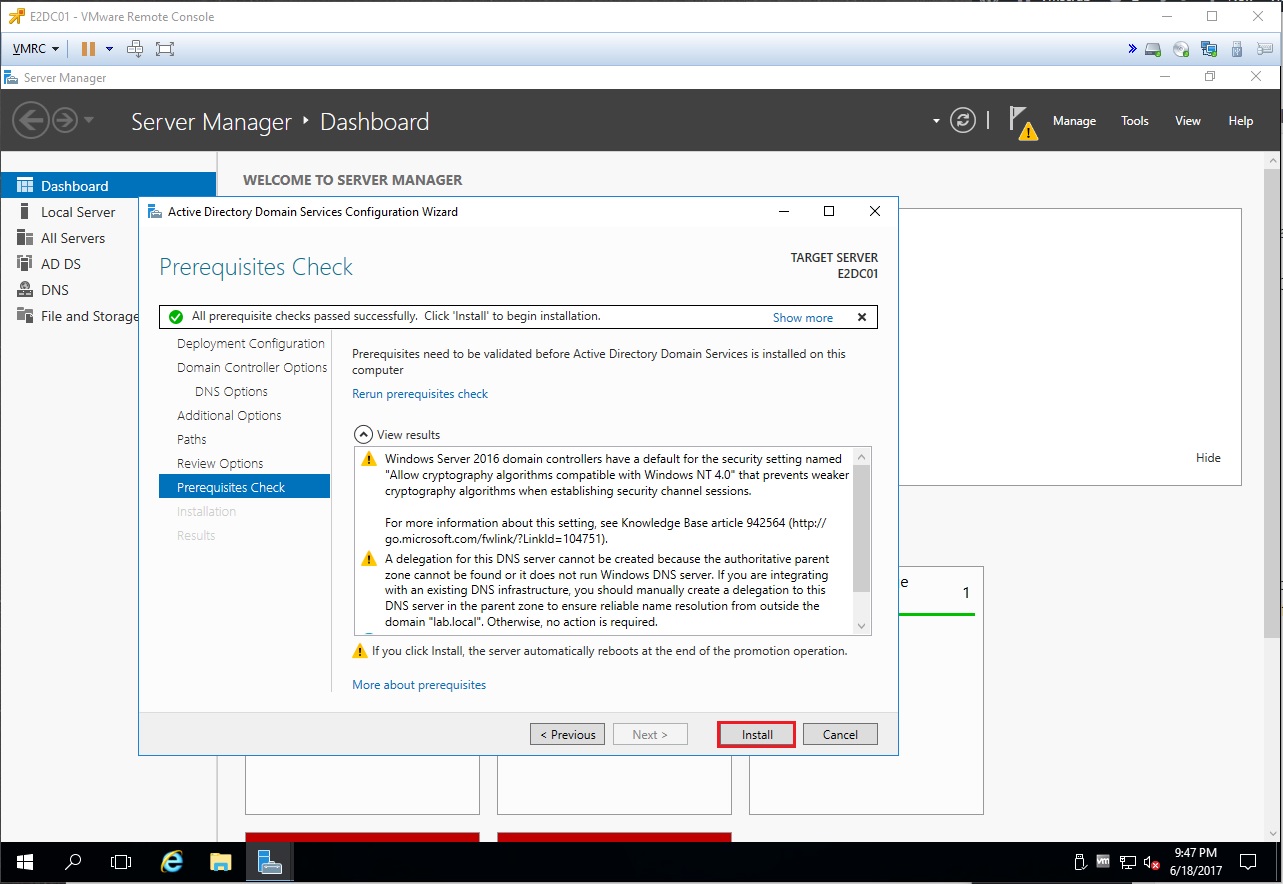
Unless you are already running a domain controller, click on the third option which is to Add a new forest. Enter your domain name here then click Next. Then on the next screen the DNS and Global Catalog options should be checked. Enter the DSRM password and click on Next.
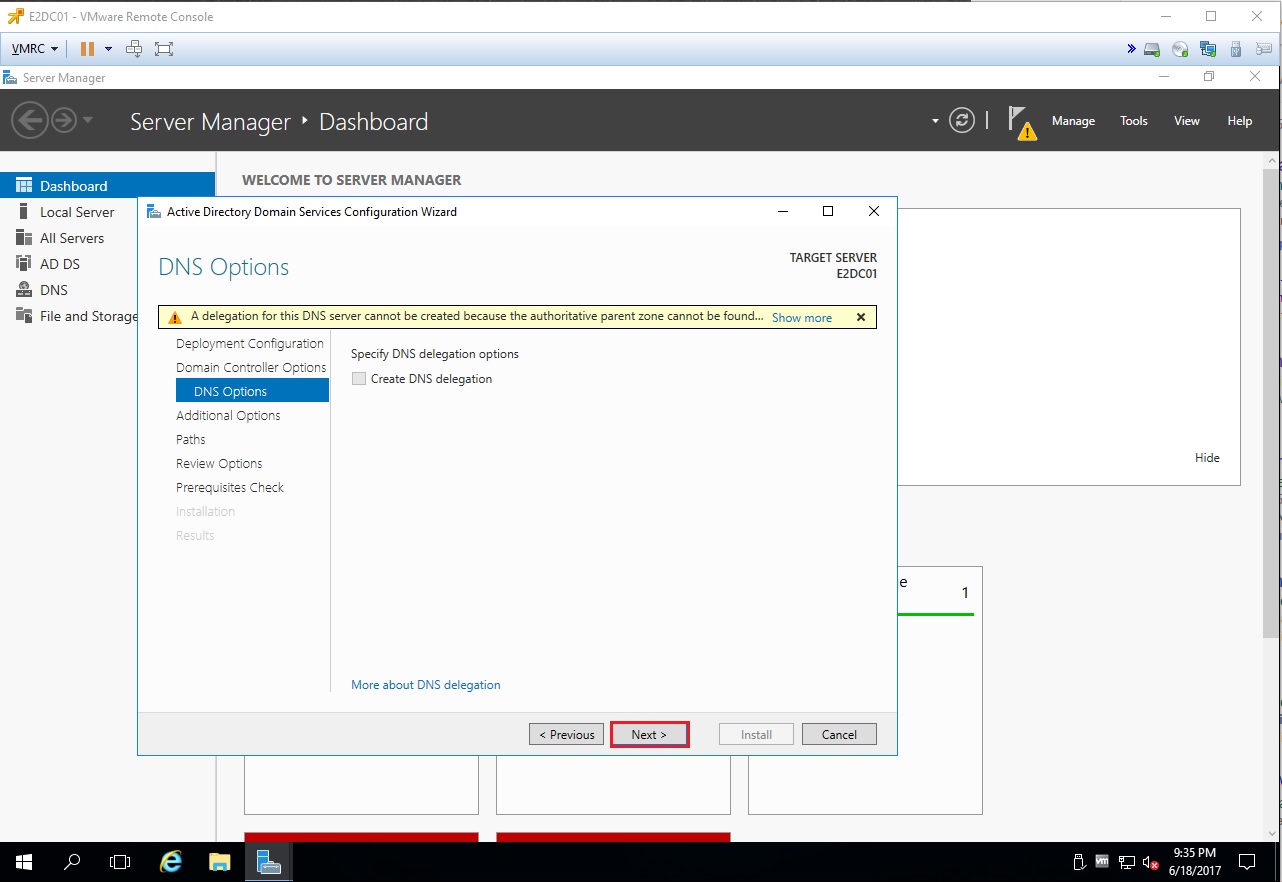
You can ignore the yellow notification on the next page. It’s a benign warning. Just click Next. Keep the defaults and click Next on the following pages as well till you get to the last page where you’ll click on Install.
DNS Configuration
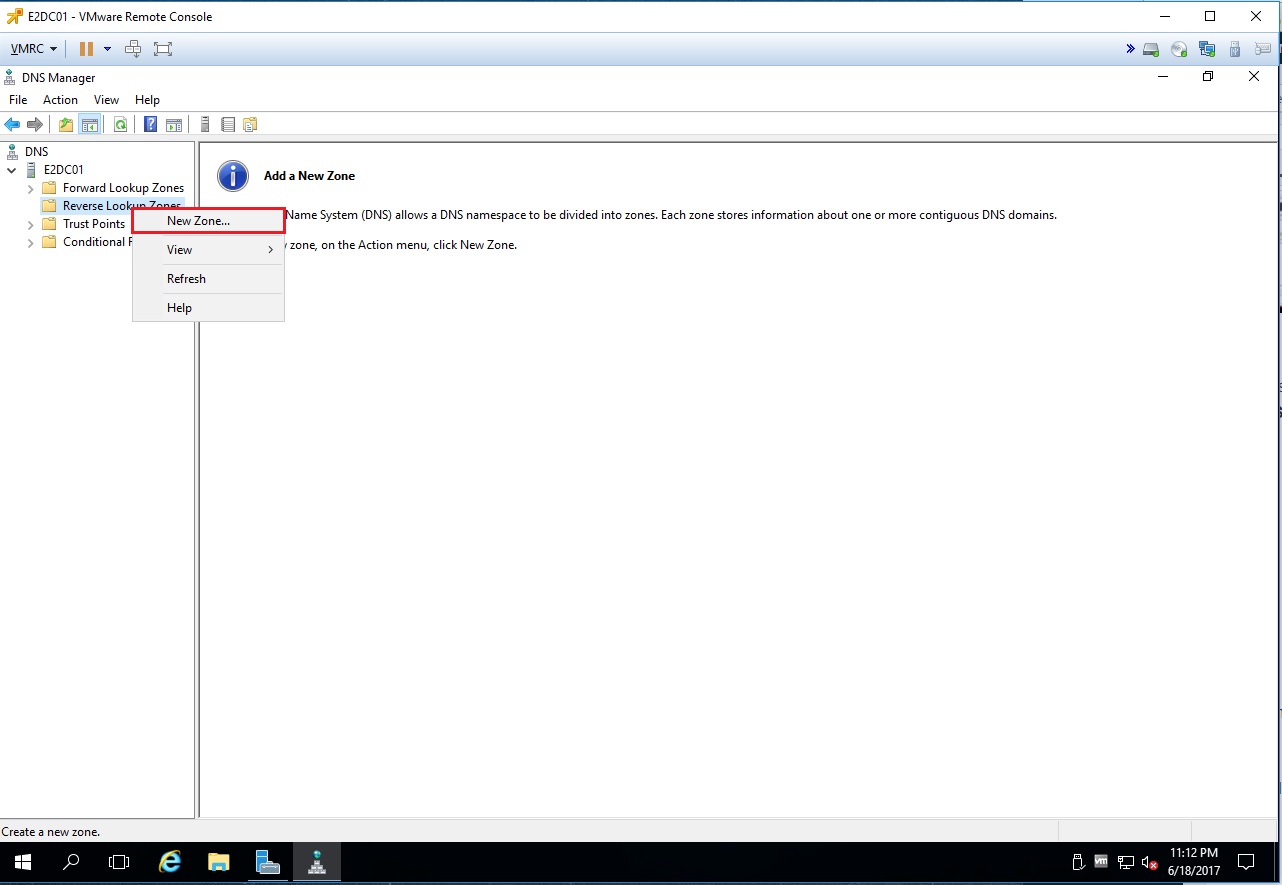
The server will then reboot automatically when complete. When it comes back up, login and the Server Manager should open automatically. Once opened, click on Tools > DNS
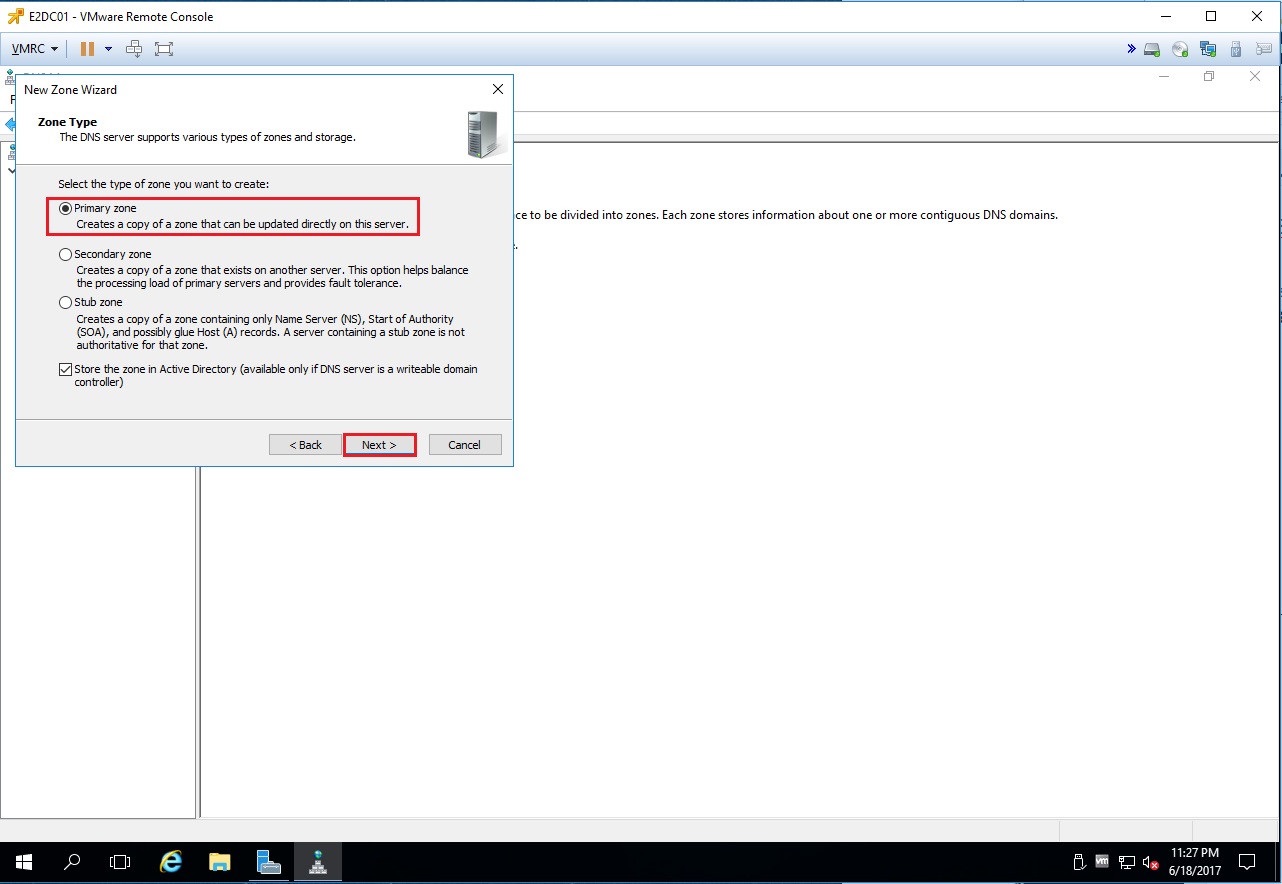
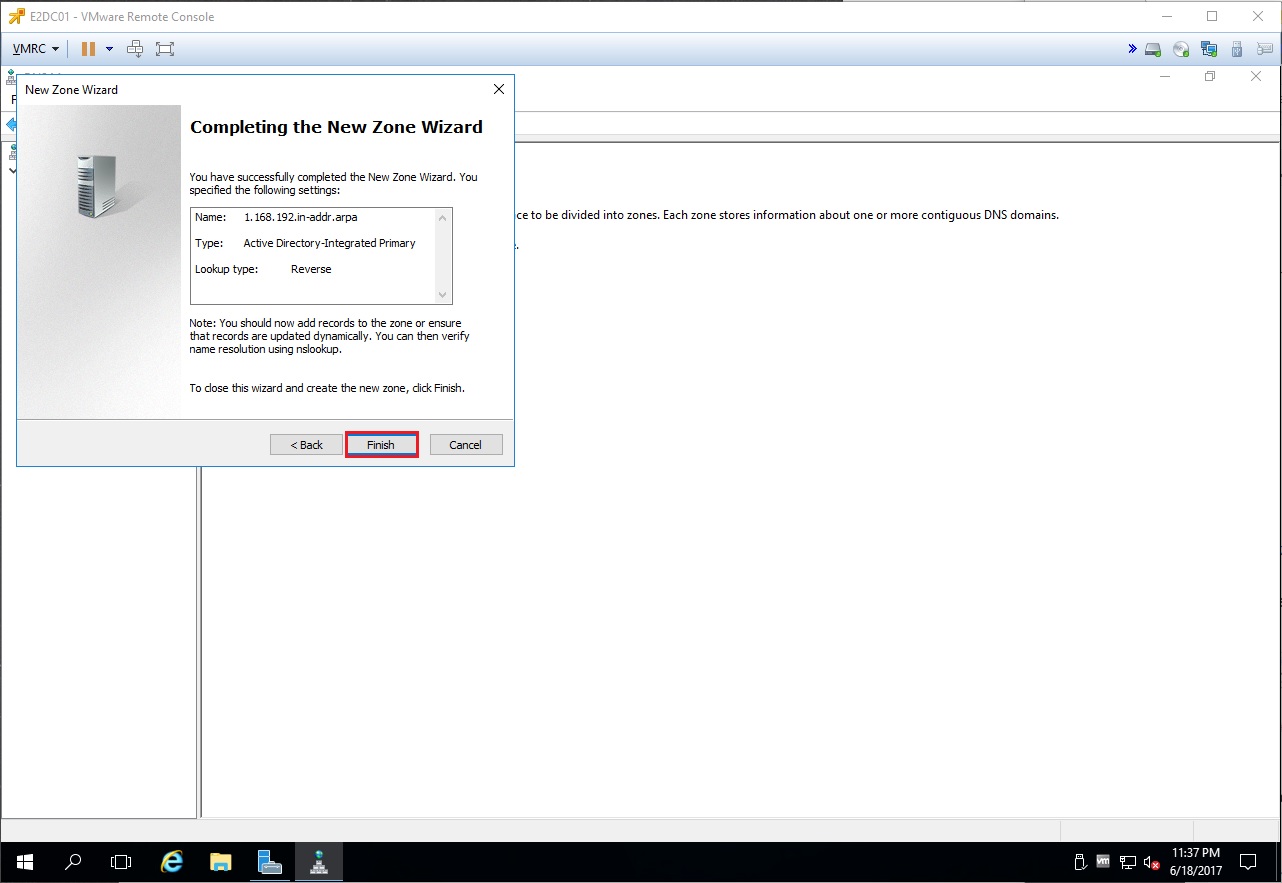
Let’s first create a Reverse Lookup Zone since one doesn’t exist at the moment. Navigate down to Reverse Lookup Zones and right click on the folder and select New Zone…
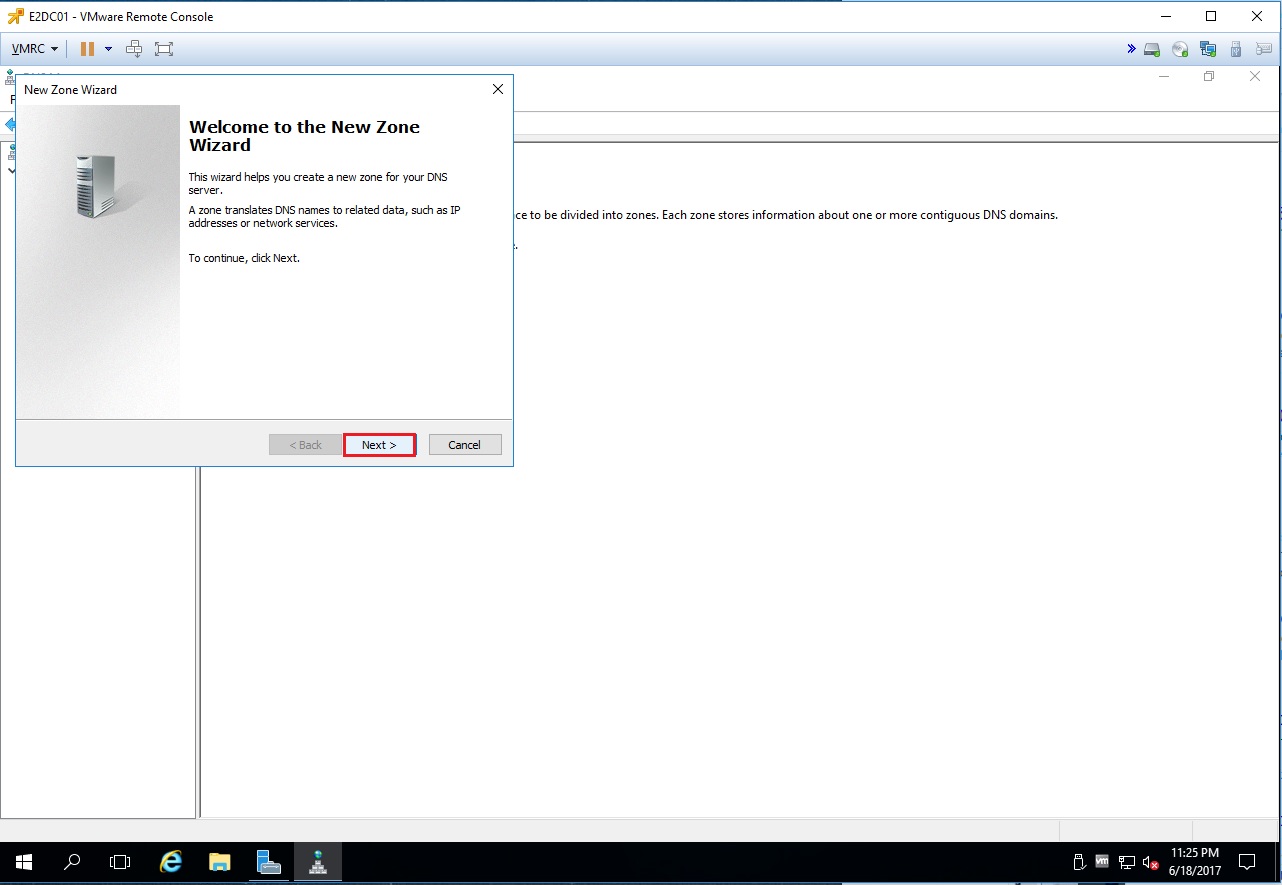
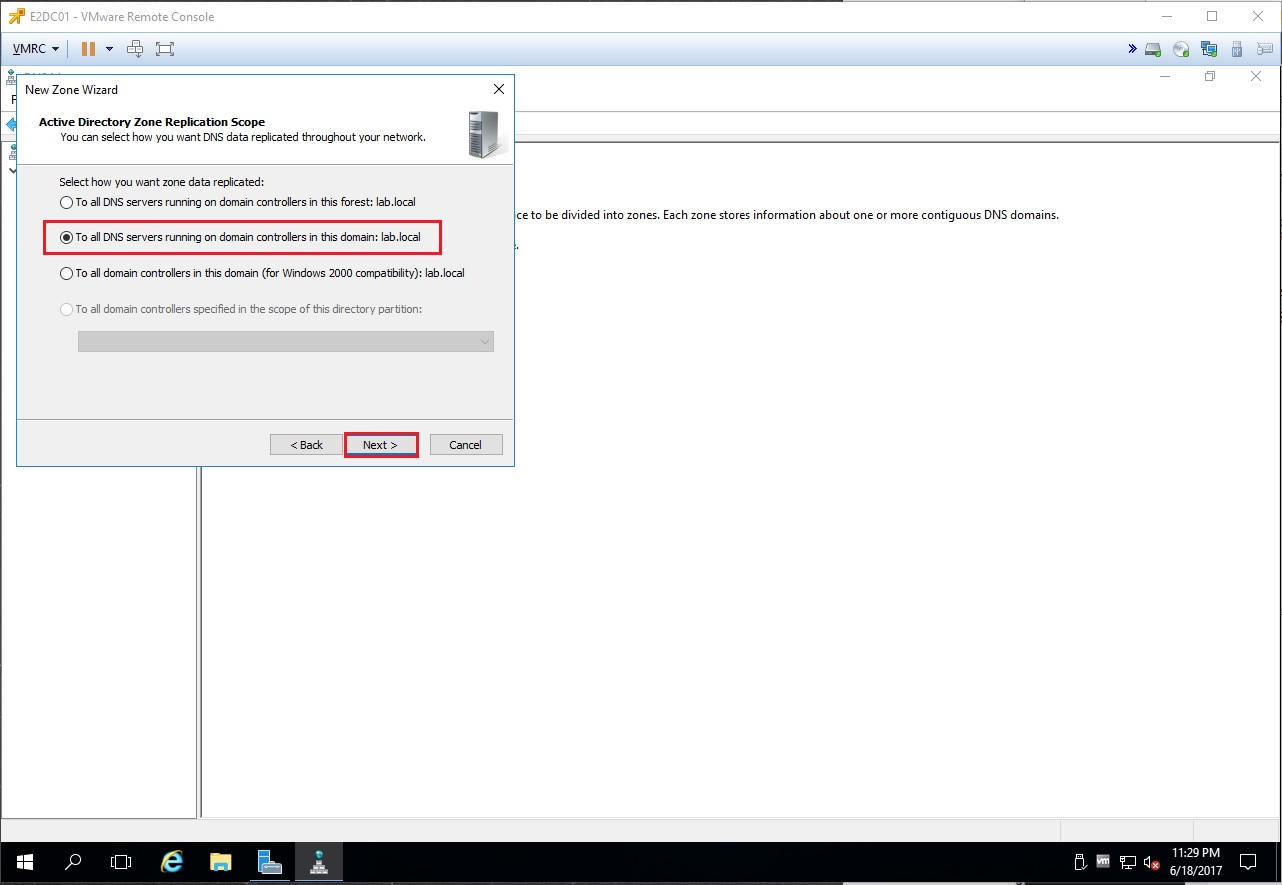
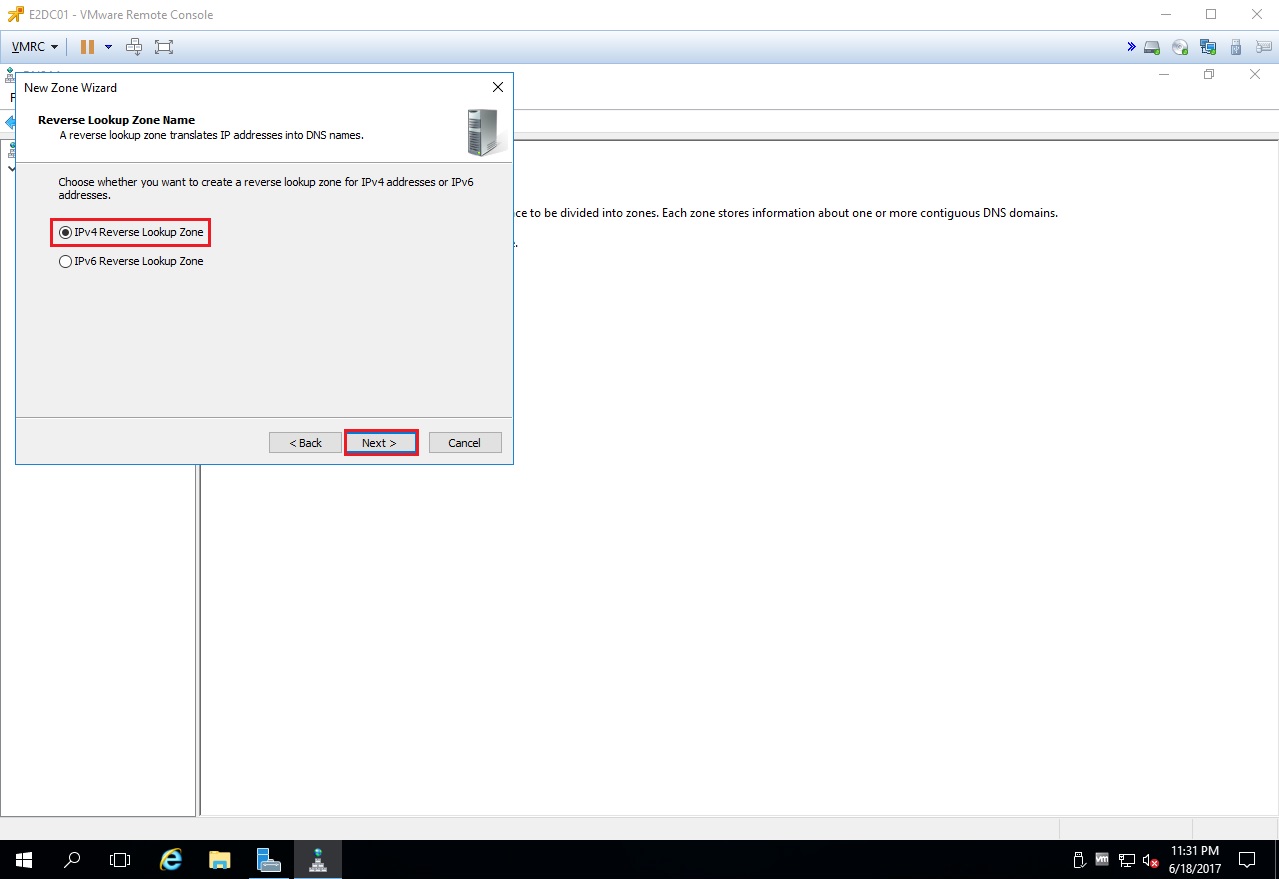
Click Next on this first page. On the next page you’ll want to create a Primary Zone and click on Next. Keep the default setting on the next page and click on Next yet again. Choose IPv4 Reverse Lookup Zone on this page and click Next.
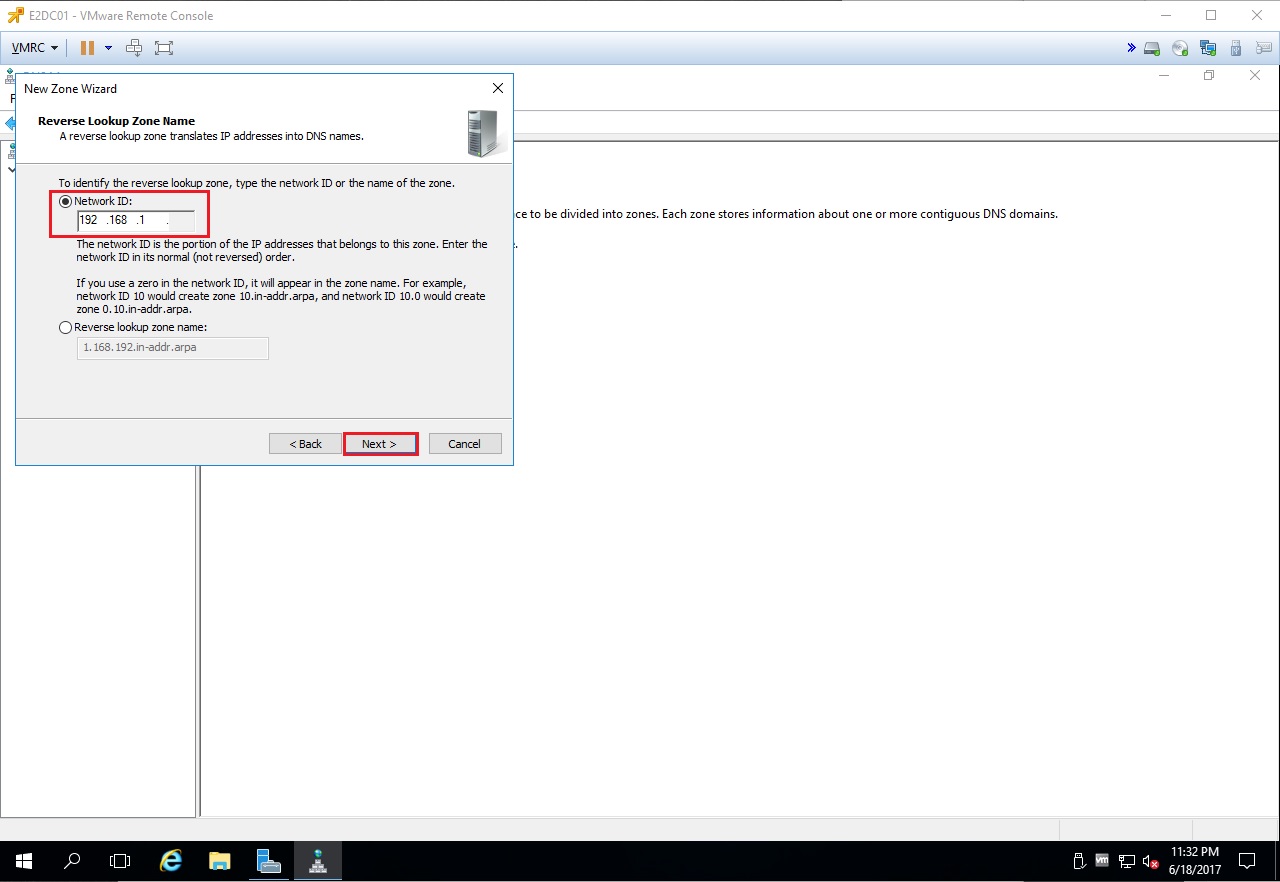
On this page, you’ll want to enter the first 3 octets of the network that our vCenter will live in. Click on Next when you are done. Click Next again for the billionth time then finally click on Finish.
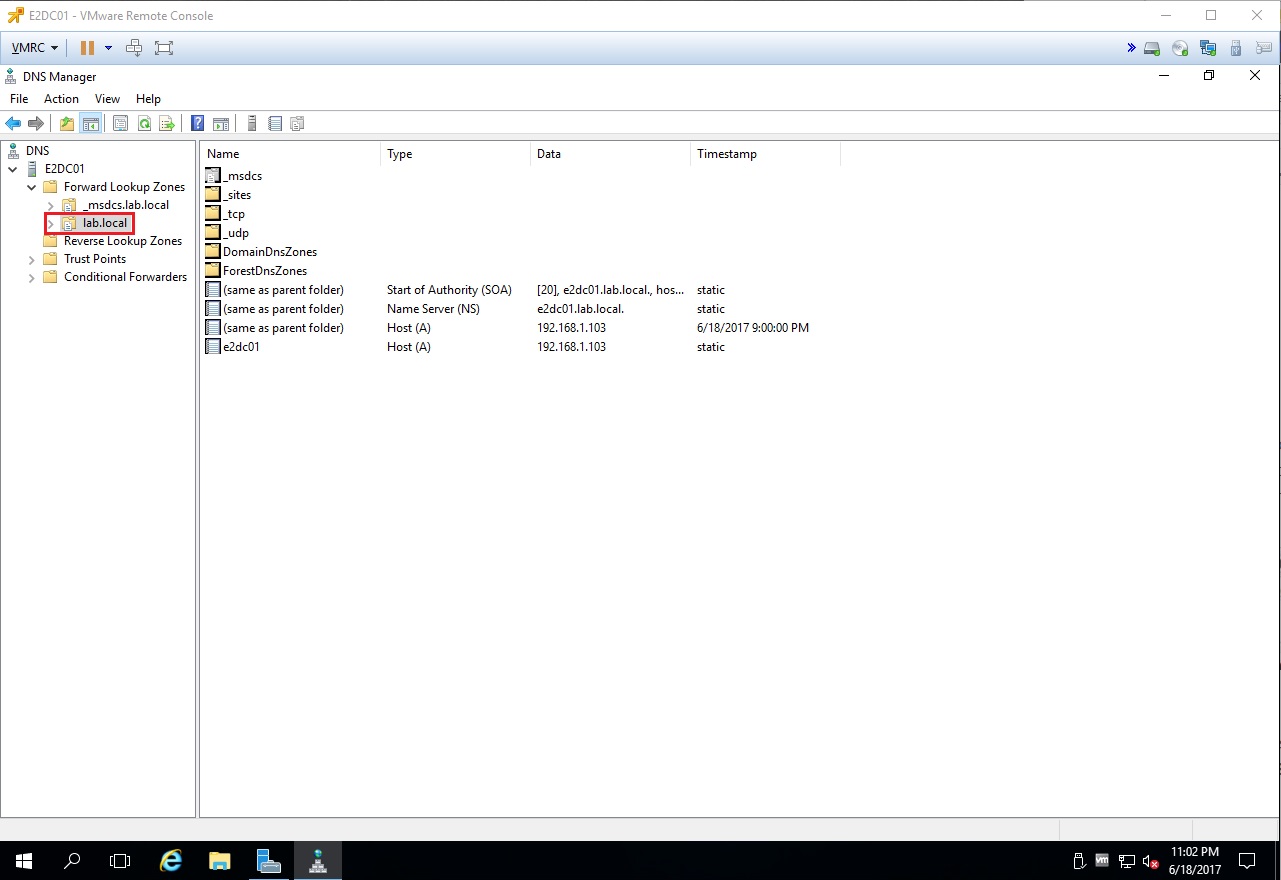
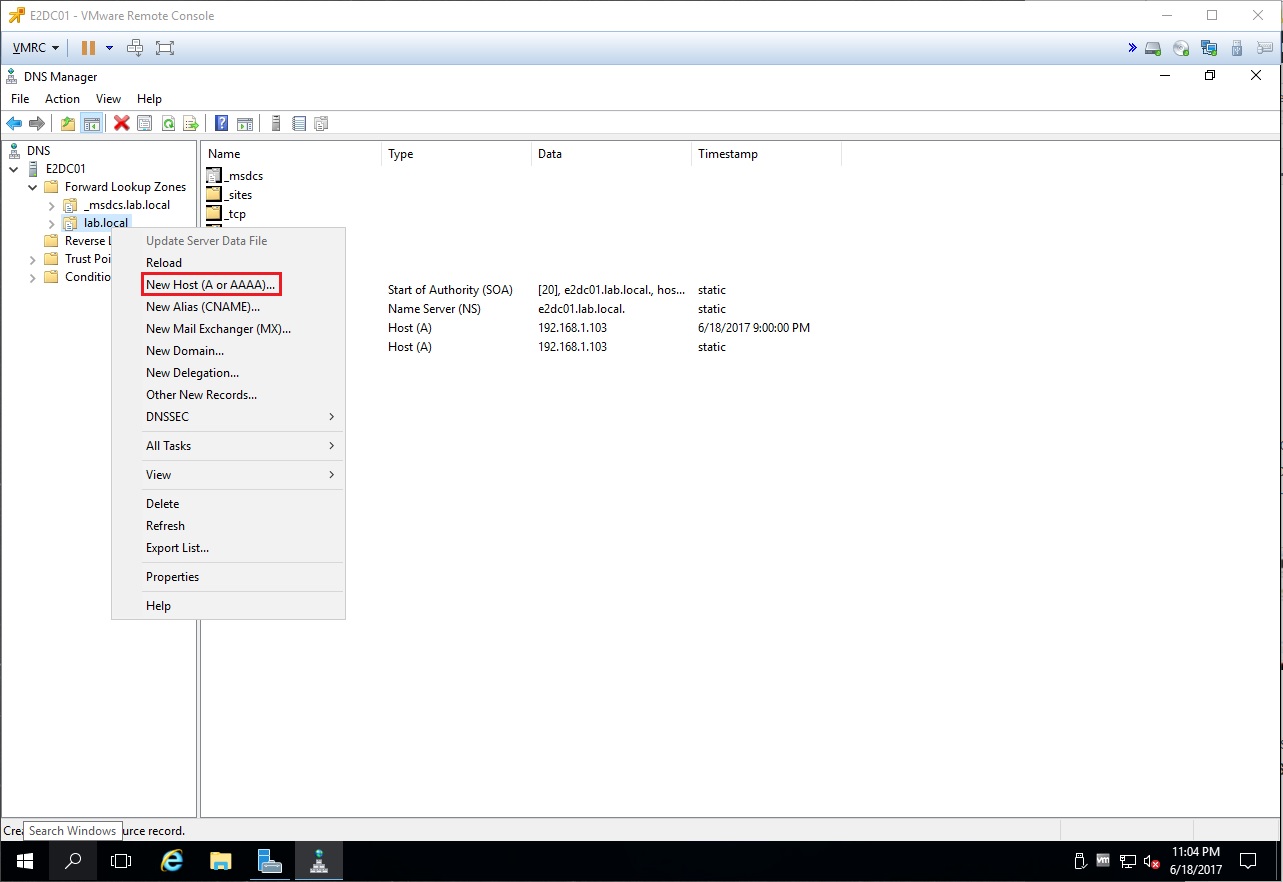
Sweet that’s done! Now navigate to the domain we’ve just created under Forward Lookup Zones. Right click on the domain and select New Host (A or AAAA)…
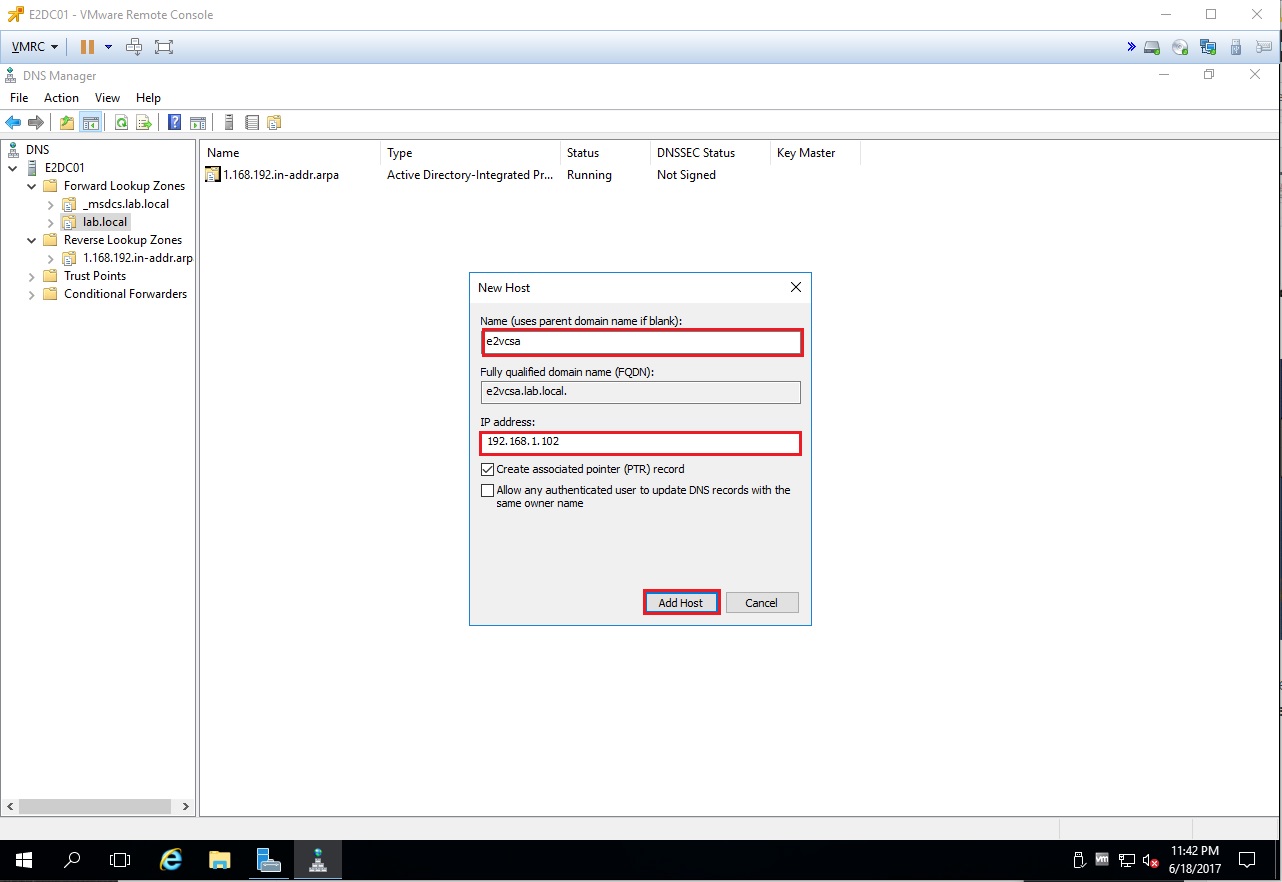
We’ll want to enter the information for the vCenter we are planning to deploy. When finished click on Add Host, Ok and Done.
Great. So as long as you are on a machine or jumpbox that has its DNS pointing to our new DNS server, the hostname and IP should now resolve both ways.
Microsoft Windows [Version 10.0.17134.137]
(c) 2017 Microsoft Corporation. All rights reserved.

C:\Users\Erick>ping e2vcsa

Pinging e2vcsa [192.168.1.102] with 32 bytes of data:
Reply from 192.168.1.225: Destination host unreachable.
Reply from 192.168.1.225: Destination host unreachable.
Reply from 192.168.1.225: Destination host unreachable.
Reply from 192.168.1.225: Destination host unreachable.

Ping statistics for 192.168.1.102:
     Packets: Sent = 4, Received = 4, Lost = 0 (0% loss),

C:\Users\Erick>ping e2vcsa.lab.local

Pinging e2vcsa.lab.local [192.168.1.102] with 32 bytes of data:
Reply from 192.168.1.225: Destination host unreachable.
Reply from 192.168.1.225: Destination host unreachable.
Reply from 192.168.1.225: Destination host unreachable.
Reply from 192.168.1.225: Destination host unreachable.

Ping statistics for 192.168.1.102:
     Packets: Sent = 4, Received = 4, Lost = 0 (0% loss),

C:\Users\Erick>ping -a 192.168.1.102

Pinging e2vcsa [192.168.1.102] with 32 bytes of data:
Reply from 192.168.1.225: Destination host unreachable.
Reply from 192.168.1.225: Destination host unreachable.
Reply from 192.168.1.225: Destination host unreachable.
Reply from 192.168.1.225: Destination host unreachable.

Ping statistics for 192.168.1.102:
     Packets: Sent = 4, Received = 4, Lost = 0 (0% loss),

C:\Users\Erick>nslookup 192.168.1.102
Server: UnKnown
Address: 192.168.1.103
Name: e2vcsa.lab.local
Address: 192.168.1.102

C:\Users\Erick>

Awesome. So now that we are done creating a DC and DNS server we can move onto installing vCenter.
Stage 1 – Installing vCenter and Creating vSAN Cluster
Mount the VCSA ISO and navigate to vcsa-ui-installer > win32. Once there launch the installer.exe.
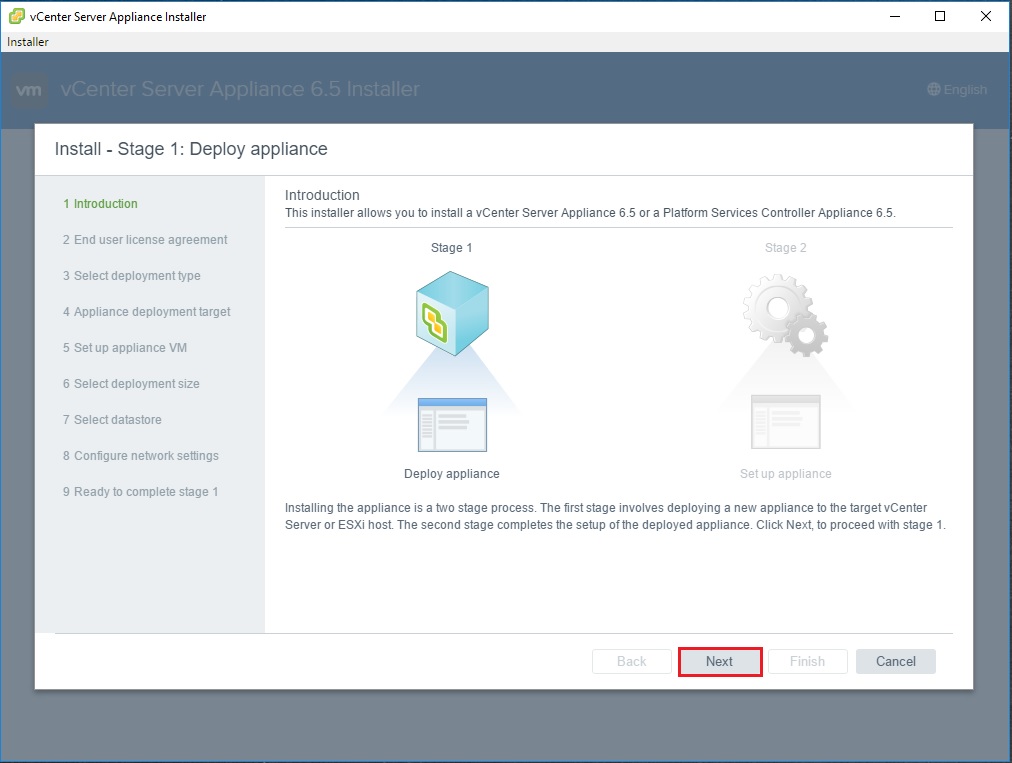
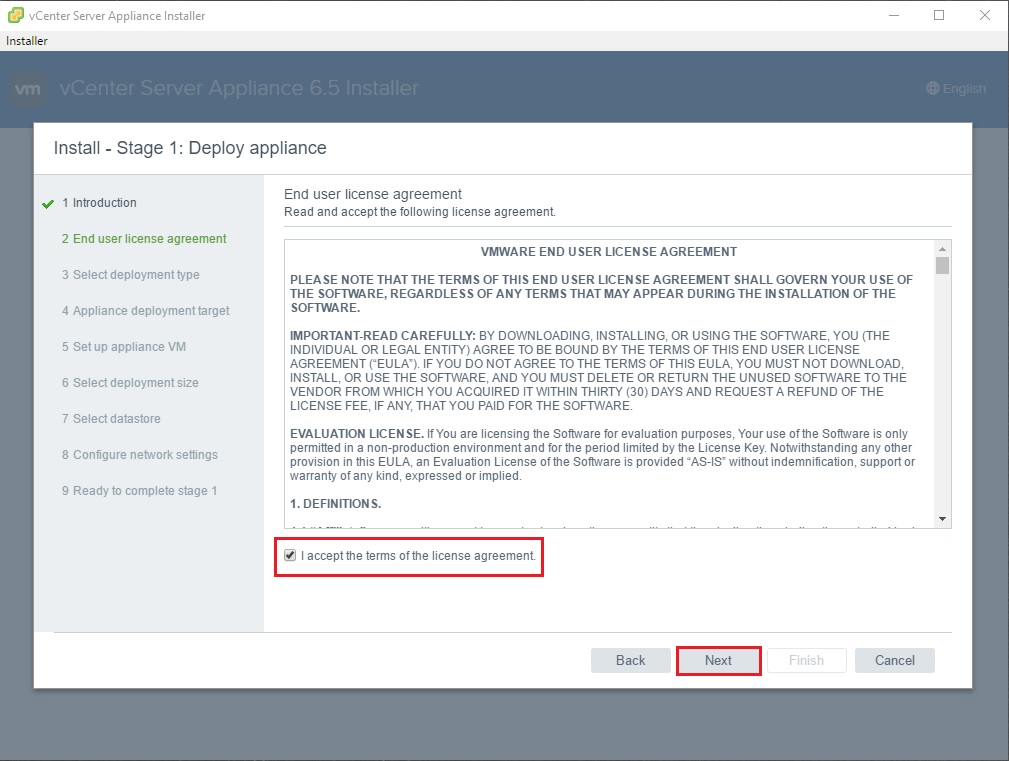
You’ll be given a few choices upon launching the installer. Choose Install since we’ll be installing for the first time. On the next Introduction screen just click on Next. Agree to the EULA on the next screen and…you guessed it…click on Next.
Now we’ll want to choose our deployment type. I’m going to go with an Embedded Platform Services Controller in my home lab. You’d want to choose an External PSC if you have multiple vCenters all connected in Enhanced Linked Mode and have a larger environment. Click Next after your selection.
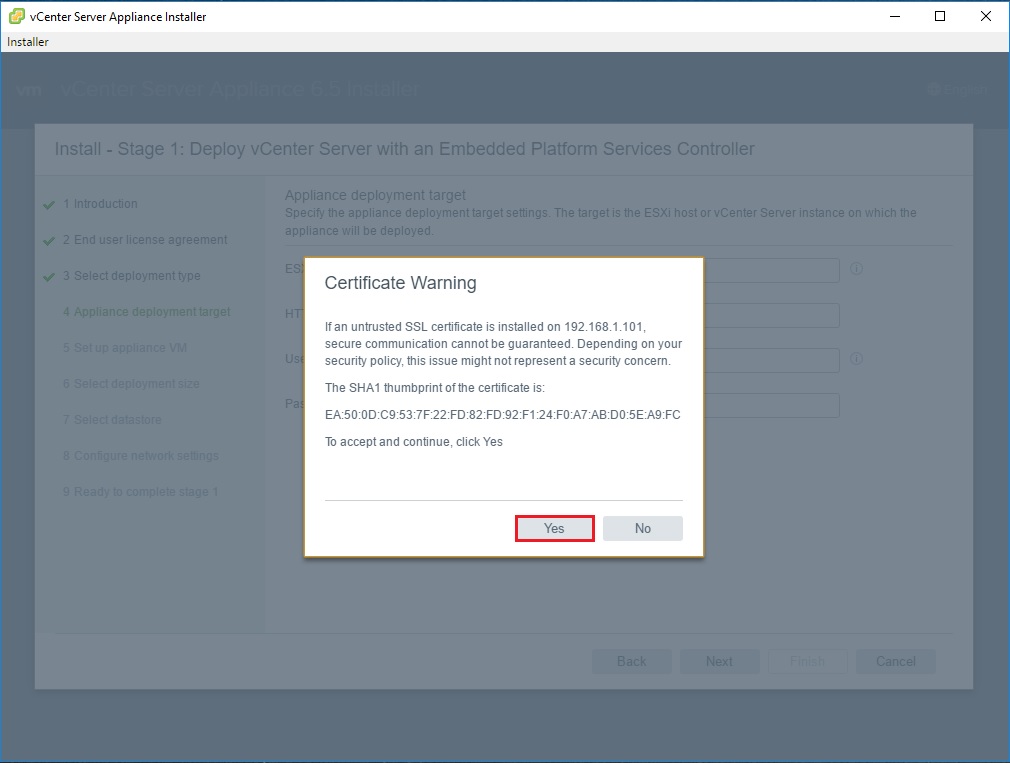
On the following page, you are going to have to add the ESXi host your vCenter will be deployed to by either IP address or FQDN. Once you do that, click on Next. The Certificate Warning will pop up. Simply choose Yes here.
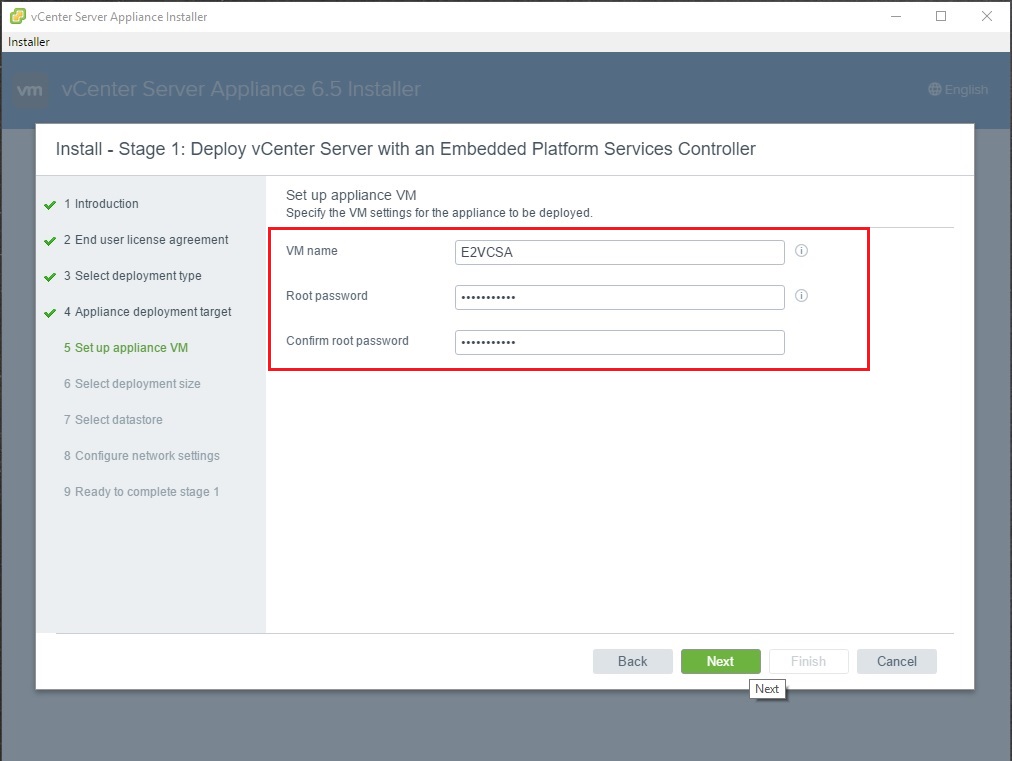
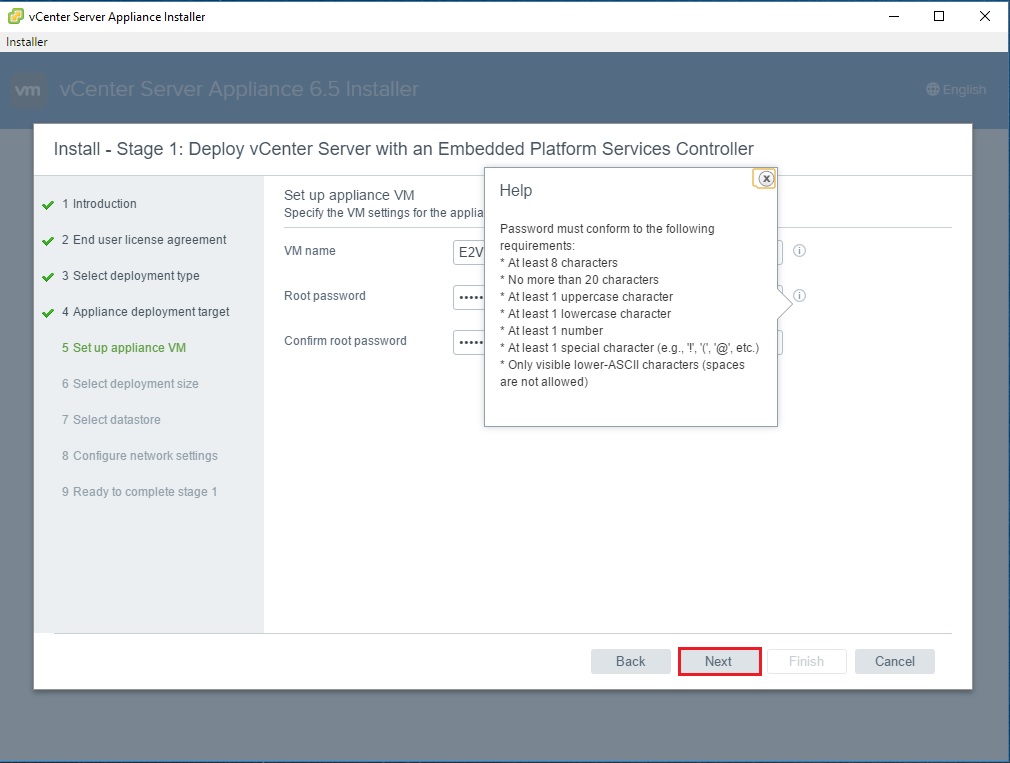
Here is where you name the VM and set a password. The password requirements are:
- At least 8 characters
- No more than 20 characters
- At least 1 uppercase character
- At least 1 lowercase character
- At least 1 number
- At least 1 special character (e.g.,’!’,'(‘,’@’,etc.)
Click Next when finished.
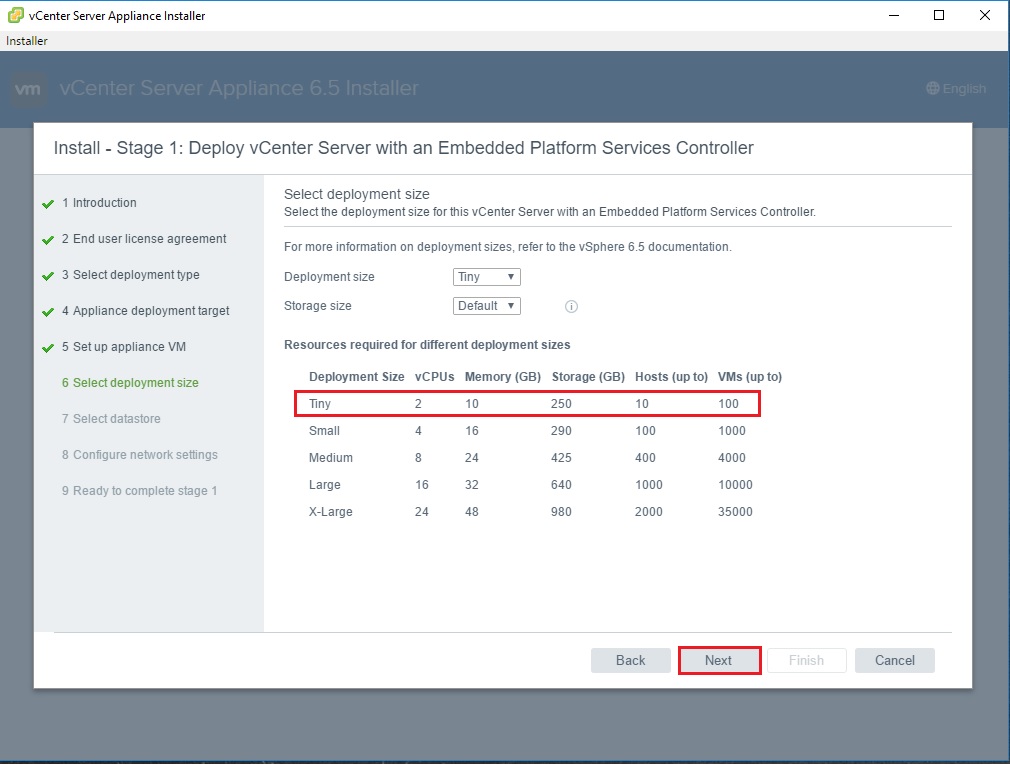
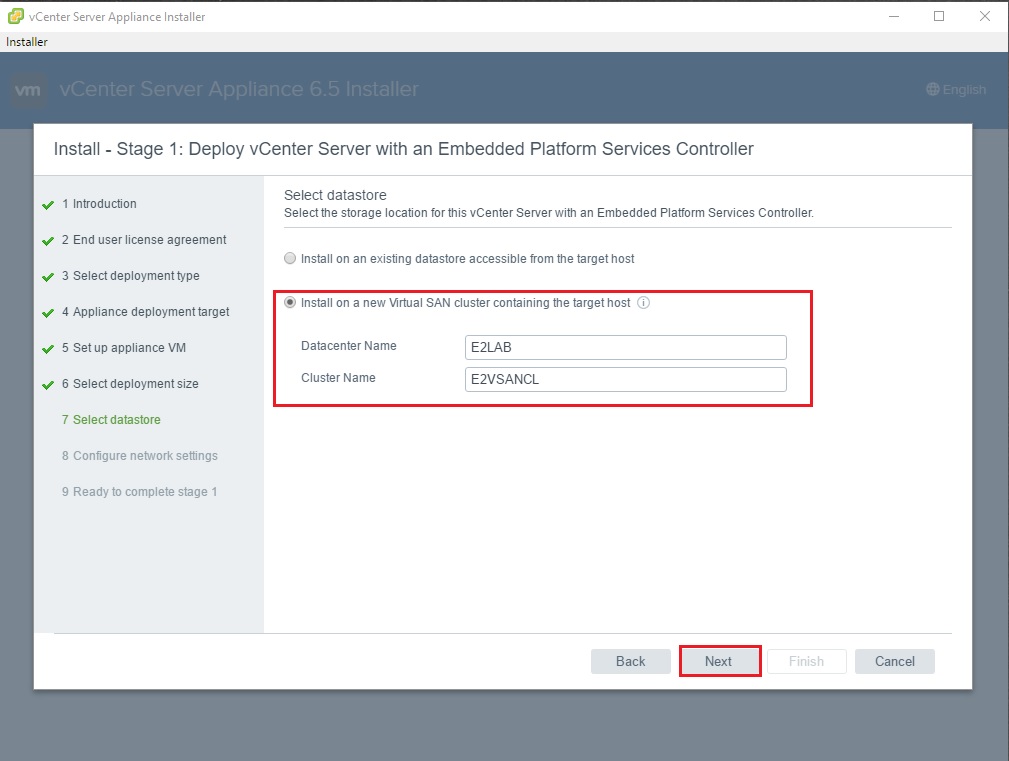
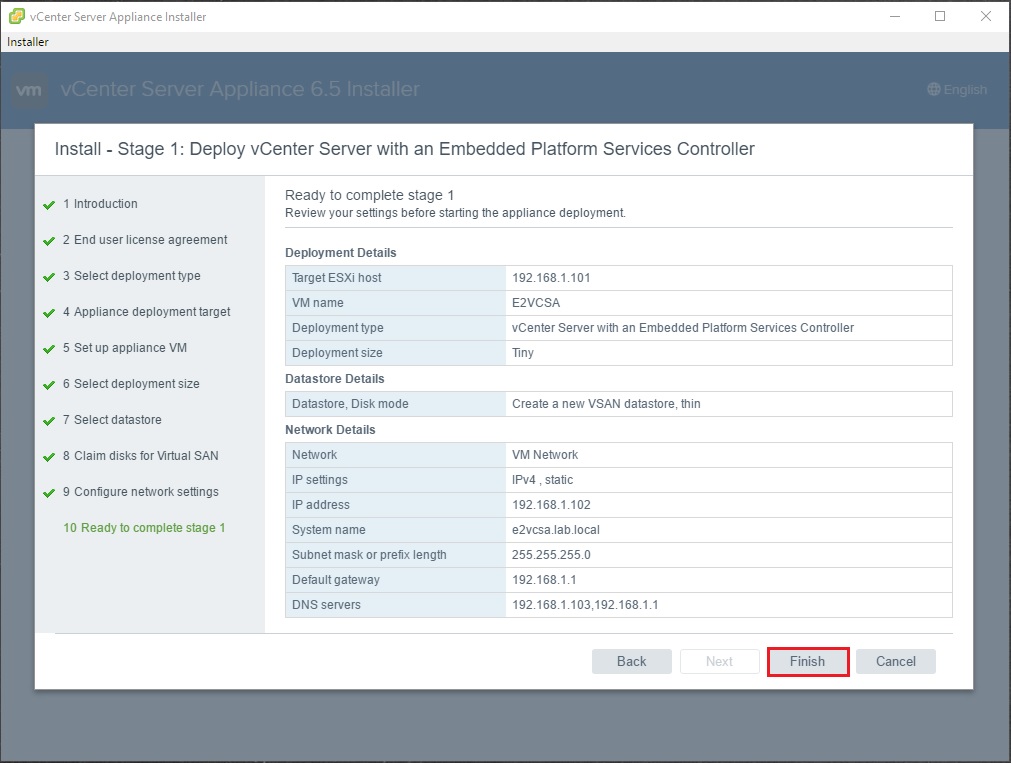
Totally sticking with a Tiny deployment here for a home lab. Click Next after you select your deployment size. Now this is where we select to install vCenter on a new Virtual SAN Cluster containing the target host. This used to be two separate processes, but now is built into the install.
**You would not see this option if you weren’t on the correct build listed in the prerequisites above.**
Selecting that radio button will give you the option to provide the Datacenter and Cluster name. Click Next when complete.
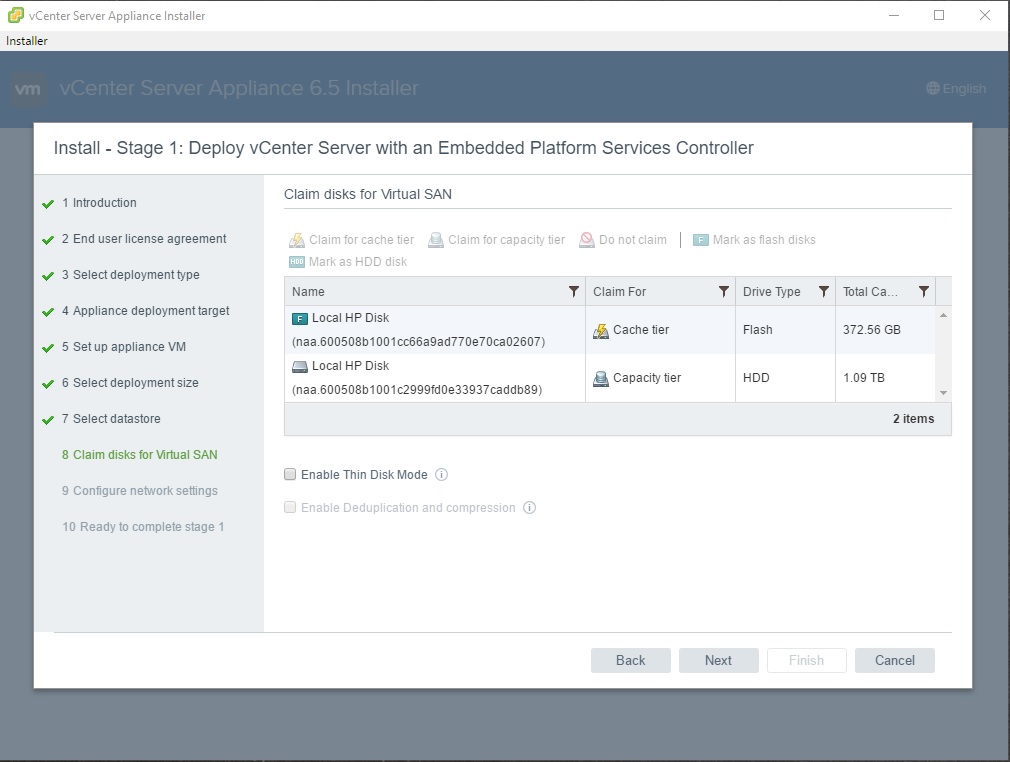
You will now have to claim disks for different tiers for the vSAN. My SSD RAID set is already recognized as a Flash Cache tier. If you sported an NVME PCIE device you can claim it for a flash cache tier if it didn’t do it automatically.
My local spinning disks are already set to the Capacity tier. Depending on your configuration, you’ll need to identify and claim the correct disk tiers.
Cache me ousside...how bow dah?
Mother of God…that’s the WORST EVER!
Anyway, the cache tier is where all of your live HOT data is stored so it’s quick as hell. All the rest of the COLD data that isn’t being accessed is placed in the Capacity tier.
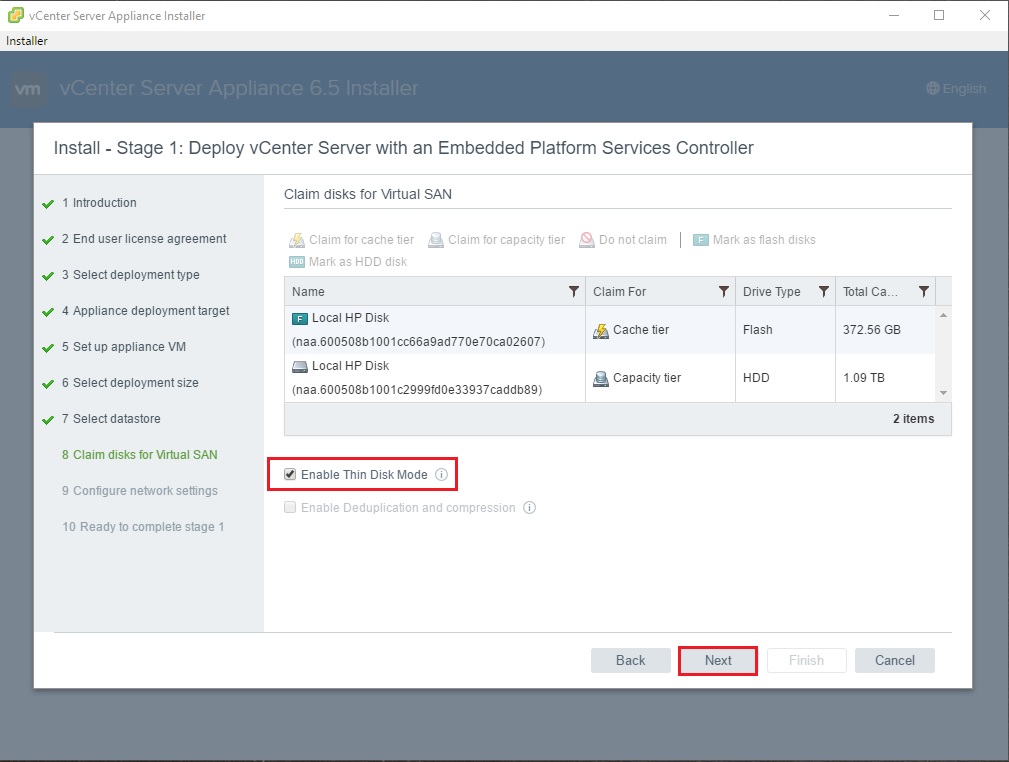
I’ll also check the box to Enable Thin Disk Mode which will allow me to save more disk space.
Ummmm....
Lulz! Anyway, Thin Provisioning doesn’t pre-allocate all the disk space provisioned. It only allocates the space when data is being written.
So for example if you installed an OS on a 100GB hard drive and the OS was only taking up 20GB. The back-end physical storage will only consume 20GB instead of the full 100GB. However, the OS will see that it has 80GB of available space. Make sense?
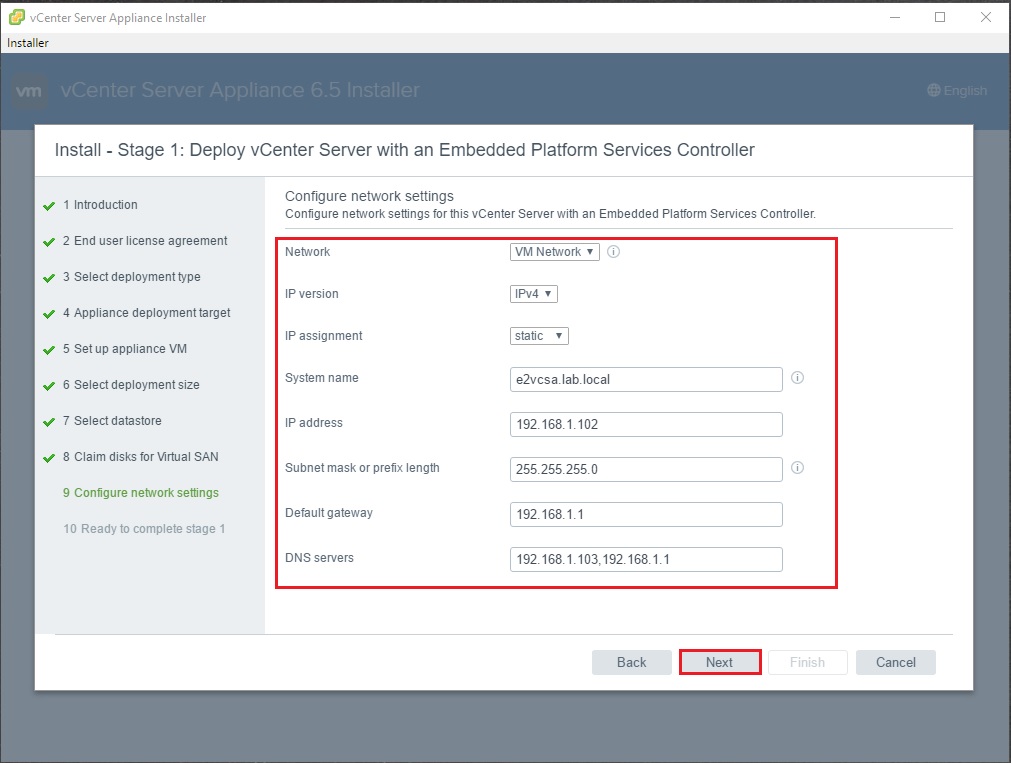
We now need to configure the network settings for vCenter. Click Next when done.
*Remember that you’ll need to run this installer from a machine that is pointed to your new DNS server.
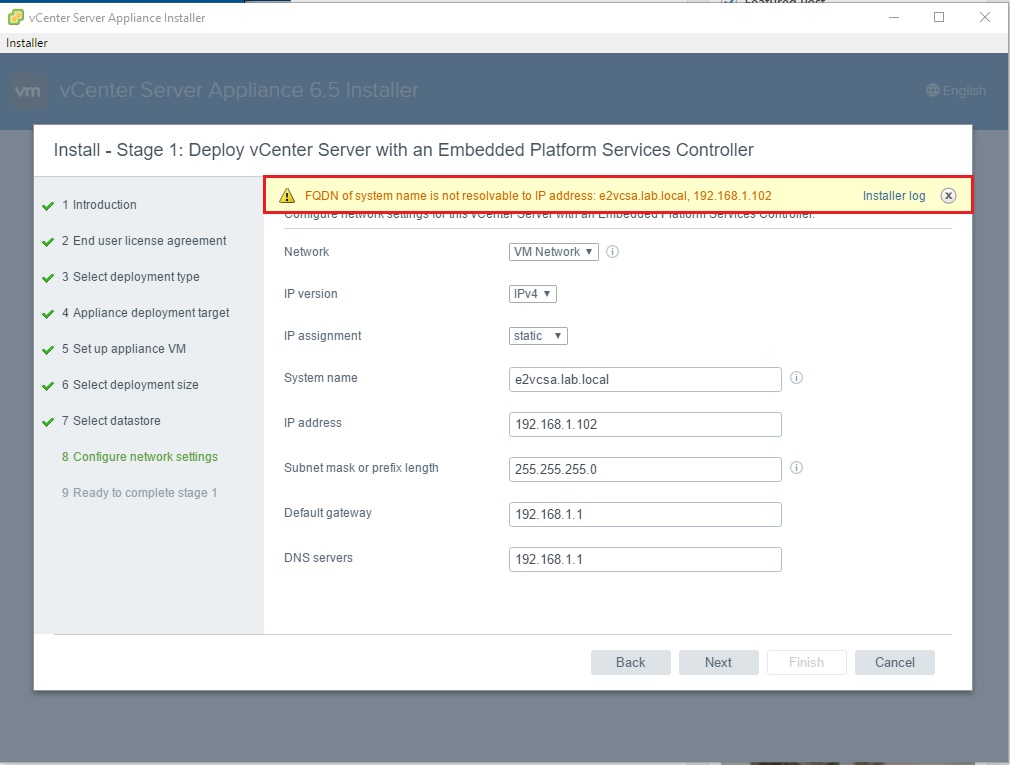
*If you didn’t setup a DNS server previously as stated above, you’ll run into this error at the top. You can still proceed with the install, but I like to have all the configuration correctly in place to mitigate these errors.
Then finally click on Finish here.
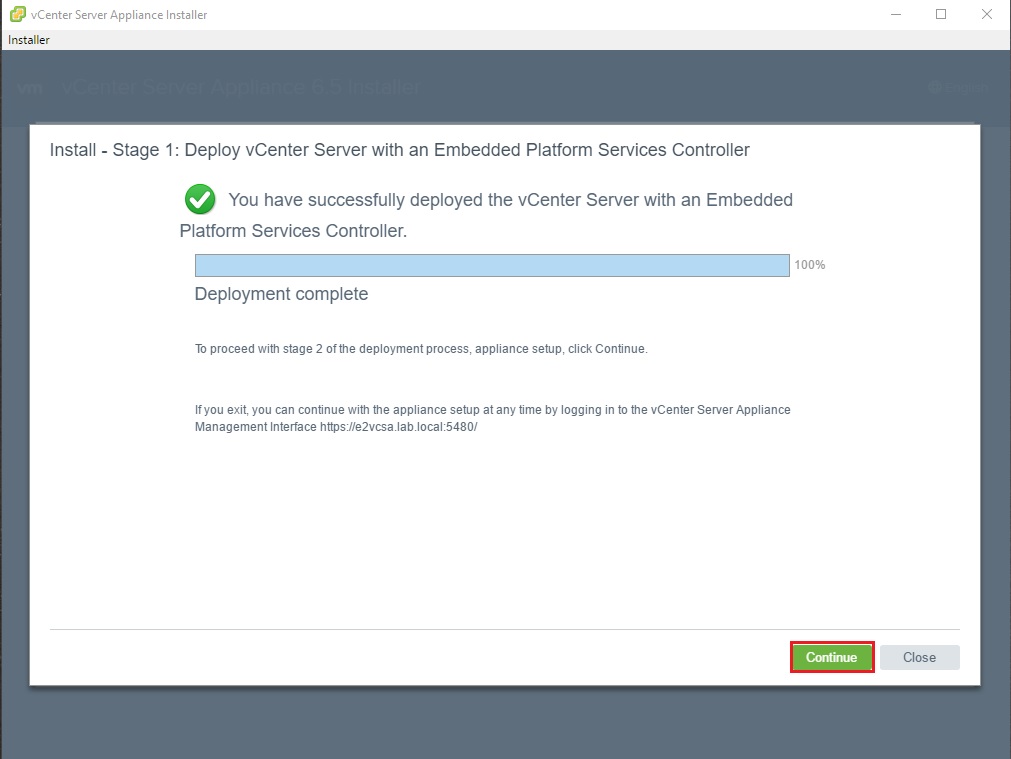
The Stage 1 install process will begin so go bake a pizza till it finishes.
Stage 2 – Completing the VCSA Setup
Alrighty then! Now that we are stuffed with pizza, let’s get back on track shall we? When the install is complete click on Continue to proceed with Stage 2 of the deployment process.
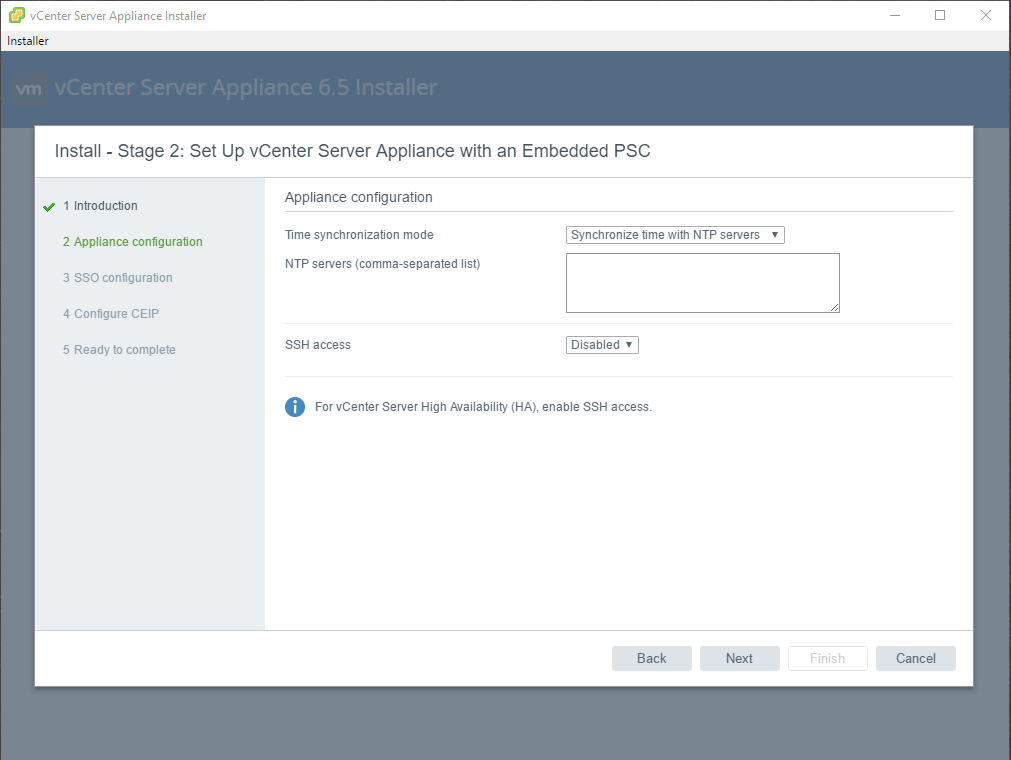
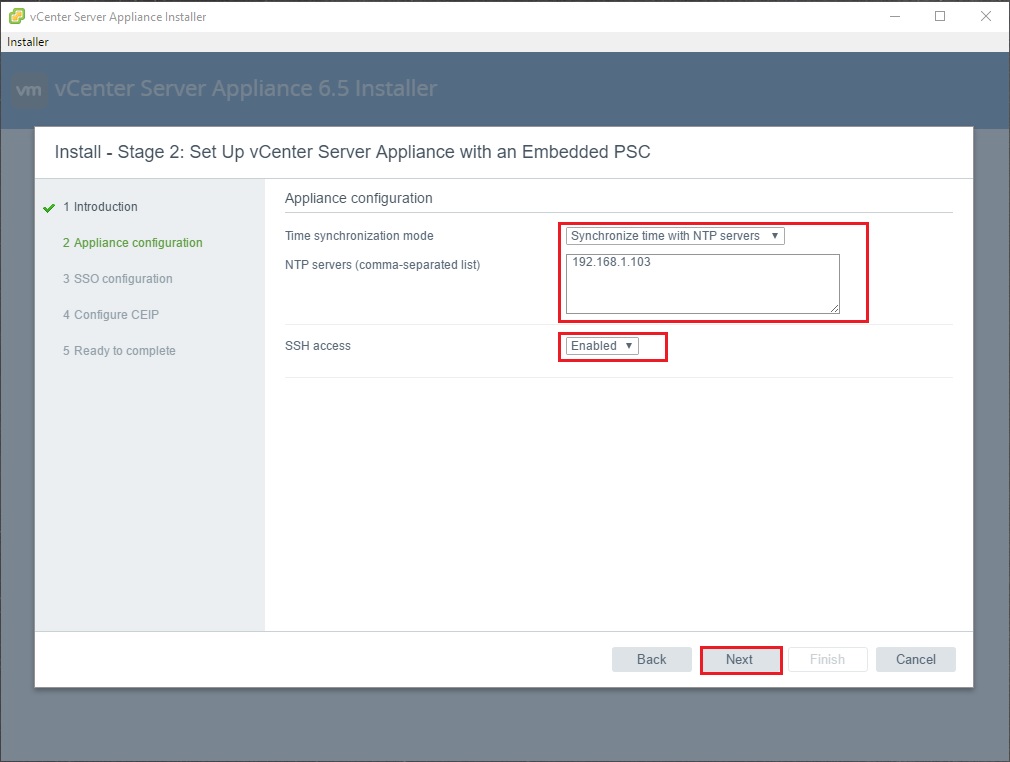
Click Next on the Introduction page. Here we need to setup our NTP servers. I’ll use our newly deployed Domain Controller as an NTP source. I’ll also choose to Enable SSH. Once done click on Next.
Next, enter the SSO domain name. I’ve read it is best practice to keep the defaults vsphere.local since configuring something like e2.local will cause issues if I try to use other VMware products in the future since they expect the SSO to be vsphere.local. Not sure if this has been resolved in this 6.5 version but why risk it?
Skip down and enter the password with the same password requirements listed above. Finally choose a site name and click on Next.
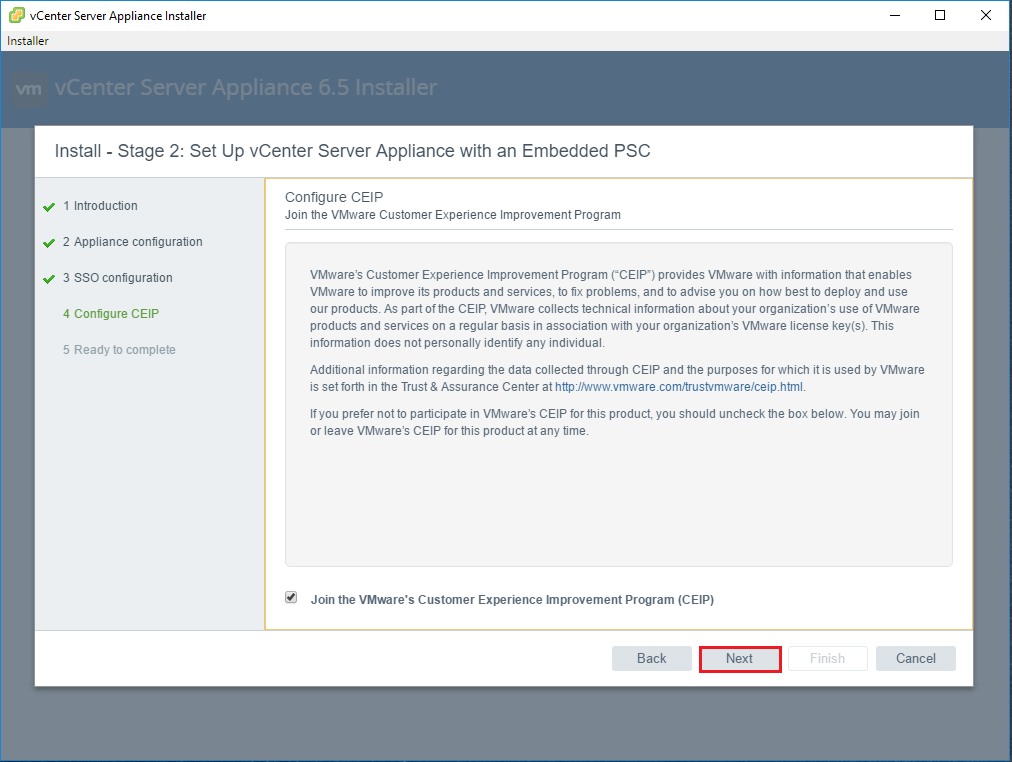
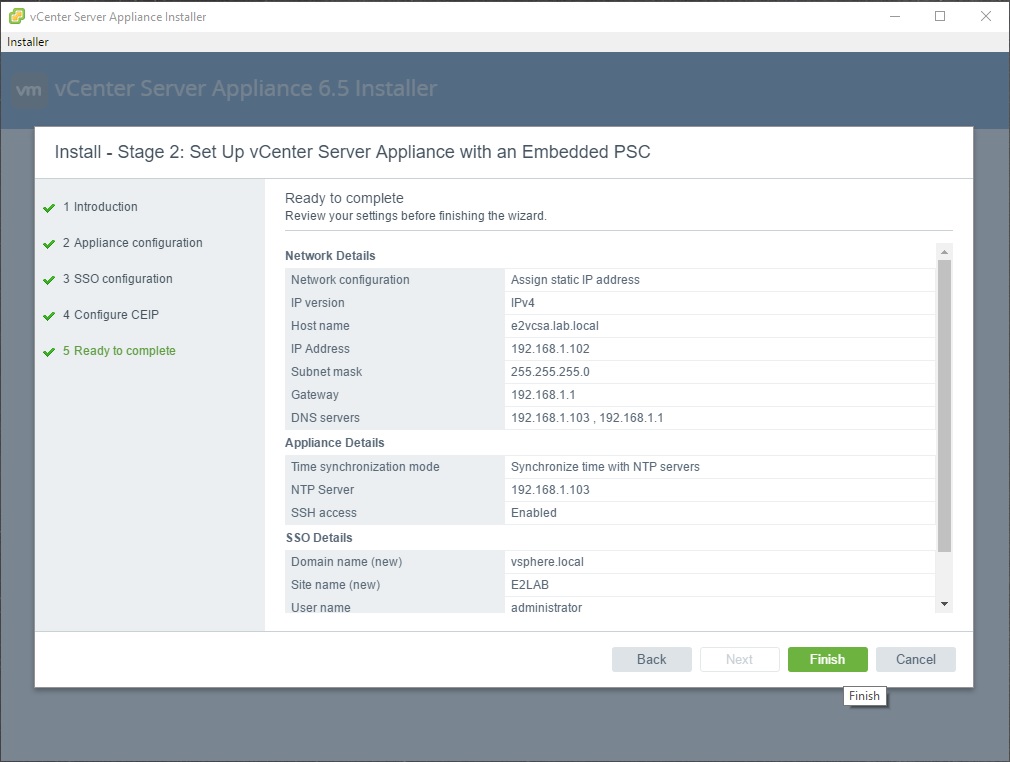
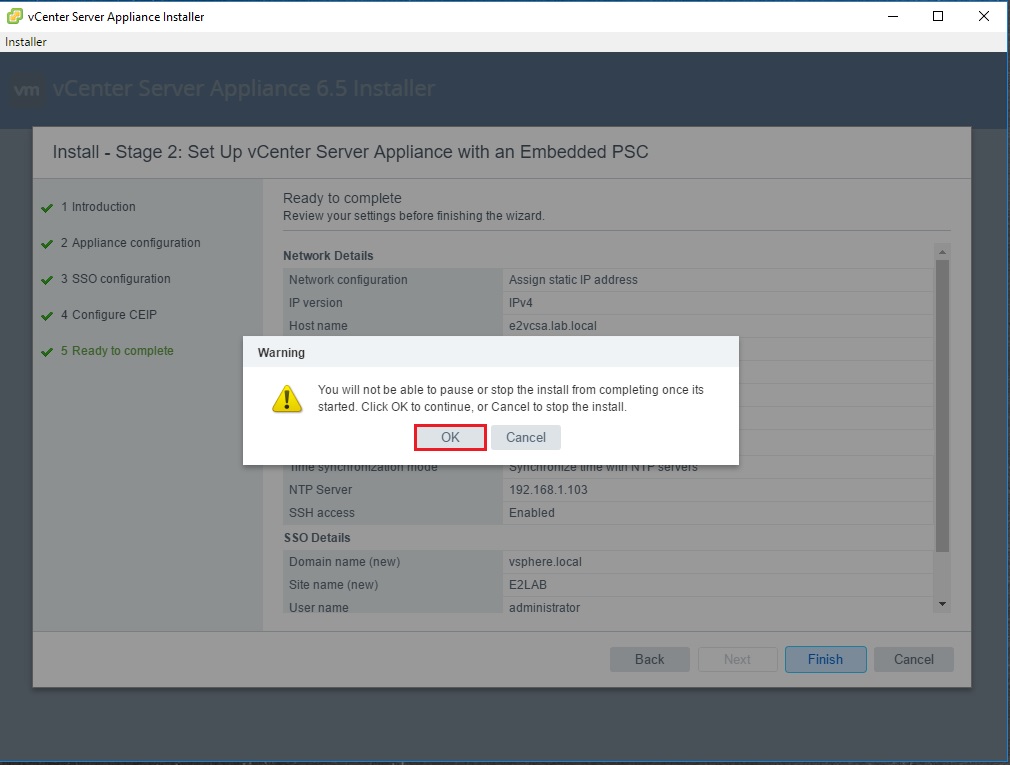
You can choose to join the Customer Experience Improvement Program (CIEP) if you’d like. It doesn’t matter either way. Decide on whatever you want and click on Next. Then finally on the last page, validate your settings and click on Finish. It’ll try to yell at you about not being able to pause the install from completing. Just click on OK.
The install will complete and start a buttload of services. Let’s nom some more on that pizza while we wait 😛
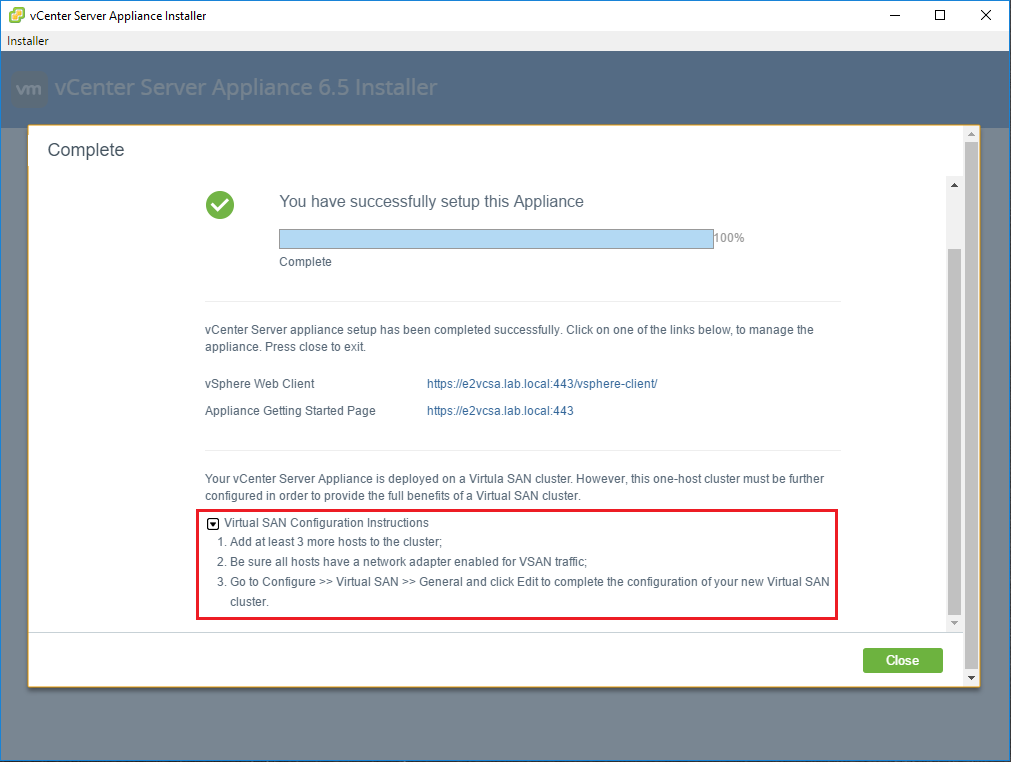
Whew…good job. Looks like everything finished properly. There are a few things we need to do after the fact to ensure the benefits of a vSAN cluster. VMware’s recommendation below:
Your vCenter Server Appliance is deployed on a Virtula SAN cluster. However, this one-host cluster must be further configured in order to provide the full benefits of a Virtual SAN cluster.
Virtual SAN Configuration Instructions
- Add at least 3 more hosts to the cluster;
- Be sure all hosts have a network adapter enabled for VSAN traffic;
- Go to Configure >> Virtual SAN >> General and click Edit to complete the configuration of your new Virtual SAN cluster.
I’ll get to that on another post where we’ll create some Nested ESXi hosts.
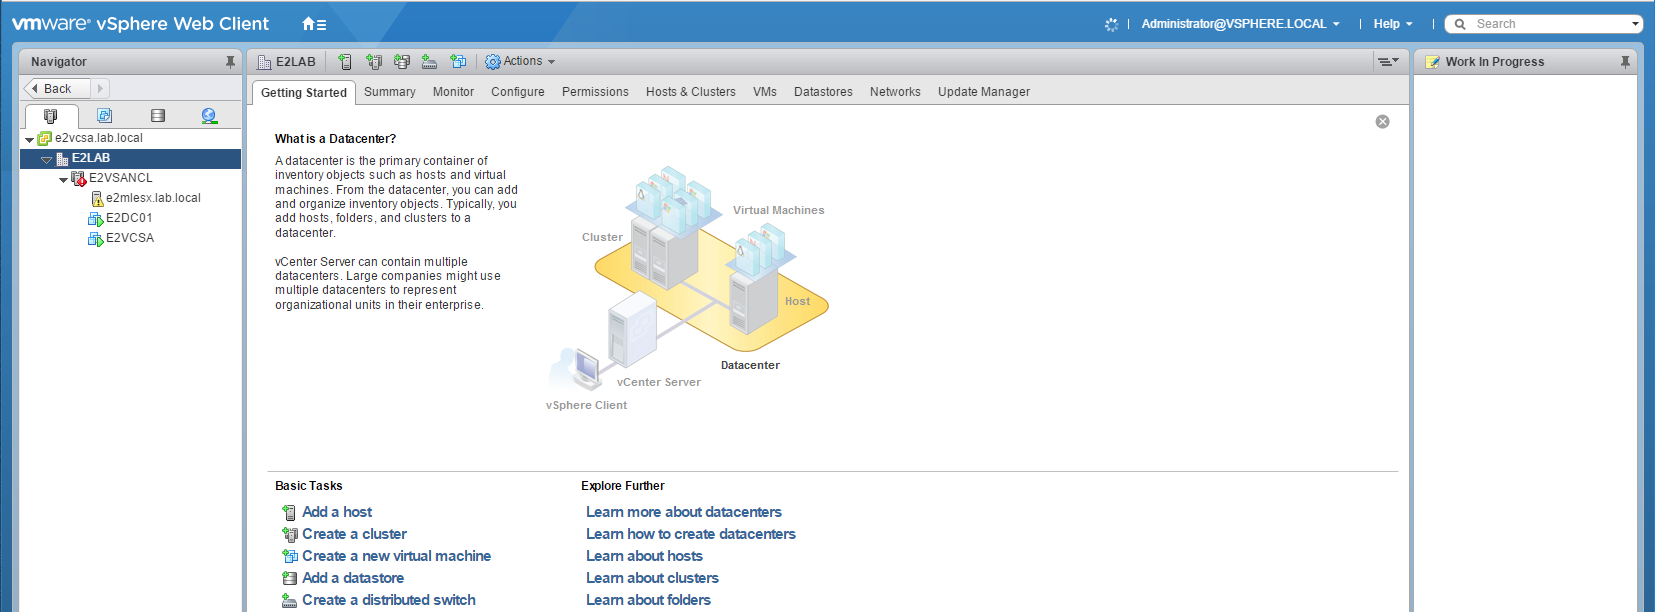
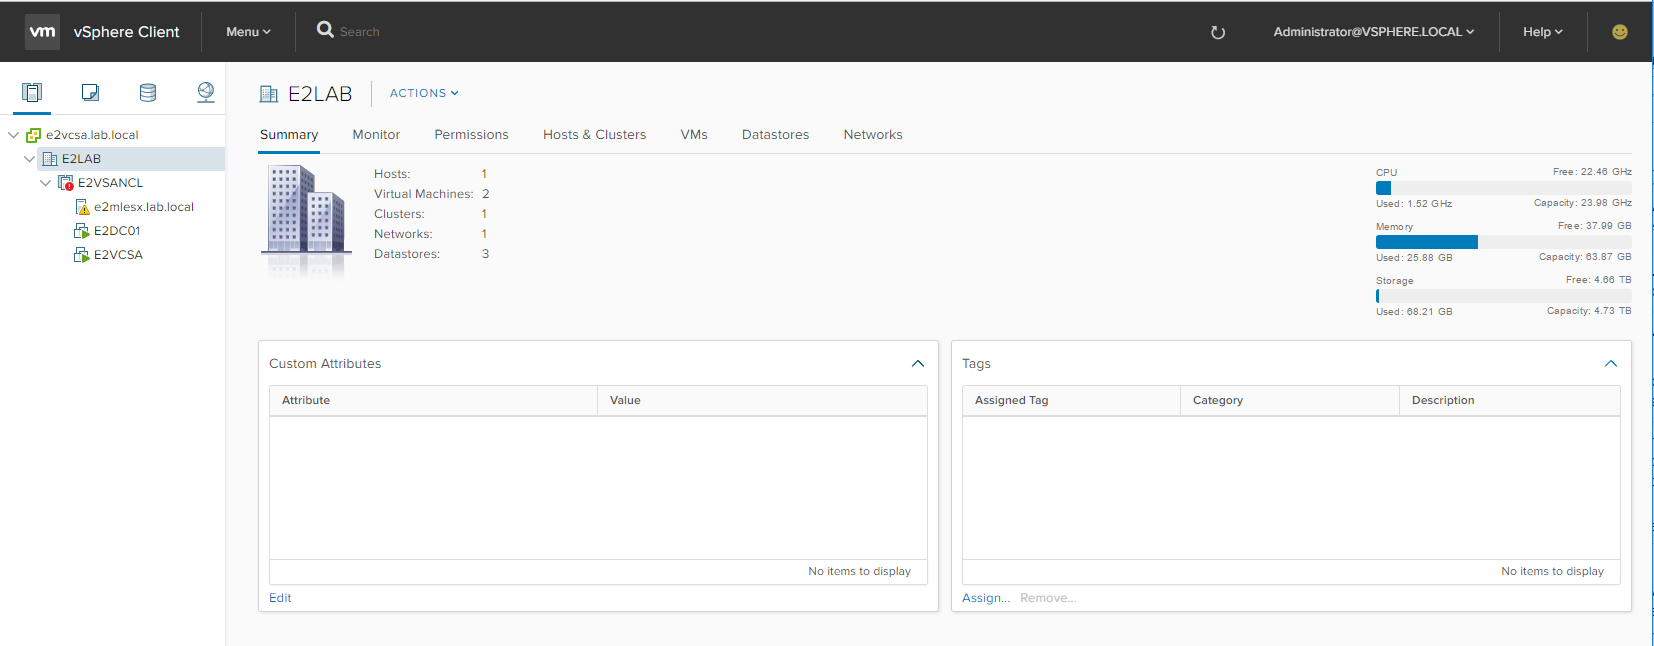
For now, login and navigate around. Use the HTML5 interface. It’s pretty slick.


")


")


")